top of page

Table reservations

Wix Restaurants: Customizing Your Table Reservations Form

Customize your table reservations form to gather the exact information you need from your guests. Add custom fields to collect details like dining preferences and allergens.

You can also include restaurant policies and request an email or last name to finalize the booking. For keeping guests informed, add an opt-in checkbox for email marketing.
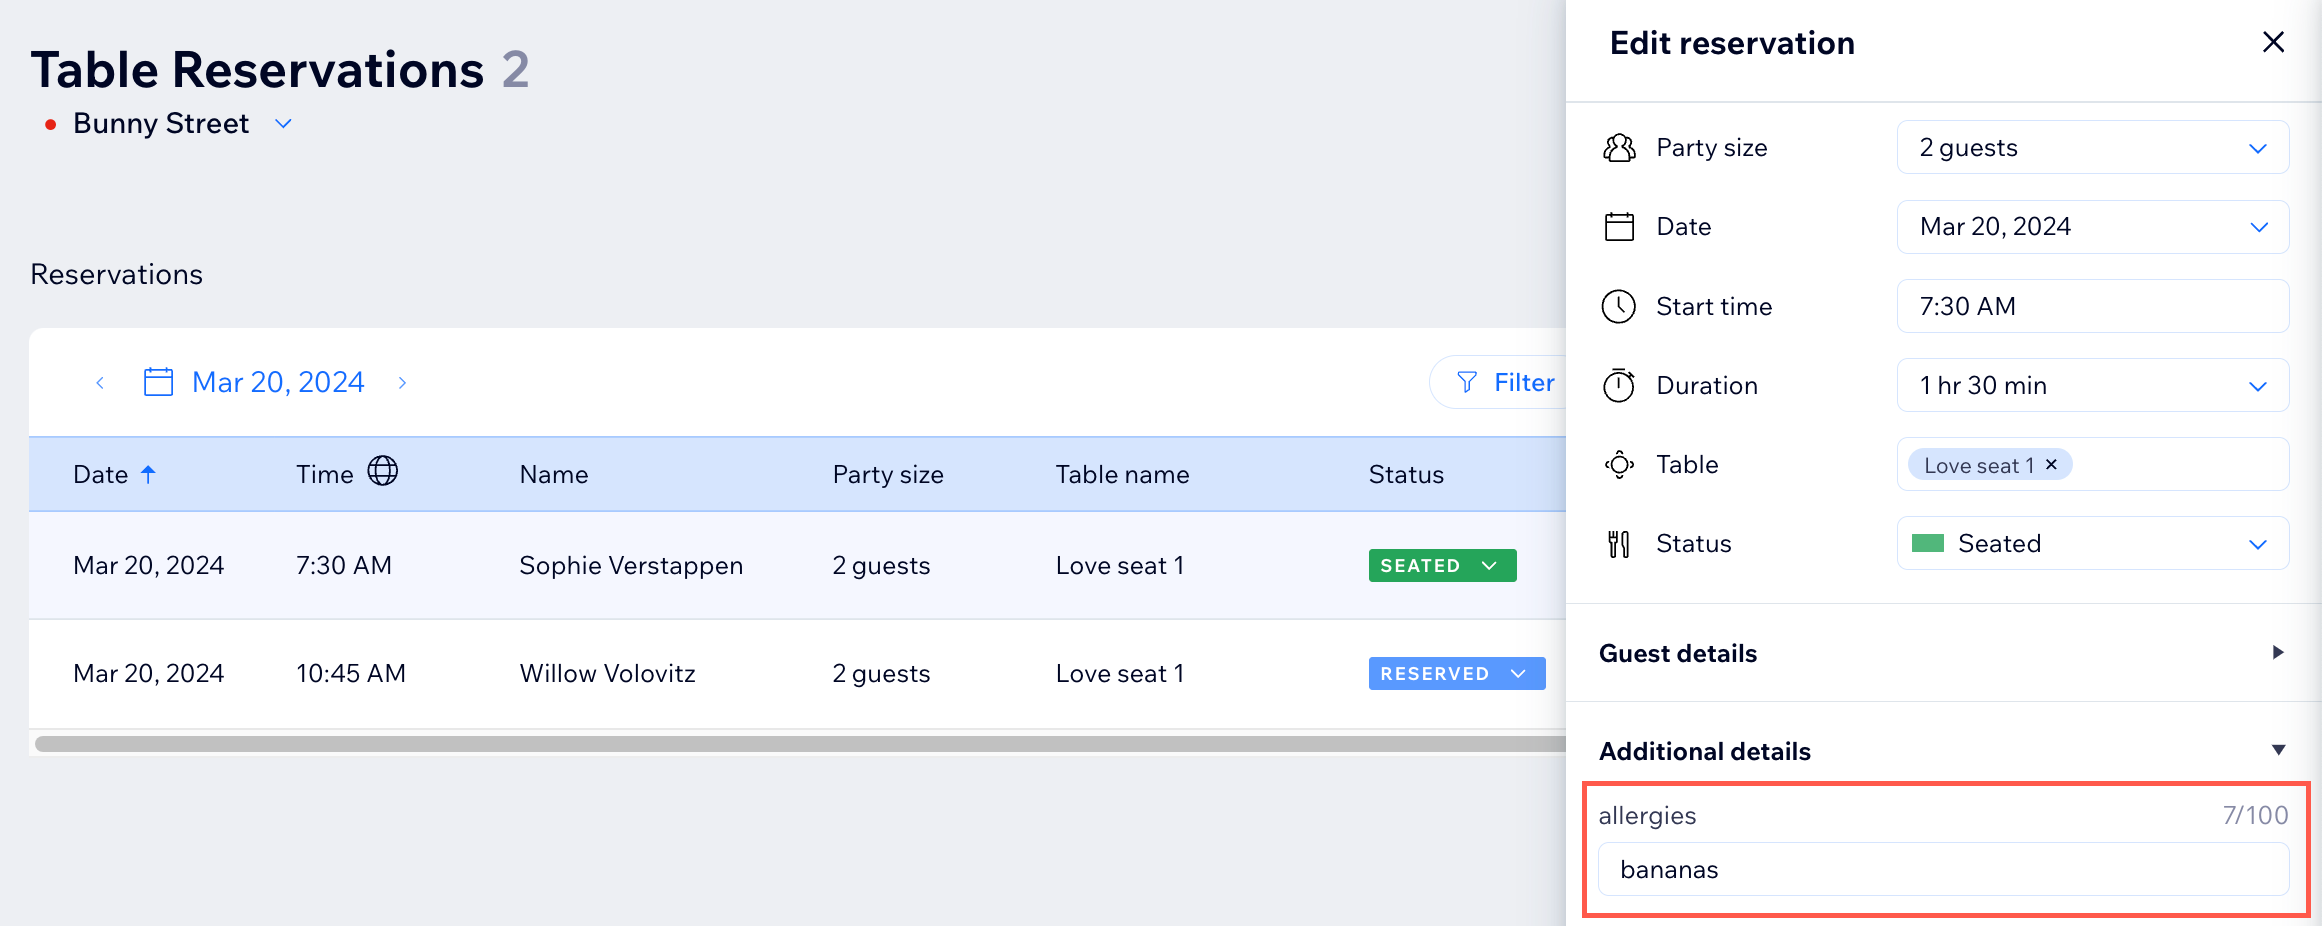
A. screenshot of the wix dashboard table reservations tab

To customize your reservation form:

Dashboard

Wix app

  1. Go to Table Reservations in your site's dashboard.

  2. Click Settings at the top right.

  3. Click Reservation form.

  4. Enable the toggle next to each option you'd like to add to your reservation form:Require email address: Require guests to enter their email to complete their table reservations.
    Require last name: Require guests to enter their last name to complete their table reservations.

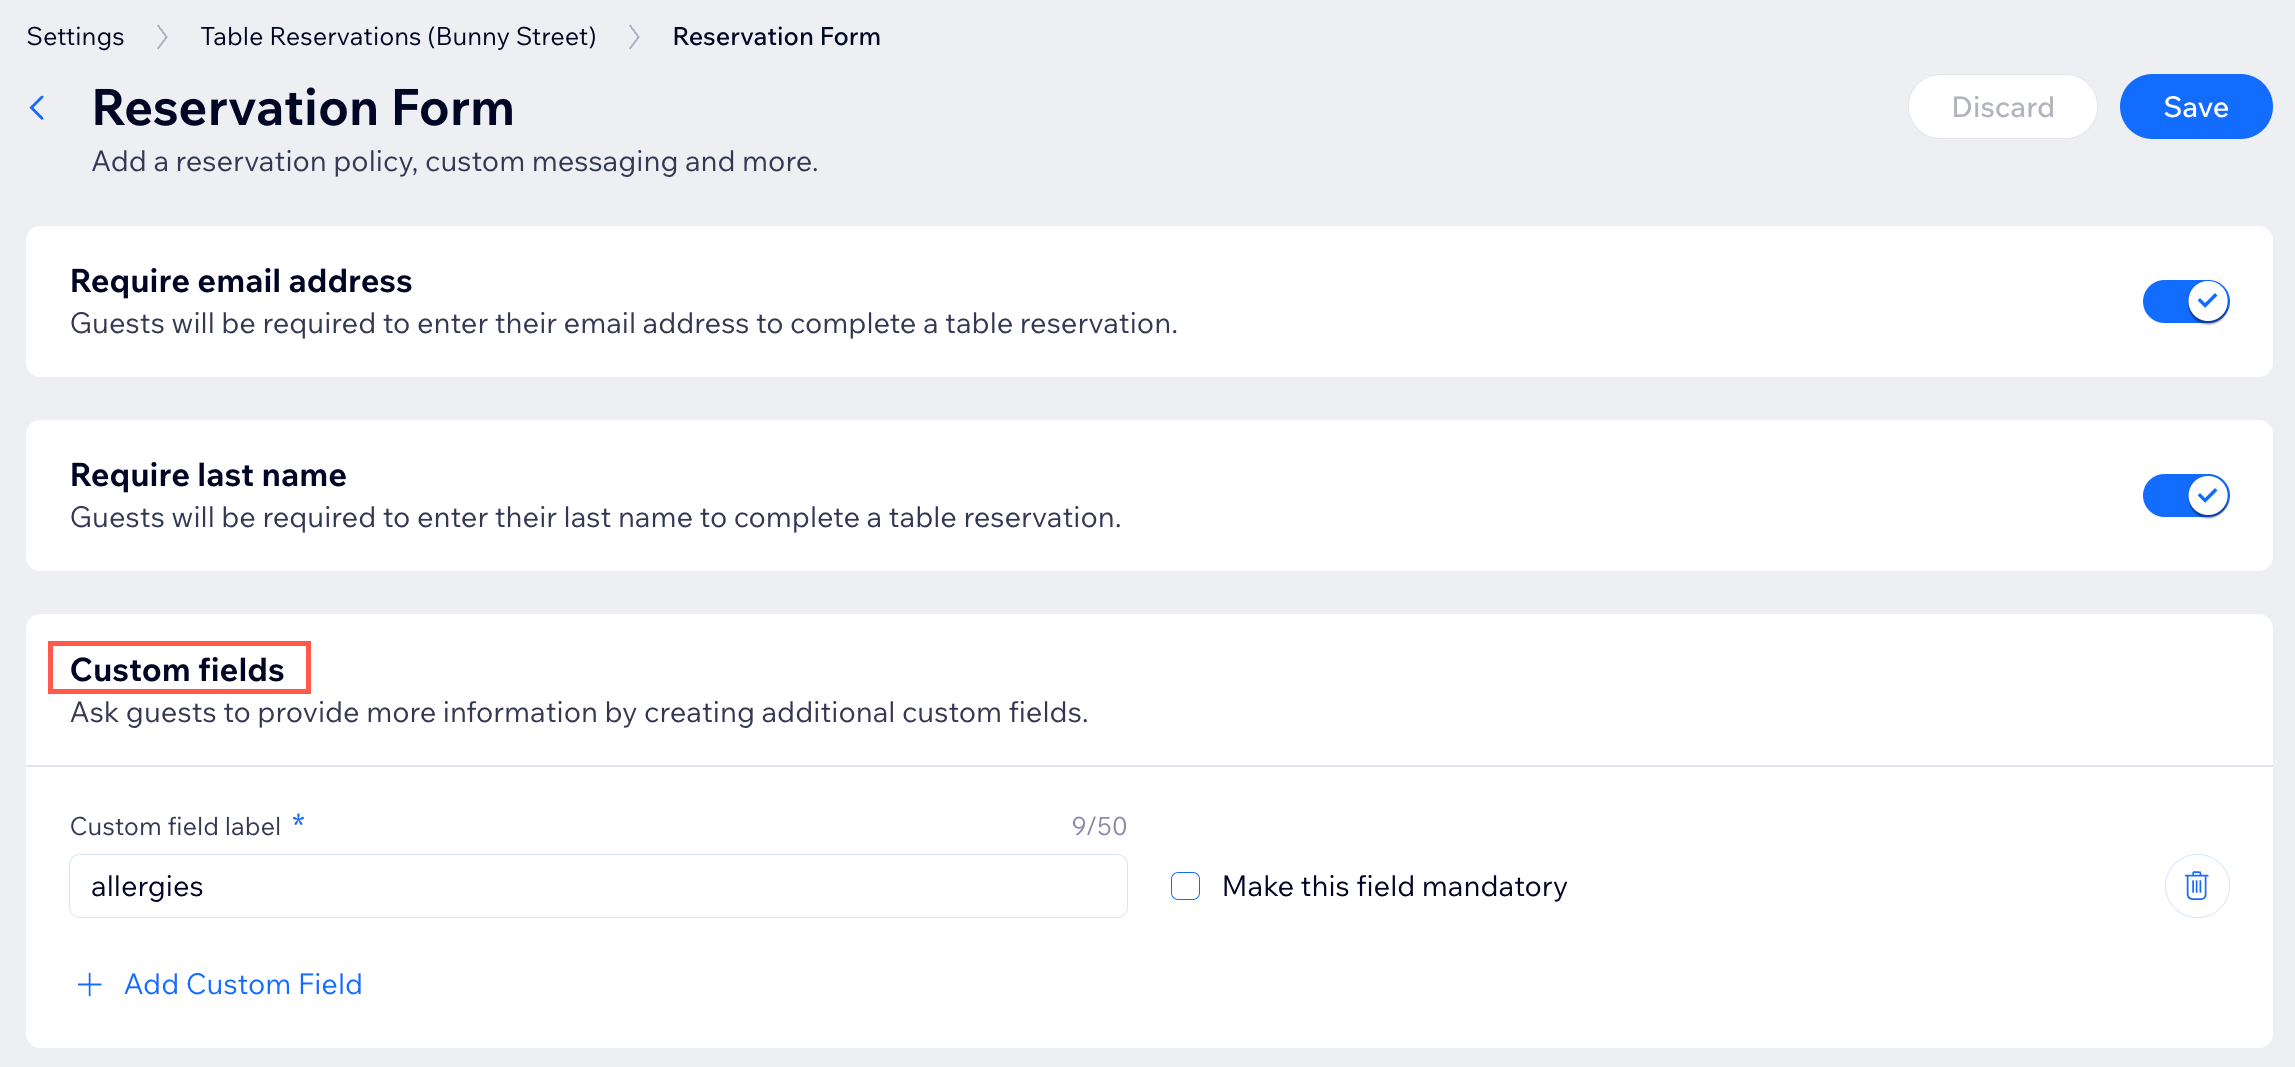
    Custom fields: Have guests provide more information to their reservations. For example, if you need to know of any allergies or seat preferences.Enter a label for the field in the reservation form under Custom field label.
    Select the Make this field mandatory checkbox to require guests to provide this information to complete their reservations.
    (Optional) Click Add Custom Field to add another field to the reservation form.
    Custom message: Add a message and include additional information for guests reserving a table.
    Email marketing checkbox: Add this checkbox to your site so guests can sign up to get updates on your restaurant. Select the Checked by default checkbox if you want the checkbox to be selected by default for guests.

    Policies: Select the checkboxes by the policies you want to add to your form: Terms & Conditions and Privacy Policy.Link to URL: Add a hyperlink that leads to the relevant policy page.
    Paste as text: The policies are displayed in a pop-up while the guests is ordering or making a reservation.

  5. Click Save.

A screenshot of the custom fields tab in the wix dashboard

Need A Professional Website?
Contact Us 
Today!

Wix Automations: Adding and Sending a Coupon

Wix Automations: Sending Automated Emails to Contacts After Form Submissions

Wix Automations: Customizing Automated Emails

Wix Automations: Creating a New Automation

Wix Automations: An Overview

The New Automation Builder: Understanding Email Types

The New Automation Builder: Creating a Multi-Action Automation

The New Automation Builder: Sending Data via Webhook

The New Automation Builder: Adding and Sending a Coupon

The New Automation Builder: Troubleshooting Wix Automations

The New Automation Builder: Understanding Conditions Operators

The New Automation Builder: Setting Up a 'Scheduled Time' Trigger

The New Automation Builder: Sending Data to Google Sheets

The New Automation Builder: Using the Property Picker

The New Automation Builder: Viewing and Managing Automations Installed for You

The New Automation Builder: Customizing Automated Emails

The New Automation Builder: Managing Your Automations

The New Automation Builder: Creating an Automation

The New Automation Builder: Overview

Microsoft Office 365 Mailbox Limits

Resetting the Password for Additional Office 365 Mailboxes

Resetting Your Admin Password for Your Office 365 Mailbox

Accessing Your Microsoft Office 365 Mailbox Through Your Wix Account

Accessing Your Microsoft Office 365 Mailbox Through Your Wix Account

Accessing the Microsoft Office 365 Admin Center

Activating Your Microsoft Office 365 Mailbox Purchased from Wix

Google Workspace: Troubleshooting Login Issues

Google Workspace: FAQs

Google Workspace: Contacting Google Support

Google Workspace Error Message: "You do not have access to Email"

wix experts
Graphic2Traffic web design
©
bottom of page