


Taking online orders
Wix Restaurants: Automatically Responding to Incoming Orders
Important:
This article is about the original Restaurants Orders app.
We've released a new online ordering app. Learn how to add and set up the new Wix Restaurants Orders (New) app.
Use Wix Automations to automatically respond to customers when they place orders on your Wix Restaurants site. You can choose how to respond or what you'd like to do when customers place orders. For example, send an automated email or receive an email, award customers with loyalty points, assign tasks to your team and more.
Tip:
Learn more about creating a new automation and how you can respond to customers when they place orders on your site.
To respond to incoming restaurant orders:
Go to Automations in your site's dashboard.
Click + New Automation.
Click + Start from Scratch.
Click the title to give your automation a name.
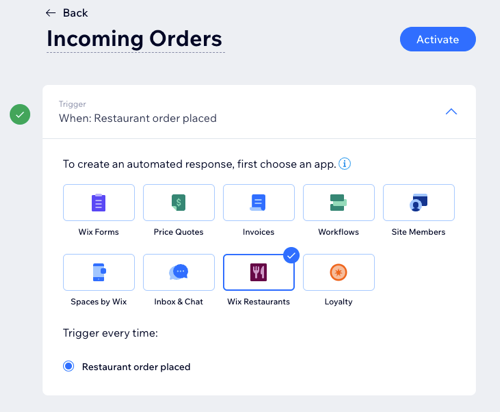
Click Wix Restaurants app in the Trigger section.
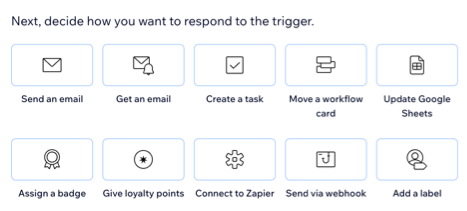
Select your chosen action in the Action section and set up the action using the available options.
Click the Timing section to expand it.
Click the Choose a time to send this action drop-down to select when the action should be carried out:Immediately: The action is performed as soon as the trigger occurs.
Set custom time: The action is performed after the trigger, at a time set by you. Click the up and down arrows to set the number and click the drop-down to choose between days, hours and minutes.
Click the Limit frequency to drop-down to set trigger frequency:Don't limit (trigger every time): Your action will take place every time it is triggered by a visitor.
Once per contact: Your action will take place only once per contact.
Once per contact every 24hrs: Your action will take place only once per contact in any 24hr period.
(Optional) Click + Add an Action at the bottom to set up a multi-action automation.
Click Activate to save your new automation.