


Taking online orders
Wix Restaurants: Adding a Service Fee to Online Orders
Important:
This article is about the original Restaurants Orders app.
We've released a new online ordering app. Learn how to add and set up the new Wix Restaurants Orders (New) app.
Add a service fee to online orders in your Wix Restaurant site to help you cover operational costs and state regulation fees.
You can add the service fee as a percentage or fixed amount of the total order, and add sales tax if applicable. You can also set the service fee to apply to orders above a certain amount and based on how you fulfill that order.
Customers will see the service fee as a separate line item and a price breakdown in their order summary during checkout.
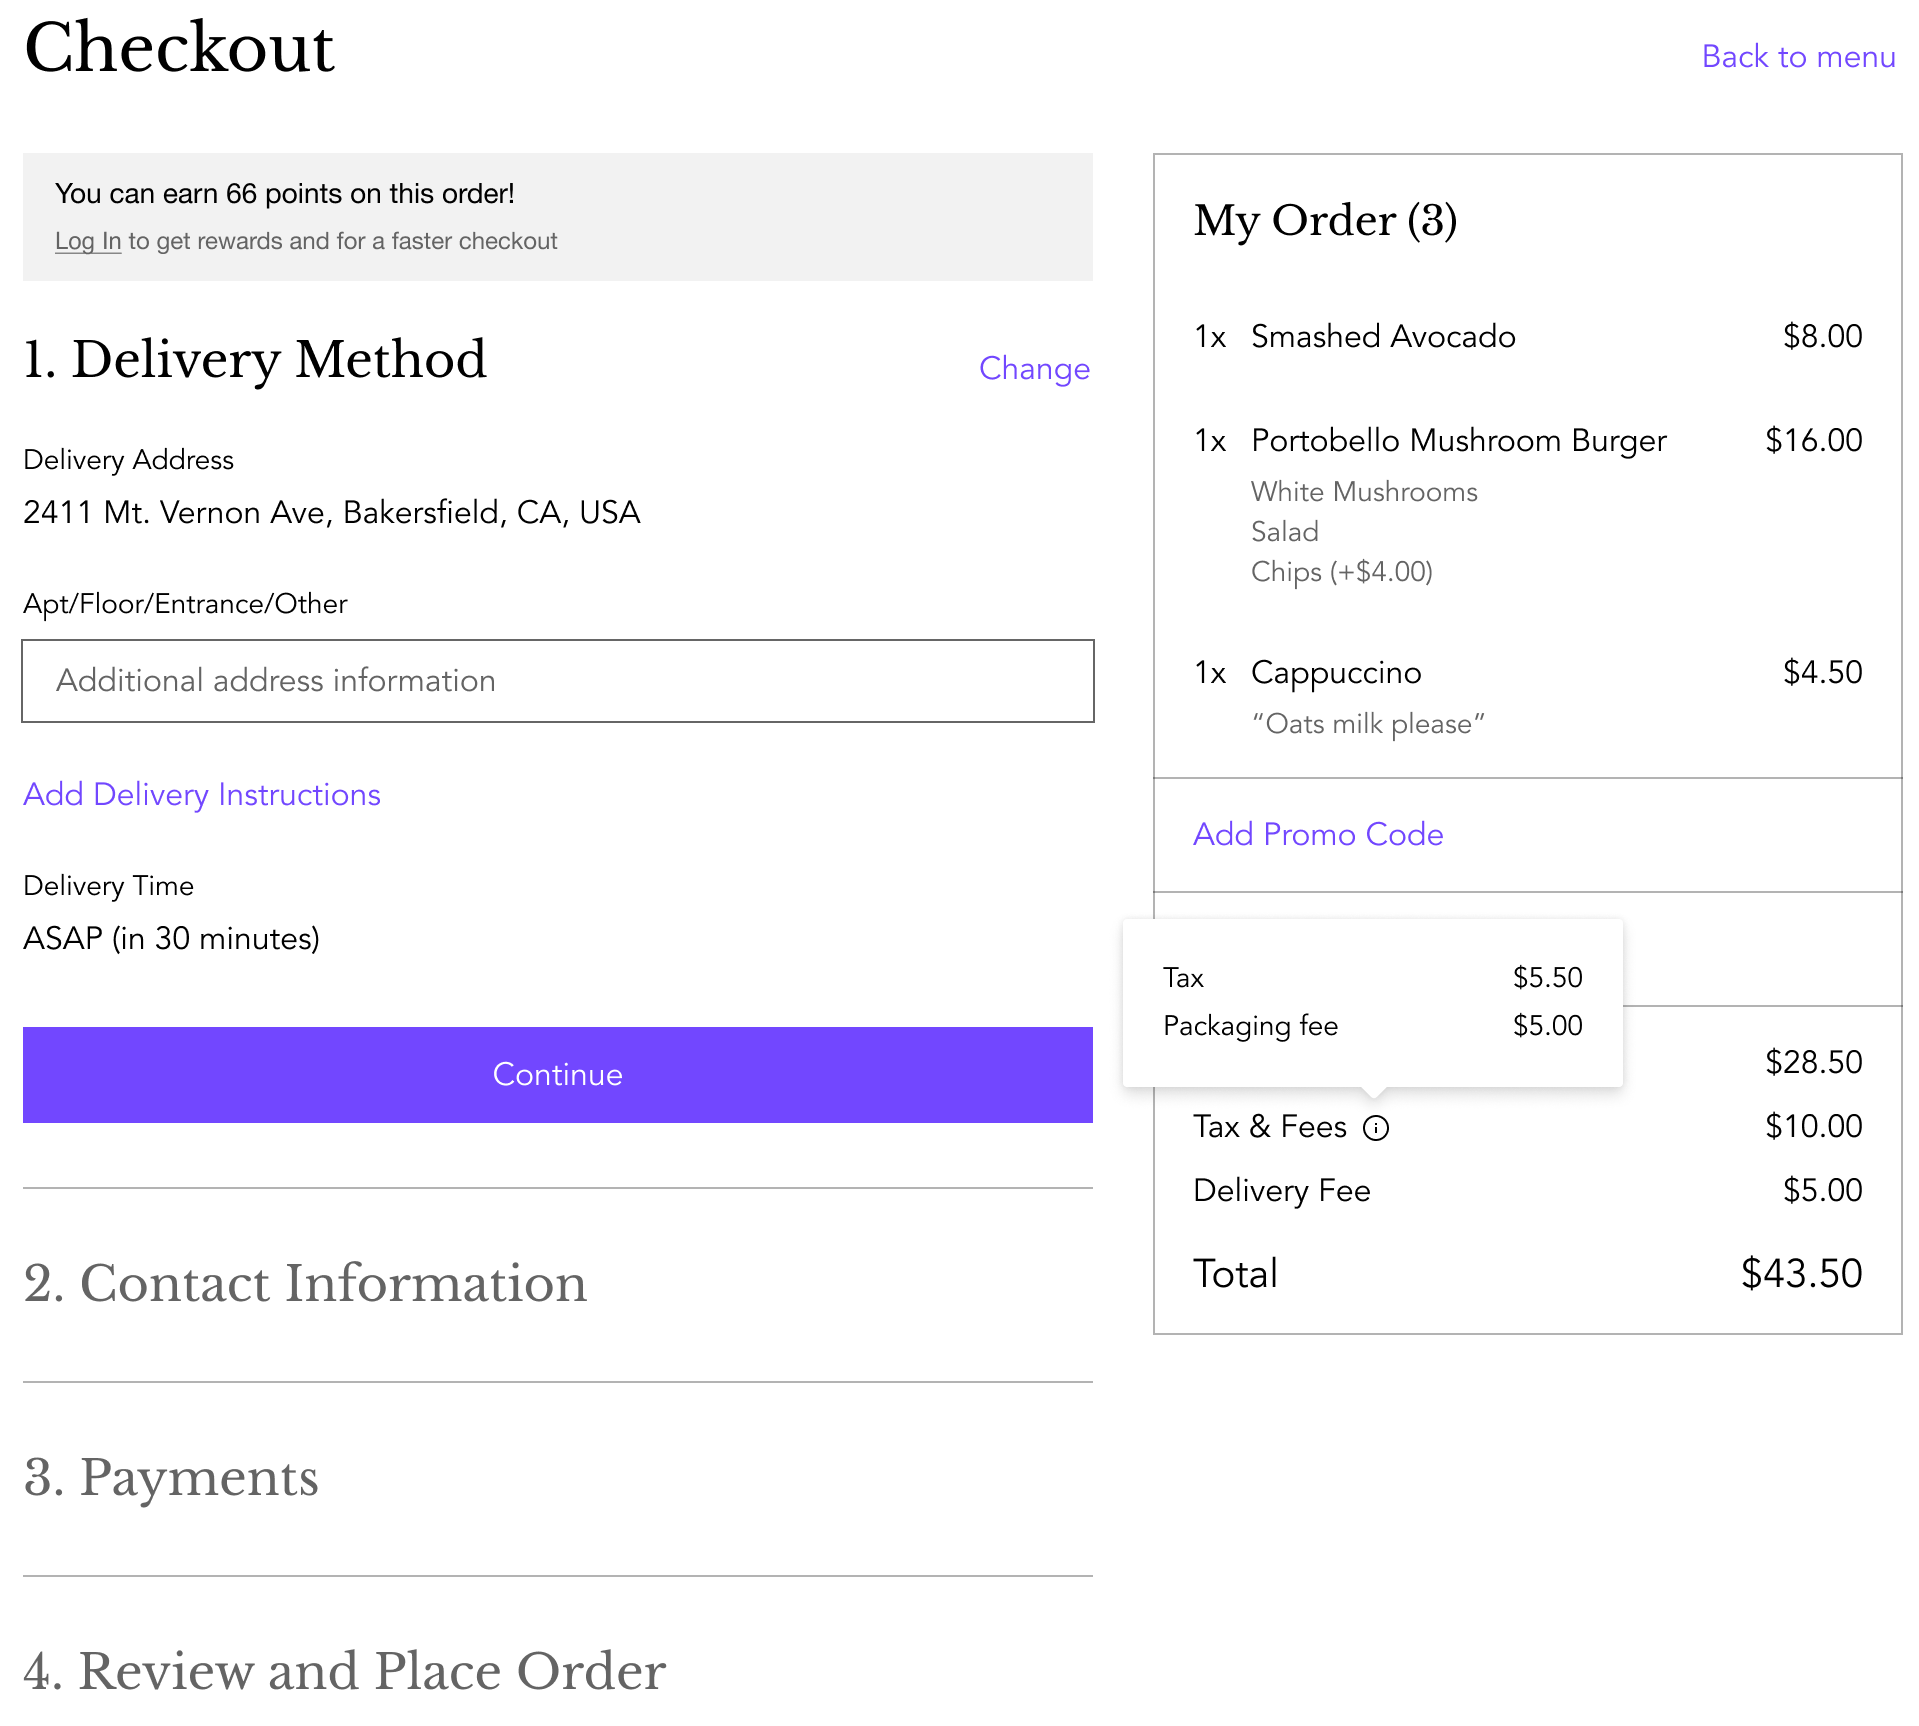
To add a service fee:
Go to Order Settings in your site's dashboard.
Click Advanced.
Scroll down to Service fees and click + New Service Fee.
Add your service fee details and set the conditions:Service name: Add a name for your service fee.
Amount: Enter your service fee. It can be a fixed amount ($) or a percentage (%).
Note: Customers will see the service fee and amount during checkout.
(Optional) Add sales tax: Click the checkbox to add sales tax to this service fee and enter the percentage to add.
Note: Adding sales tax is only available in US and Canada. Customers will see the breakdown of the tax charged during checkout.
Apply based on subtotal amount: Choose what orders to apply the service fee to:All orders: All orders will be charged the service fee.
Orders above: Orders placed above the amount you set will be charged this service fee.
Orders between: Orders between a minimum and maximum amount will be charged this service fee.
Apply based on fulfillment type: Choose the fulfillment type to apply the service fee to (Pickup / Curbside Pickup / Delivery / Contactless Dine-in).
Click Create.
Click Save.
(Optional) Repeat steps 3-5 to add another service fee.