top of page

Getting started with Wix Music

Wix Music: Adding and Setting up Wix Music

Note:

Wix Music is not yet available in the Studio Editor. If this is something you'd like to see in the future, vote for that feature.

Wix Music lets you share and spread your music online, completely free of charge. Add the Wix Music player to your site and choose which track, playlist or album it displays. You can also control whether visitors can share or download your music.
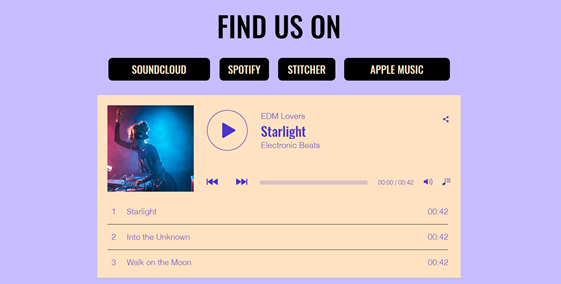
A screenshot of a Wix Music player on a live site.

Step 1 | Add Wix Music to your site

First, add the Wix Music player to your site in the Wix Editor. You can choose the design that best suits your site's style - compact or classic.

To add Wix Music:

  1. Go to your editor.

  2. Click Add Elements  on the left side of the editor.

  3. Click Video and Audio.

  4. Click Wix Music.

  5. Drag a Wix Music player onto your page.
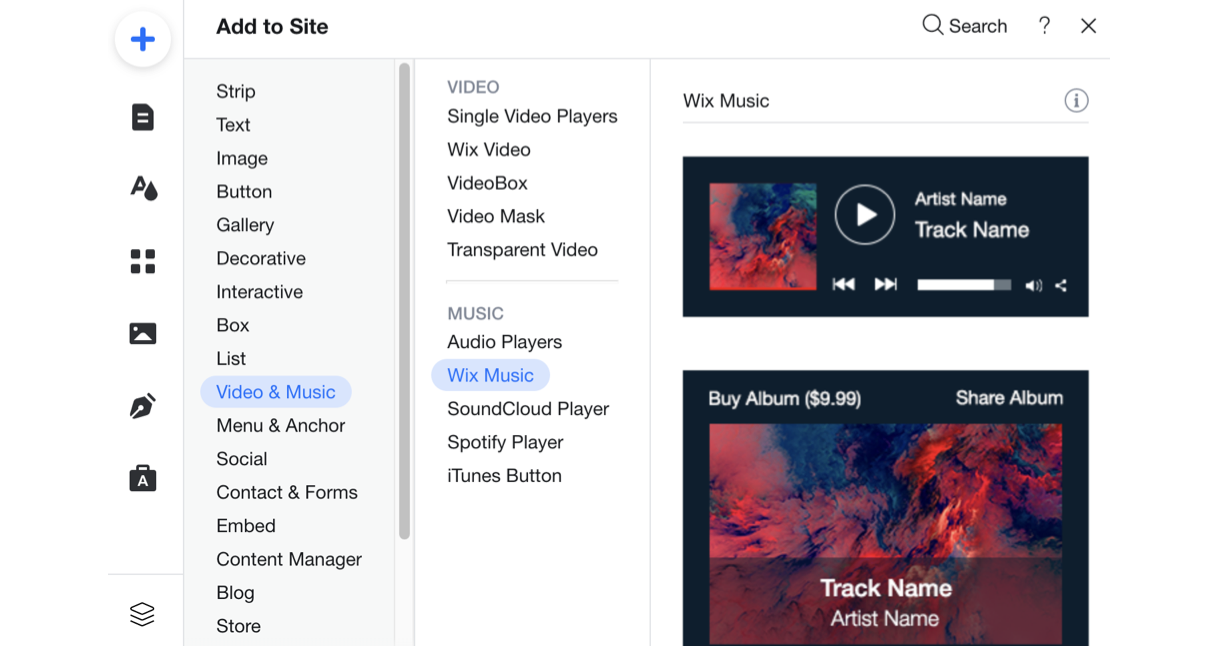
A screenshot of the player's available to add to your site in the Editor.

Step 2 | Choose music for your player

After adding the Wix Music player to your site, it's time to choose which music you want to display. You can choose from music you've already uploaded to your Music Library or add new music. Then choose whether to display an album, single, or playlist.

To choose music for your player:

  1. Click the Wix Music player in your editor.

  2. Click Settings.

  3. Click the My Music tab.

  4. Choose what music to add to the player:Existing music: Choose from music you've already uploaded to your Music Library.
    New music: Click + New Music to upload a single, album or playlist.
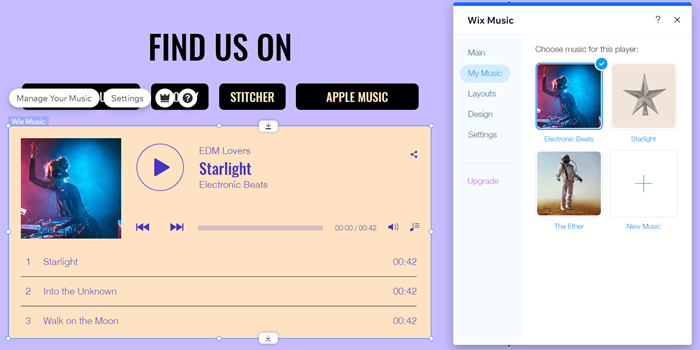
A screenshot of the My Music tab in the Editor.

Step 3 | Set up your player

Lastly, set up your player to work just how you want. Adjust your player's settings to allow your visitors to share your music and enable autoplay. Learn more about setting up your Wix Music player.
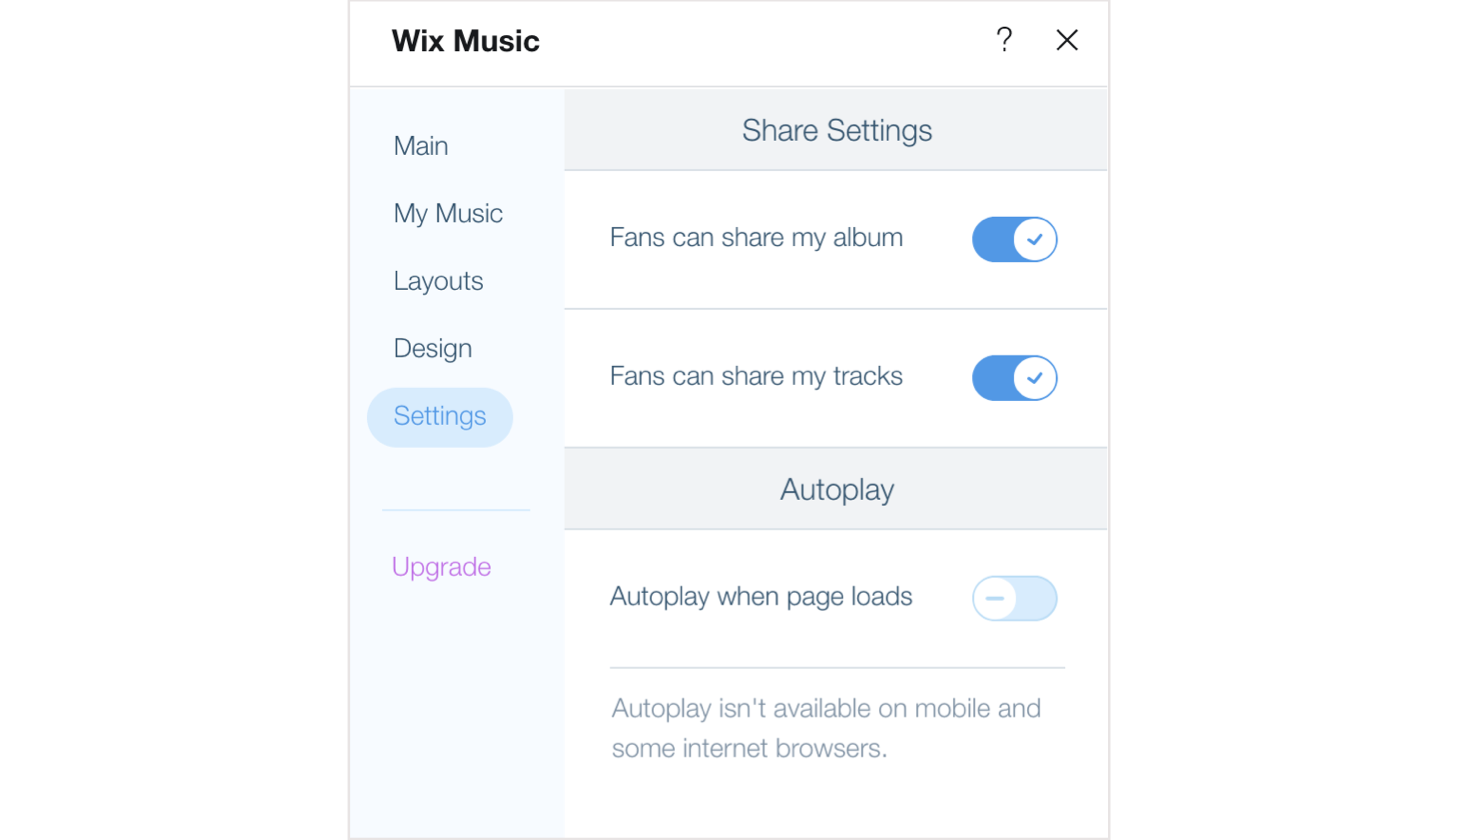
A screenshot of the Settings options available in the Wix Music player.

Need A Professional Website?
Contact Us 
Today!

Wix Automations: Adding and Sending a Coupon

Wix Automations: Sending Automated Emails to Contacts After Form Submissions

Wix Automations: Customizing Automated Emails

Wix Automations: Creating a New Automation

Wix Automations: An Overview

The New Automation Builder: Understanding Email Types

The New Automation Builder: Creating a Multi-Action Automation

The New Automation Builder: Sending Data via Webhook

The New Automation Builder: Adding and Sending a Coupon

The New Automation Builder: Troubleshooting Wix Automations

The New Automation Builder: Understanding Conditions Operators

The New Automation Builder: Setting Up a 'Scheduled Time' Trigger

The New Automation Builder: Sending Data to Google Sheets

The New Automation Builder: Using the Property Picker

The New Automation Builder: Viewing and Managing Automations Installed for You

The New Automation Builder: Customizing Automated Emails

The New Automation Builder: Managing Your Automations

The New Automation Builder: Creating an Automation

The New Automation Builder: Overview

Microsoft Office 365 Mailbox Limits

Resetting the Password for Additional Office 365 Mailboxes

Resetting Your Admin Password for Your Office 365 Mailbox

Accessing Your Microsoft Office 365 Mailbox Through Your Wix Account

Accessing Your Microsoft Office 365 Mailbox Through Your Wix Account

Accessing the Microsoft Office 365 Admin Center

Activating Your Microsoft Office 365 Mailbox Purchased from Wix

Google Workspace: Troubleshooting Login Issues

Google Workspace: FAQs

Google Workspace: Contacting Google Support

Google Workspace Error Message: "You do not have access to Email"

wix experts
Graphic2Traffic web design
©
bottom of page