


Wix Inbox FAQ
Wix Inbox: Setting Up Your Inbox Profile and Outgoing Emails
Make your outgoing emails professional while adding a personal touch. Set the subject and sender address to reflect your brand. Edit your profile so customers receive messages with your name and personalised signature attached.
Setting up your Wix Inbox profile
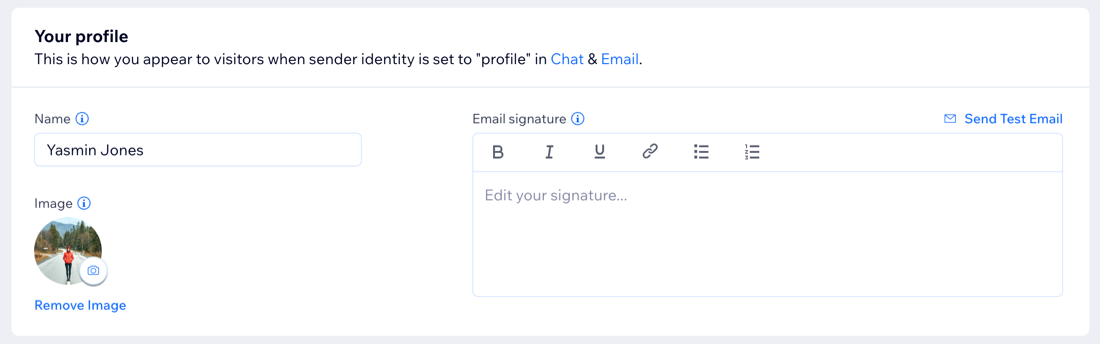
Your profile is how you appear to visitors when messaging via chat and email.
Note:
If you add a profile image here, it will appear alongside your outgoing chat messages. To add a profile image to outgoing emails, connect your Gmail account to Wix Inbox or purchase a business email, and then edit your email profile image in your Gmail account.
To set up your profile:
Go to Inbox in your site's dashboard.
Click the Settings drop-down at the top right.
Click Profile & collaborators.
Customize your personal profile in the Your profile section:Name: Enter your name, as you'd like it to appear when you send messages.
Image: Upload an image you'd like to be displayed with chat messages you send.
Email signature: Enter your email signature and use the toolbar to style the text.
(Optional) Click Send Test Email so you can preview how an outgoing email will look.
Click Save Changes at the top right.
Tip:
As site owner, you'll receive an email notification every time a chat or inbox message is received. You can change the email address these notifications go to.
Your site's email settings
Edit the subject and sender name attached to all emails you send from your Wix Inbox. Connect your Gmail account to Wix Inbox or purchase a business email if you'd like emails you send to come from your own address.
To manage your email settings:
Go to Inbox in your site's dashboard.
Click the Settings drop-down at the top right.
Click Email.
In the Outgoing email settings section, choose what you want to customize:Subject line: This will be the subject line of every email you send.
Sender identity: Choose what you want to appear as "sender" of every email you send:Profile name: The name of the team member who sent the message will appear (e.g. "Jane").
Business or website name: The name of your business/website will appear (e.g. "Ava Homeware").
Profile name + business or website name: Both will appear (e.g. "Jane from Ava Homeware").
Sender address: Choose to connect your Gmail account to Wix Inbox or purchase a business email to have your emails coming from your own address. If neither is connected, emails will be sent from reply@crm.wix.com.
Click Save Changes at the top right.
Do you have team members working on your site too?
Set up notifications and profiles for site collaborators so everyone is aware of new messages and you can share the responsibility of managing your inbox.