


Managing your guests
Wix Events: Manually Adding Guests to an Event
You can manually add guests to your event without them having to RSVP or purchase a ticket through your site. This can come in handy in various situations, such as:
Adding multiple tickets / guests to one order.
Purchasing tickets for a group.
Handling guests who RSVP'd in person.
Offering free tickets to your ticketed event.
Assigning specific seats to guests in your seating map.
In this article, learn more about:
Manually adding guests
When adding guests manually, you can choose whether to add just 1 or multiple people at once. This lets you assign tickets or seats to an entire group in a single transaction.
Depending on your registration form settings, guest information can either be collected once for the entire order or separately for each ticket.
Note:
Currently, adding multiple guests is only available on desktop.
To manually add guests:
Dashboard
Wix app
Wix Studio app
Go to Events in your site's dashboard.
Hover over the relevant event and click Manage.
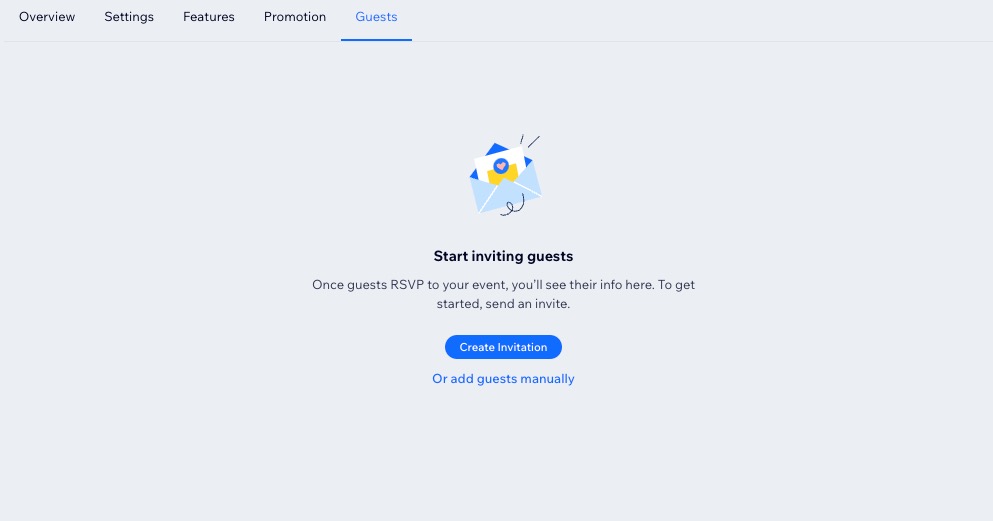
Click the Guests tab at the top.
Click Add Guests.
Note: If your event doesn't have guests yet, click Or add guests manually.Click a type of event below to complete the Add Guests form:
Event without tickets
Enter the Guest details (first name, last name, email).
Note: You can click Add from Contacts to choose a guest from your contact list.(Optional) Click +Add New Guest to add more people.
Select an RSVP status (going, not going or waitlist).
Click Save at the top right.

Events with tickets
Add Ticket details:Click the Ticket Type drop-down and select a ticket type (e.g. VIP, Early Bird).
Click the Quantity drop-down and select the number of tickets.
(Optional) Click + Add ticket to add another ticket type.
Enter the Buyer details (first name, last name, email).
Note: You can click + Add from Contacts to choose a guest from your contact list.Add the Guest details (If your registration form settings is "registration form for each ticket in an order"):If the guest is also the buyer, select the Same as buyer details checkbox.
Enter the first name, last name and email.
Click + Add from Contacts to select and add guests from your contact list.
Select an Order status (not paid, paid, or free).
Select or deselect the Send tickets via email checkbox.
Click Save at the top right.

Ticketed event with a seating map
Add Ticket details:Click Select tickets.
Choose a seat(s) from the seating map.
Click Select Tickets.
(Optional) Click + Add ticket to add another ticket type.
Enter the Buyer details (first name, last name, email).
Note: You can click + Add from Contacts to choose a guest from your contact list.Add the Guest details (If your registration form settings is "registration form for each ticket in an order"):If the guest is also the buyer, select the Same as buyer details checkbox.
Enter the first name, last name and email.
Click + Add from Contacts to select and add guests from your contact list.
Select an Order status (not paid, paid, or free).
Select or deselect the Send tickets via email checkbox.
Click Save at the top right.

Adding multiple guests?
Gather guest details by collecting registration information for the entire order or for each guest individually.
FAQs
Click a question below to learn more about manually adding guests to events.
Can I add a guest to a past event?
Yes, but only if the event already has at least one guest. If your past events have no guests, then it's not possible.
What email notifications do manually-added guests receive?
Guests that you've added manually receive reminder emails if they were added before the reminder is sent out. This also applies to cancellation emails. However, they do not receive a confirmation email.
How can I check details about an order?
When viewing an order, you can access the buyer's info, such as the order number and order date. Additionally, you can review the order summary, which includes all purchased tickets for the event along with their payment status.
Go to Events in your site's dashboard.
Click Manage next to the relevant event.
Click the Guests tab at the top.
Hover over the relevant guest and click View.
Click View Order under Buyers info.

How many tickets can I add to a single order?
You can add up to 50 tickets at once.