top of page

Creating your event

Wix Events: Creating an Event Schedule

Let participants know what's happening at your event by creating an event schedule. Schedules are ideal for conferences, festivals, and more.

Guests can view the first 2 schedule items on the events details page and click to see the whole schedule. You can also choose to display the schedule on a separate site page.
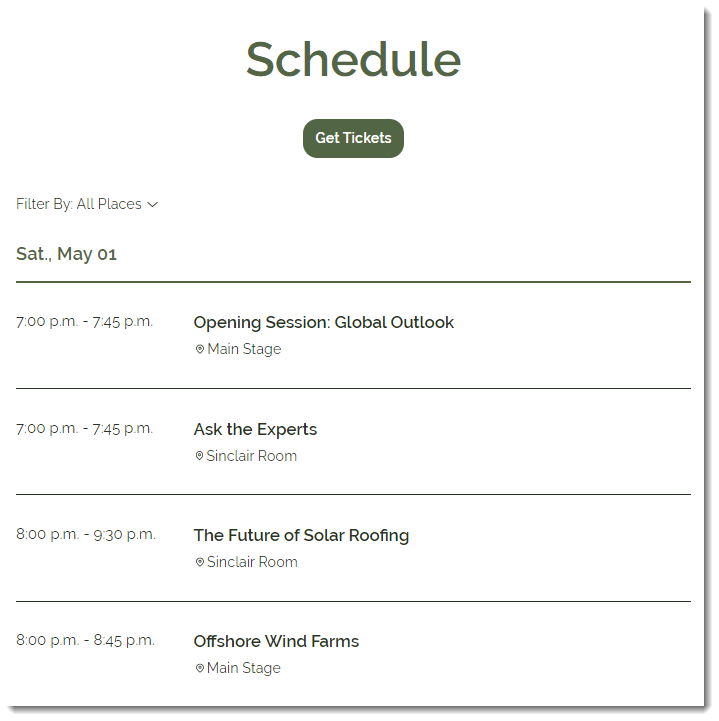
A screenshot of an event schedule.

Before you begin:

Create and save your event as a draft or published event.

To create an event schedule:

  1. Go to Events in your site's dashboard.

  2. Select the relevant draft or published event.
    Note: For recurring events, you can add a schedule to an individual occurrence of an event.

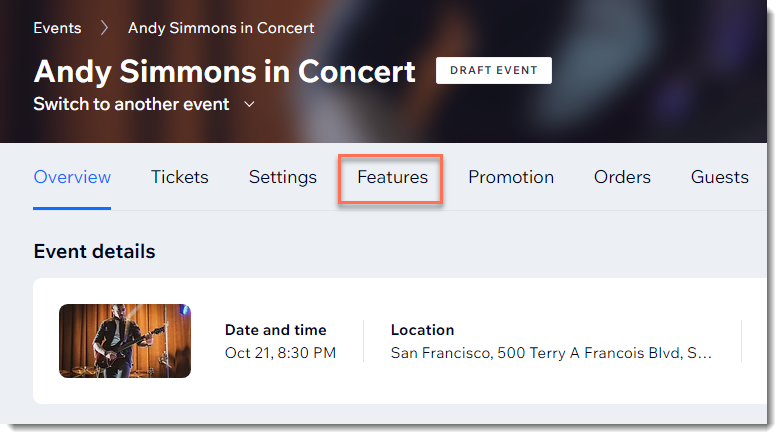
  3. Click the Features tab.

A screenshot of the features tab to add a schedule to the event.

  1. Click Schedule.

  2. Click Add Schedule Item.

  3. Add the details for the first schedule item:Enter the item name (e.g. Opening Session)
    Set the start and end dates and times.
    Note: The minimum time limit for a scheduled item is 10 minutes.
    Enter the location (e.g. Main Stage).
    (Optional) Enter a tag and press Enter on your keyboard.
    Note: Tags can be used to classify event sessions. For example, a renewable energy conference might create tags for  "Solar Energy", "Wind Energy", and "Electric Vehicles". Guests can filter the schedule to locate the content they're interested in. After you create a tag, apply it to other items of the same type.
    (Optional) Enter a description of the schedule item.
    Click Add.
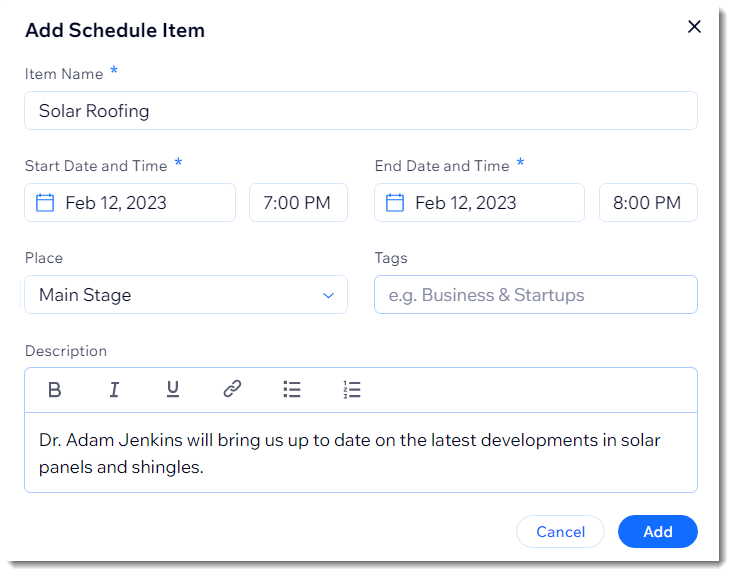
A screenshot of adding the schedule item details to the event.

  1. Repeat steps 5 and 6 to add additional items to the schedule.

  2. (Optional) Click the Enable Personal Agenda toggle enable it.  
    Note: When enabled, guests can mark the events they're interested in and then click View My Agenda to see their selections.
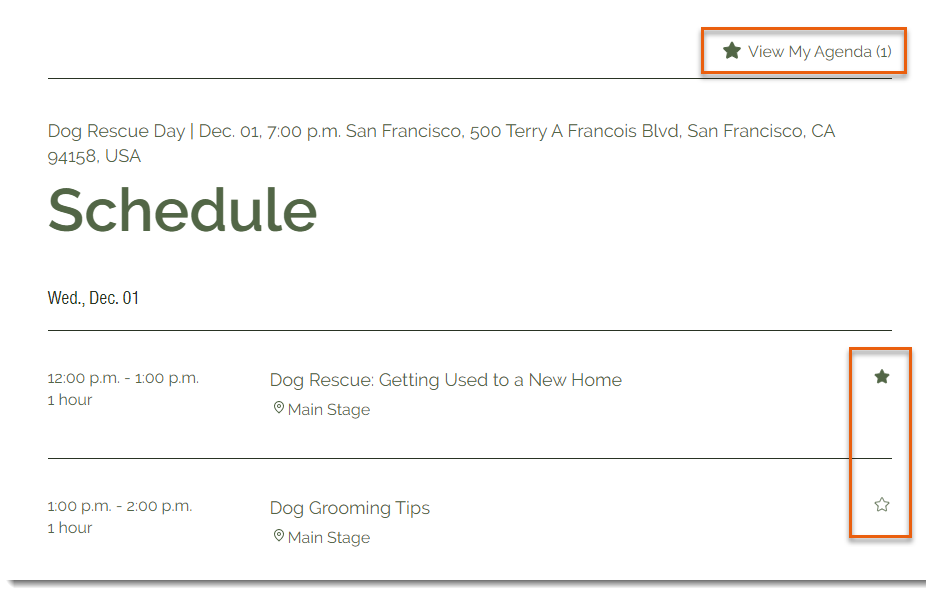
A screenshot of guests being able to mark their favorites items in the event schedule.

Need A Professional Website?
Contact Us 
Today!

Wix Automations: Adding and Sending a Coupon

Wix Automations: Sending Automated Emails to Contacts After Form Submissions

Wix Automations: Customizing Automated Emails

Wix Automations: Creating a New Automation

Wix Automations: An Overview

The New Automation Builder: Understanding Email Types

The New Automation Builder: Creating a Multi-Action Automation

The New Automation Builder: Sending Data via Webhook

The New Automation Builder: Adding and Sending a Coupon

The New Automation Builder: Troubleshooting Wix Automations

The New Automation Builder: Understanding Conditions Operators

The New Automation Builder: Setting Up a 'Scheduled Time' Trigger

The New Automation Builder: Sending Data to Google Sheets

The New Automation Builder: Using the Property Picker

The New Automation Builder: Viewing and Managing Automations Installed for You

The New Automation Builder: Customizing Automated Emails

The New Automation Builder: Managing Your Automations

The New Automation Builder: Creating an Automation

The New Automation Builder: Overview

Microsoft Office 365 Mailbox Limits

Resetting the Password for Additional Office 365 Mailboxes

Resetting Your Admin Password for Your Office 365 Mailbox

Accessing Your Microsoft Office 365 Mailbox Through Your Wix Account

Accessing Your Microsoft Office 365 Mailbox Through Your Wix Account

Accessing the Microsoft Office 365 Admin Center

Activating Your Microsoft Office 365 Mailbox Purchased from Wix

Google Workspace: Troubleshooting Login Issues

Google Workspace: FAQs

Google Workspace: Contacting Google Support

Google Workspace Error Message: "You do not have access to Email"

wix experts
Graphic2Traffic web design
©
bottom of page