top of page

Wix Contacts FAQ

Wix Contacts: Adding and Managing Custom Contact Fields

Add custom fields to store additional information about your contacts. Custom fields can be either text, number, date or URL, and can have any name you choose.
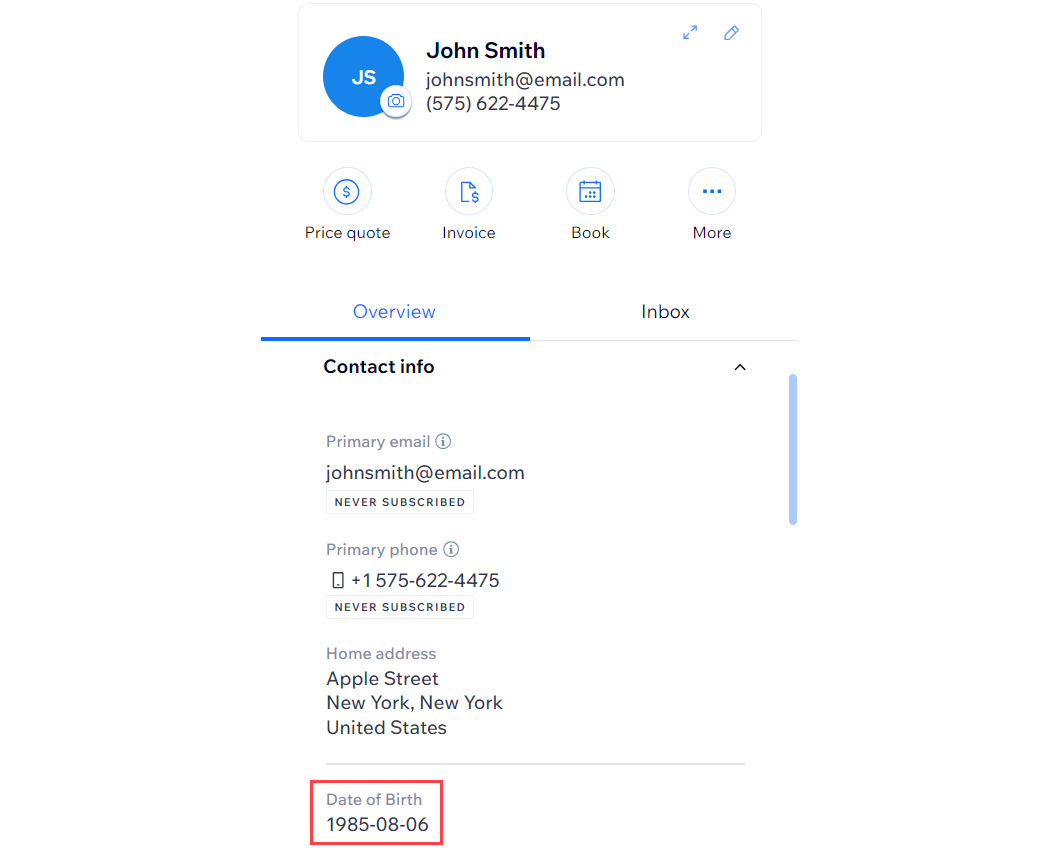
A screenshot of the contact panel with the date of birth custom field highlighted.

Adding custom fields to contacts

Any custom field that you add is automatically added to all contacts in your Contact List. This way, you do not have to fill in this field for every contact.

Tip:

Sync custom fields from your contacts to Wix Forms to collect this information from your visitors from a form on your site.

To add a custom field:

  1. Go to Contacts in your site's dashboard.

  2. Click the More Actions icon at the top and select Custom fields.

  3. Click + Add New Field.

  4. Click the Field Type drop-down and select the type of content: Text, Number, Date, or URL

  5. Enter the name of the new field (e.g. "Date of Birth") in the Field Name field.

  6. Click Add.

A screenshot of the custom field menu with the text field type selected, and Date of Birth entered as the custom field.

  1. Click Done.

Renaming custom contact fields

You can change the name of a custom field without affecting any of the information stored in the field.

To rename a custom contact field:

  1. Go to Contacts in your site's dashboard.

  2. Click the More Actions icon at the top and select Custom fields.

  3. Hover over the field you want to rename and click the Rename icon .

  4. Edit the name of the field and click the checkmark to save.

  5. Click Done.

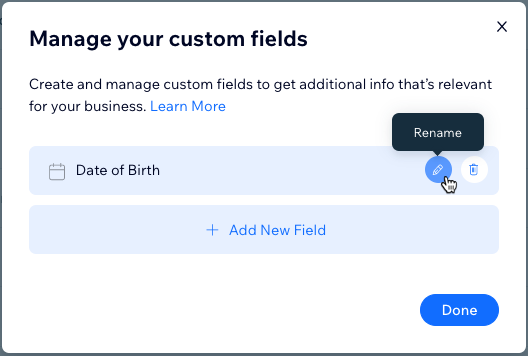
A screenshot of the Manage your custom fields menu, with the mouse hovering over the Rename option on a custom field.

Deleting custom contact fields

Clean up your contacts by deleting custom fields that you no longer need. Deleting the custom field removes it, and the information it contains, from all your contacts.

To delete a custom field:

  1. Go to Contacts in your site's dashboard.

  2. Click the More Actions icon at the top and select Custom fields.

  3. Hover over the field you want to delete and click the Delete icon .

  4. Click Delete to confirm.

  5. Click Done.

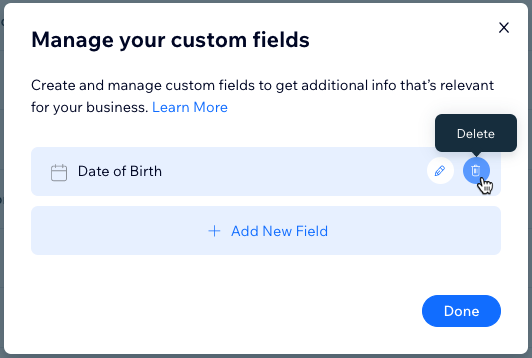
A screenshot of the Manage your custom fields menu, with the mouse hovering over the Delete option on a custom field.

Need A Professional Website?
Contact Us 
Today!

Wix Automations: Adding and Sending a Coupon

Wix Automations: Sending Automated Emails to Contacts After Form Submissions

Wix Automations: Customizing Automated Emails

Wix Automations: Creating a New Automation

Wix Automations: An Overview

The New Automation Builder: Understanding Email Types

The New Automation Builder: Creating a Multi-Action Automation

The New Automation Builder: Sending Data via Webhook

The New Automation Builder: Adding and Sending a Coupon

The New Automation Builder: Troubleshooting Wix Automations

The New Automation Builder: Understanding Conditions Operators

The New Automation Builder: Setting Up a 'Scheduled Time' Trigger

The New Automation Builder: Sending Data to Google Sheets

The New Automation Builder: Using the Property Picker

The New Automation Builder: Viewing and Managing Automations Installed for You

The New Automation Builder: Customizing Automated Emails

The New Automation Builder: Managing Your Automations

The New Automation Builder: Creating an Automation

The New Automation Builder: Overview

Microsoft Office 365 Mailbox Limits

Resetting the Password for Additional Office 365 Mailboxes

Resetting Your Admin Password for Your Office 365 Mailbox

Accessing Your Microsoft Office 365 Mailbox Through Your Wix Account

Accessing Your Microsoft Office 365 Mailbox Through Your Wix Account

Accessing the Microsoft Office 365 Admin Center

Activating Your Microsoft Office 365 Mailbox Purchased from Wix

Google Workspace: Troubleshooting Login Issues

Google Workspace: FAQs

Google Workspace: Contacting Google Support

Google Workspace Error Message: "You do not have access to Email"

wix experts
Graphic2Traffic web design
©
bottom of page