top of page

Wix Bookings

Wix Bookings: Setting the Time Zone Display

Your customer may be in a different time zone than you when booking one of your services, especially if you offer online services. To avoid confusion or missed sessions, you have several options for how to display the service times on your site.

Before you begin:

Make sure to set your own time zone in the General section of your site's dashboard.

Notes:

The first calendar day of the week is determined by the business location you enter in your regional settings. Learn how to change your regional settings.

In this article, learn more about:

Display only your local time zone

This option is useful for businesses with local clients who visit in person, such as a hair salon.

Your regional settings define your time zone, and you can edit this at any time.

To display only your local time zone:

  1. Go to Booking Settings in your site's dashboard.

  2. Scroll down and select Calendar time zone.

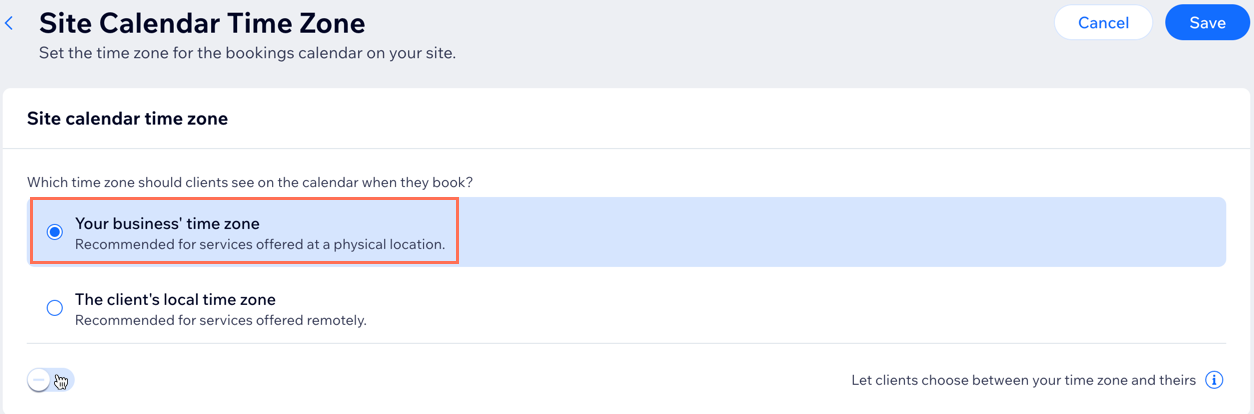
  3. Select Your business' time zone.

  4. Disable the Let clients choose between your time zone and theirs toggle.

  5. Click Save.

Setting the time zone display to your business time zone and deselecting the toggle to let clients choose time zones.

Display only the client's time zone

This option is useful for businesses that sell online sessions with clients around the world. The system detects where the customer is currently located and displays services in their local time zone.

To display only the client's time zone:

  1. Go to Booking Settings in your site's dashboard.

  2. Scroll down and select Calendar time zone.

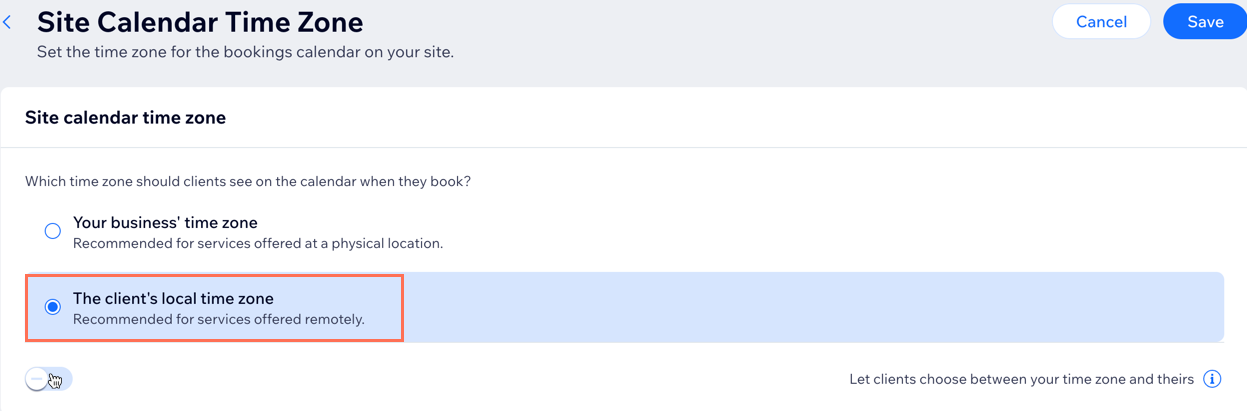
  3. Select The client's local time zone.

  4. Disable the Let clients choose between your time zone and theirs toggle.

  5. Click Save.

Setting the time zone display to the client's local time zone and disabling the toggle to let clients choose time zone.

Allow clients to choose which time zone they want to view

If you have both local and international bookings, you may want to select this option. Choose a default time zone display and then let clients decide if they want to change it.

Note

In the Wix member apps, clients are not able to choose which time zone they want to view. The calendar time zone you select in your Booking Settings determines which time zone clients see when they view services.
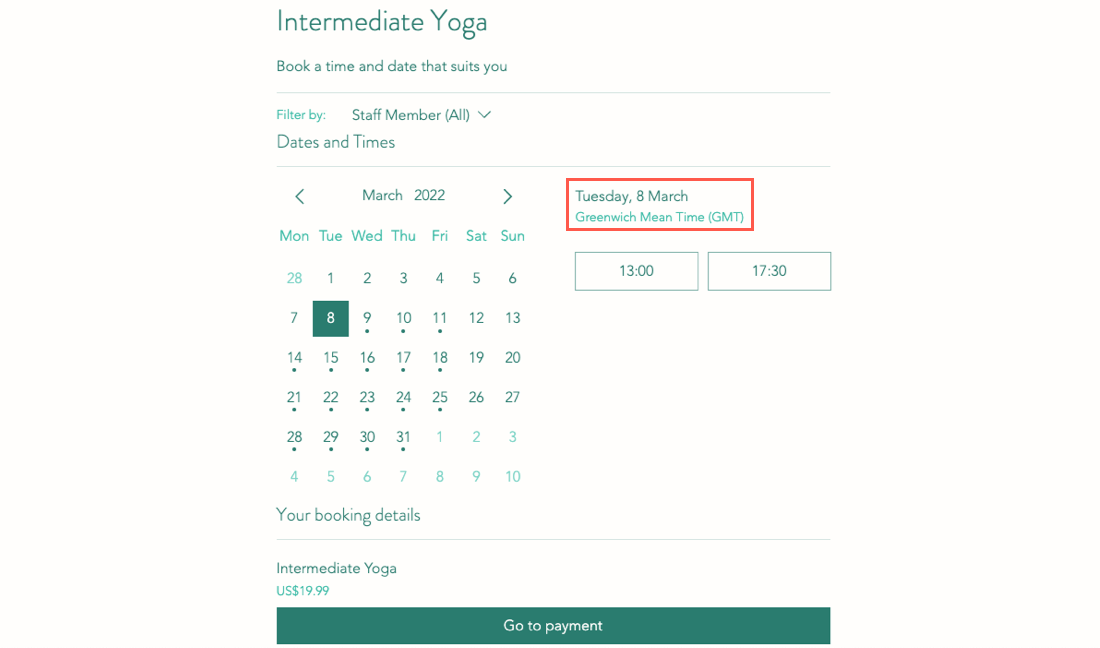
A screenshot showing where clients choose the time zone to be displayed in their booking details.

To allow clients to choose a time zone display:

  1. Go to Booking Settings in your site's dashboard.

  2. Scroll down and select Calendar time zone.

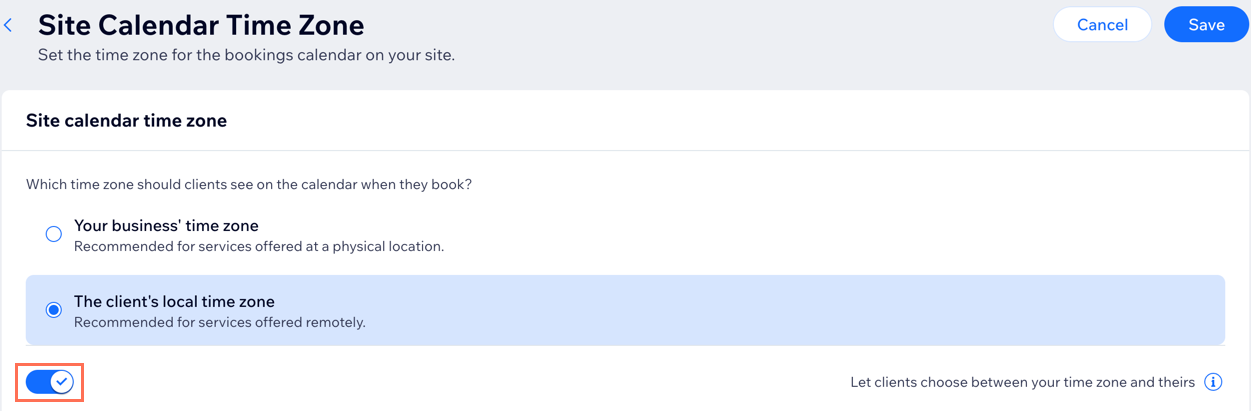
  3. Enable the Let clients choose between your time zone and theirs toggle.

  4. Click Save.

A screen shot showing enabling the toggle to let clients choose to view your site in your time zone or theirs.

Need A Professional Website?
Contact Us 
Today!

Wix Automations: Adding and Sending a Coupon

Wix Automations: Sending Automated Emails to Contacts After Form Submissions

Wix Automations: Customizing Automated Emails

Wix Automations: Creating a New Automation

Wix Automations: An Overview

The New Automation Builder: Understanding Email Types

The New Automation Builder: Creating a Multi-Action Automation

The New Automation Builder: Sending Data via Webhook

The New Automation Builder: Adding and Sending a Coupon

The New Automation Builder: Troubleshooting Wix Automations

The New Automation Builder: Understanding Conditions Operators

The New Automation Builder: Setting Up a 'Scheduled Time' Trigger

The New Automation Builder: Sending Data to Google Sheets

The New Automation Builder: Using the Property Picker

The New Automation Builder: Viewing and Managing Automations Installed for You

The New Automation Builder: Customizing Automated Emails

The New Automation Builder: Managing Your Automations

The New Automation Builder: Creating an Automation

The New Automation Builder: Overview

Microsoft Office 365 Mailbox Limits

Resetting the Password for Additional Office 365 Mailboxes

Resetting Your Admin Password for Your Office 365 Mailbox

Accessing Your Microsoft Office 365 Mailbox Through Your Wix Account

Accessing Your Microsoft Office 365 Mailbox Through Your Wix Account

Accessing the Microsoft Office 365 Admin Center

Activating Your Microsoft Office 365 Mailbox Purchased from Wix

Google Workspace: Troubleshooting Login Issues

Google Workspace: FAQs

Google Workspace: Contacting Google Support

Google Workspace Error Message: "You do not have access to Email"

wix experts
Graphic2Traffic web design
©
bottom of page