


Wix Bookings
Wix Bookings: Selling Services as Products
Selling a specific service you provide as a single "product" with one predefined price, instead of charging billable hours, can help simplify the purchasing process for your clients.
For example, instead of having clients book multiple appointments, you can offer a "5-year Family Financial Plan," and sell it like a pre-packaged product. Other examples include “Tax Return Preparation” for accountants or “Contract Drafting” for lawyers.
This clarity on cost, scope and value makes these services easier and more appealing to buy. It also gives clients the freedom to book and pay without having to commit to specific dates and times upfront.
Before you begin:
Make sure that you add Wix Stores to your site.
To sell products, you need to upgrade your site to a Premium plan or Studio plan that allows you to accept payments.
Review the legal requirements for Wix features before adding Wix Stores.
When selling your services as products, you will need to manually schedule any appointments in your Booking calendar.

To sell a service as a product:
Go to Products in your site's dashboard.
Click +New Product.
Select Physical product.
Select an option:Click Add Images to add images or GIFs.
Click Add Videos to add a video.
Click Upload Media to add images, GIFs, or videos and select the relevant media.
Click Add to Page.
Enter the service name in the Name field under Product info (max. 80 characters).
(Optional) Add a ribbon by typing the ribbon name (e.g. New).
Notes:You can also select ribbons you previously created. This lets you manage your ribbons as a group. Learn more about ribbons.
Ribbons appear in the product gallery.
Enter a description of the product in the Description field. (maximum 8000 characters, including HTML tags)
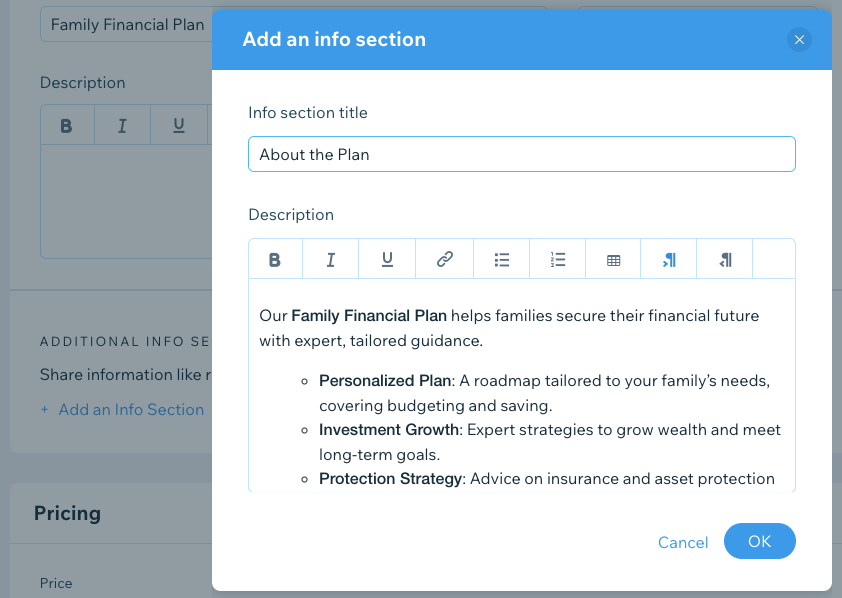
Click +Add an Info Section.
Enter the info section title.
Enter the relevant information in the Description box.
Tip: You can also use the text editing toolbar to format the text.Click OK.
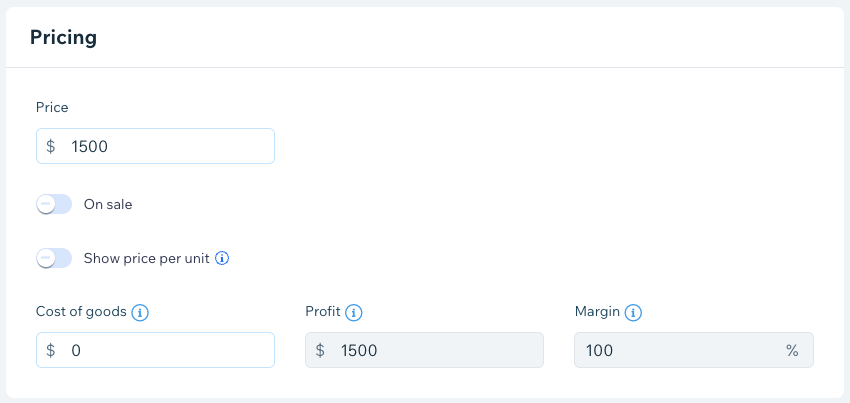
Enter the Price for the service product.
(Optional) Enable the On sale toggle and choose either a percentage (%) or monetary ($) discount and enter the relevant number in the Discount field.
Note: The sale price appears after the discount is applied, so you can check the offer is correct.Click Save.
Tips:
Click Generate AI Text to get help composing an effective product description.
You can save time by adding the same info section to multiple products at once.
When copying and pasting a description from another source, paste the text by pressing Shift + Ctrl + V on Windows and Cmd + Shift + V on Mac. This removes any formatting to make sure the text displays correctly.