


Memberships, packages & payments
Wix Bookings: Saving and Charging Clients' Credit Cards
Add a checkbox to your checkout page that allows your clients to consent to you storing their card details on file. Once a card is saved to a client's file, you can use it for future orders, as long as you have your client's consent to do so. Only customers who are site members will see this checkbox and can choose to opt in.
This is different than when a customer saves their cards in their My Wallet part of the Members Area. You can't charge cards from their personal wallet, but you can charge a card if the customer agrees to store it on file.
Tip:
You can also save and charge clients' credit cards in Wix Stores.
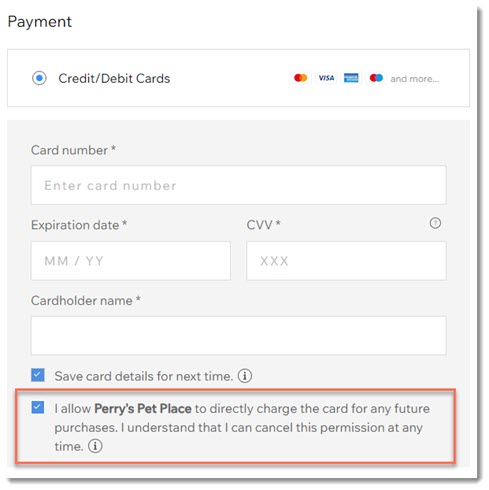
To allow clients to save their card details during checkout:
Go to Settings in your site's dashboard.
Click Checkout.
Scroll down to Payments.
Enable the Save customers' cards on file toggle to enable it.

Saving card details while making payments on behalf of a client
You can manually enter a client's credit or debit card details to complete payment for an order. You can also securely save the card on file once they are a member of your site and they give you consent. This allows you to charge the card for future orders, provided you have the client's explicit consent to do so. Remember to use this payment method correctly to avoid charging customers unexpectedly.
Important:
Make sure you read this article to learn how to save cards responsibly.
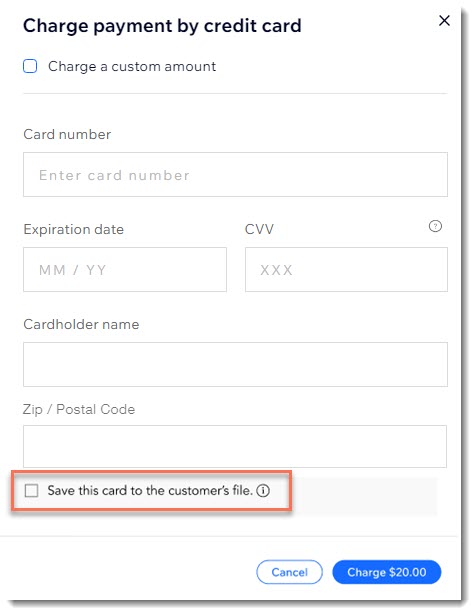
To manually save a customer's card details:
Go to Orders in your site's dashboard.
Select the relevant order.
Click the Collect Payment drop-down and select Charge card manually.
Enter the card details.
Select the Save this card to the customer's file checkbox.
Note: This option is only available for clients who are site members.Click Charge.
Send your customer an authorization form and save the signed form.
Important: We strongly recommend you send the form within 24 hours. Learn more about best practices for storing card details.
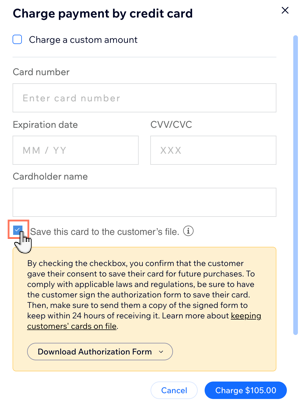
Charging a card on file
After you save a client's card on file, you can use it to complete payment for future orders, as long as you have your client's consent to do so.
Note:
You should notify your client about the transaction and provide as many details as possible. This is a requirement of card schemes such as Visa and Mastercard. Additionally, clear communication builds trust and helps the customer to recognize the payment. If they don’t recognize the payment, they may issue a chargeback.
To accept payment using a card on file:
Go to Orders in your site's dashboard.
Select the relevant order.
Click the Collect Payment drop-down and select Charge card manually.
Select an authorized saved card
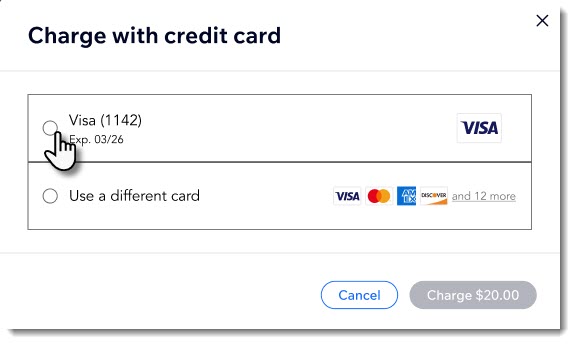
Click Charge.
Saving a card to an order
You can require clients to provide credit card information for every booking service, including free ones. The card will only be used for a specific order and can't be used for any other orders. This allows you to charge clients for cancellation and no-show fees, when necessary.
Important:
When you add a policy that requires clients to provide a credit card, that card is only attached to the specific order. To keep a card on a client's file more permanently, follow the steps for saving cards during checkout.
To save a card to an order:
Go to Booking Settings in your site's dashboard.
Click Bookings policies.
Click on an existing policy or click + Add a New Policy.
Scroll down to Require payment details for booking.
Select the Always require clients to provide their payment info checkbox.
Note: Clicking the Charge cancellation and no-show fees checkbox automatically enables the Require payment details for booking option.

Click Save.
FAQs
Click a question to learn more about saving credit cards.
What are the risks of card-on-file transactions?
While cards are stored securely, there's always the chance that hackers can find a way to access the online account and bill customers.
Additionally, as a merchant, you need to be careful to only bill your client for orders they approve of and know about.
How can I get authorization from my customer?
We've created a suggested authorization form. We recommend you use it as is, as it requests all the necessary information for authorization. After your customer has signed the form, send them a copy of the signed form that they can keep for future reference.
Download the authorization form
Why are the save card checkboxes not visible at checkout?
For the checkbox to appear at checkout, the person checking out needs to be logged in as a site member. Learn more about your site's Members Area.
What is the difference between saving a card on a contacts file and saving it to an order?
When you save a card to a customer's file, you can manually charge the client for any order (with their consent). However, if you save the card for a specific order only, you can only use it for that session and can't charge them for other orders.
Can I only require some services to save a payment method but not others?
Yes, you can add individual booking policies to each service separately.