


Memberships, packages & payments
Wix Bookings: Offering Packages
Offer clients packages (for example, a six-class "punch card") with reduced rates. Clients enjoy the discount and you gain increased customer loyalty.
You create a package while creating a new Wix Bookings service or editing an existing one. You can control all aspects of the package, including:
Benefits: Create a package that gives access to all your sessions or only to specific classes.
Duration: Limit the time clients have to use the package (for example, 5 sessions per month) or make the package unlimited.
Pricing: Choose from recurring payments, a one-time payment, or offer your plan for free.
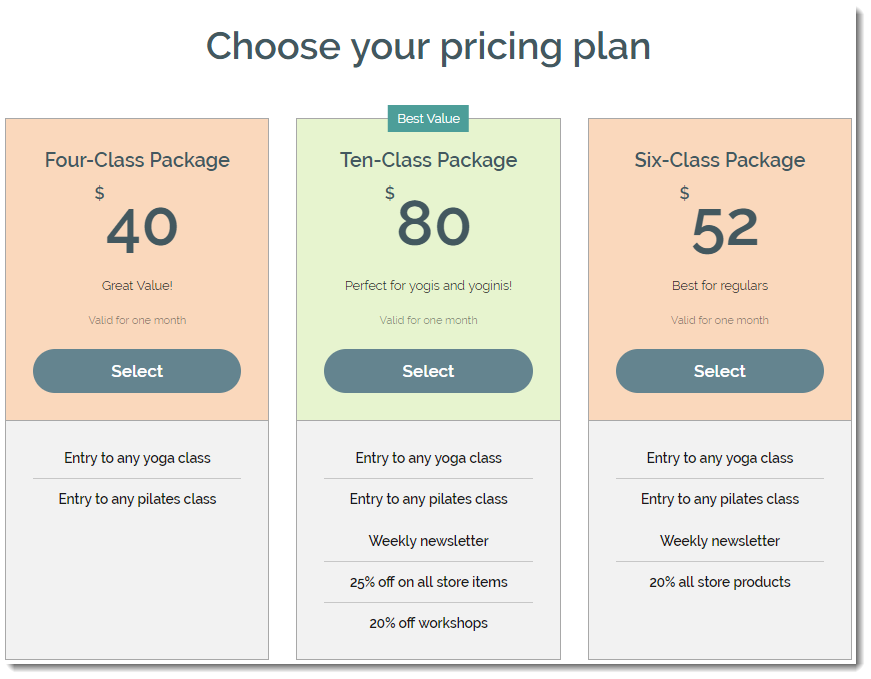
In this article, learn more about:
Creating a package for your service
As you add new services to your site, you can offer them as part of a package. This is a great way for new clients to experience the full range of services you offer at a discounted rate.
For example, clients can book different types of yoga classes offered in a package to see which one is right for them. You choose which services you offer in the package, how many sessions clients can book and how long the package is valid for.
To create a package:
Go to Booking Services in your site's dashboard.
Create a new appointment or class, or edit an existing one.
Scroll down to the Price and Payment section.
Choose the relevant price option in the Price type drop-down:Fixed Price: Set a standard price for the service.
No Fee: Choose this option for free service.
Varied prices: Create different price options depending on either the client type or the staff member.
Note: This feature is not available for everyone yet.
Custom Price: Describe how you charge for the service, for example, "Price negotiable".
Click Create New Plan next to Pricing Plans (Memberships & Packages).
Click Package.
Click Next.
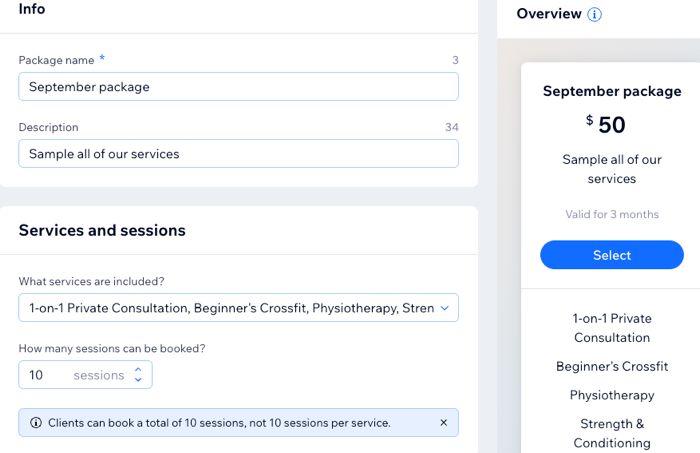
Enter the plan name and description.
Choose the services included in the package:Click the What services are included? drop-down.
Select the checkbox next to the relevant services.
Tip: Click Select All Services to create an all-inclusive package.
Choose how clients pay under Price and Duration:
One-time payment: Your clients pay for the package as they check out:Enter the package's price.
Decide how long this package is valid for.
Free: Offer this package for free. This is a great way to gain new clients.
Click the Package is valid for drop-down and choose the relevant length of time.(Optional) Click Custom to set the number of weeks, months or years the package is valid for using the options available.
(Optional) Add more benefits to your package (e.g. Blog or File Share Subscriptions) under Extra benefits.
(Optional) Further customize your package using the options under Settings:Limit to 1 per person: Enable the toggle to make the package a one-time offer for each client.
Let clients cancel: Enable the toggle to allow clients to cancel their package themselves at any time.
Clients set start date: Allow clients to set when their package starts at checkout.
Add a policy: Create your own terms & conditions for the package:Click Add.
Enter your terms and conditions in the field provided.
Click Save.
Click Save.
What's next?