
Managing your calendar & bookings
Wix Bookings: Managing Bookings with the Booking List
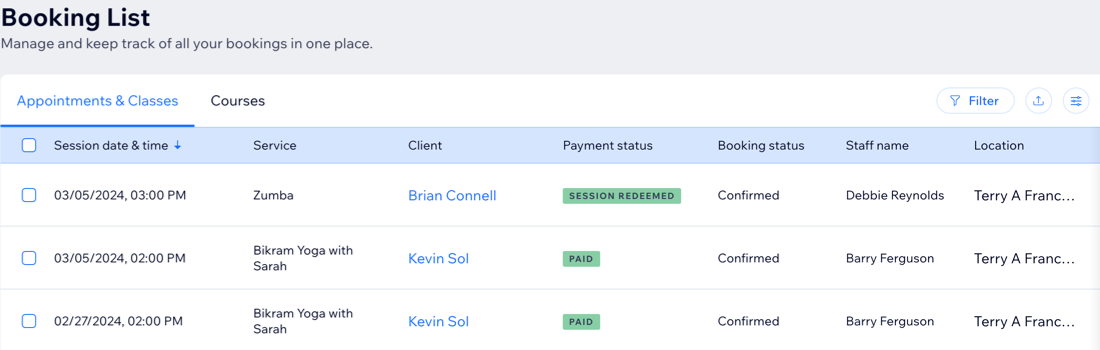
Use the booking list in your site's dashboard to track and review all booking activity on the site. You can also add different filters and search parameters to review the past, present and future bookings. For example, you can check a client or staff member's records and download the information as a CSV file to access offline.
Tip:
Print the booking list and post the daily agenda at your business reception for walk-in clients to see.
In this article, learn more about:
Filtering the booking list
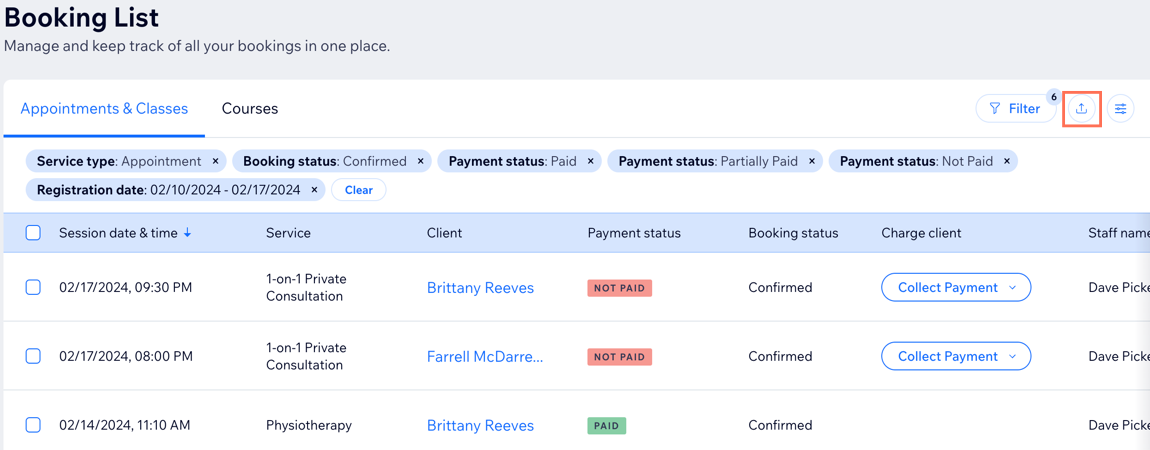
While reviewing your site's booking list, choose from various filters to find the information you want. You can filter the bookings by status (e.g. "Confirmed", "Waitlist"), service name, staff member and client name.
To filter your booking list:
Go to Booking List in your site's dashboard.
Click Appointments & Classes or Courses at the top.

Click Filter at the top right.
Click to select the filter(s) you want to apply:Session date & time: Show only sessions that occurred within a specific date and time range.
Registration date: Show only sessions that were booked within a specific date and time range.
Service type: (Appointments & Classes tab only) Choose the type of service you want to view: Appointment or Class.
Booking status: Click the checkbox next to the relevant status:Confirmed: Scheduled bookings that appear in the calendar. They can be completed online bookings or bookings that you (or a site admin) manually confirmed.
Waitlist: Bookings that remain on the waitlist for a service.
Canceled: Bookings that either the client or a site admin canceled.
Pending Approval: A request from a client that needs to be approved or declined.
Declined: Booking requests that you (or a site admin) declined.
Incomplete: When a client creates a booking but does not complete the booking form or payment.
Payment status: Click the checkbox next to the relevant status:All: Show all bookings, regardless of payment status.
Paid: Show all paid bookings.
Not Paid: Show all unpaid bookings.
Partially Paid: Show all partially paid bookings.
Refunded: Show all refunded bookings.
Partially Refunded: Show all partially refunded bookings.
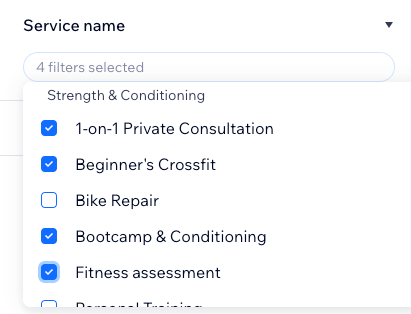
Service name: Click the checkbox next to the relevant services.
Staff member: Click the relevant staff member.
Client name: Enter the relevant client's name in the search bar and select them from the list.
Click Apply.
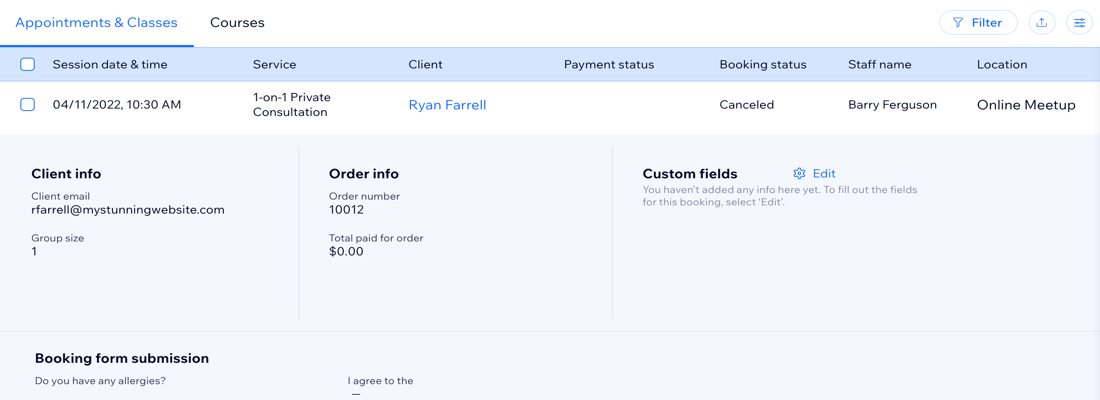
(Optional) Click an individual booking to review the information provided by the client at registration.
Customizing columns in the booking list
Choose which columns to show, and decide which order to display them in.
To customize columns in the booking list:
Go to Booking List in your site's dashboard.
Click the Customize column icon
 at the top right.
Select the checkbox to choose which columns you want displayed.
Note: You cannot hide or remove Session date & time and Charge client.(Optional) Click Add field to add more information in a custom field. Then choose the Field type, enter a name for the field and click Add Field. This field appears on all items on the booking list.
Drag and drop to rearrange the order of the columns in the booking list.
Collecting payment from the booking list
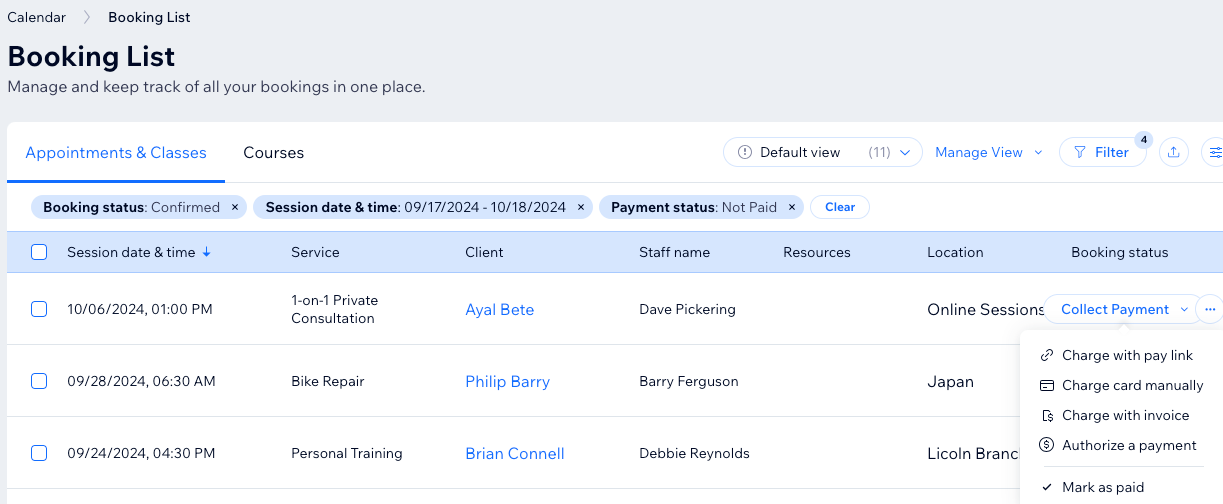
You can collect payments for unpaid services from the booking list in a variety of different ways: By sending a pay link, manually entering the customer's credit card details, sending an invoice, authorizing a payment, or marking as paid if the customer paid in cash.
To collect payment from the booking list:
Go to Booking List in your site's dashboard.
Hover over the relevant unpaid order.
Click Collect Payment.
Choose the relevant option:
Charge with pay link
You can create, customize and send a pay link to charge your customer.
To charge with pay link:
Click Charge with pay link.
Enter the Link name.
Enter the Price.
Enter a Description.
(Optional) Click + Open settings and choose what you want to do:Enable the Set an expiration date toggle. Click the Expiration date field to select the relevant expiration date.
Customize the pay link's Button color, Button text and Link image using the design options available.
Click Create Link.
Choose how you want to send the pay link to your customer:Copy link: Click to copy the pay link URL to your computer's clipboard to send to your client later.
Send Link: Click to email the pay link directly to the email address provided by the client.
Get QR code: Click to generate a QR code to send to your client.

Charge card manually
You can accept partial or complete payment for any unpaid order by manually entering your customer's credit or debit card details. This can come in handy when, for example, you accept an order by phone.
Important:
Manual card entry is only available through certain payment providers.
This is the least secure way of accepting card payments. Accepting manual payment from buyers you trust. In case of fraud, it's the merchant who is liable. Learn more.
To charge a card manually:
Click Charge card manually.
Enter the card details.
Click Charge.
Note: You can select the Charge a custom amount checkbox and enter a custom amount to accept partial payments for your services with your client's permission.

Charge with invoice
You can create an invoice for an unpaid order to request payment from your customer. If you send the invoice to your customer by email or as a shared link, they can click to pay for it online using any of your payment methods.
To charge with an invoice:
Select Charge with invoice.
Click Create Invoice to confirm.
(Optional) Share, print, or email the invoice using the links at the top.
Authorize a payment
Authorize payment for any unpaid or partially paid order to make sure your customer has the means to cover the cost. When you do, the payment is approved by the customer’s payment method and the sum is held in their account, in readiness to pay, if needed. The payment is held for 7 days.
Learn more about authorizing payments at checkout and capturing funds later.
Important:
Authorization and capture is available only through Wix Payments or Stripe.
Authorization and capture can only be applied to orders paid for through a credit card payment. This means that additional payment methods, such as PayPal, Apple Pay, Google Pay, will be hidden from your website (see FAQ below).
It's not currently possible to collect partial captures.
To authorize a payment:
Click Authorize payment.
Enter the amount.
(Optional) Enable the Capture automatically before the authorization period ends checkbox.
Enter the card details.
Click Authorize.
Mark as paid
If you accept cash or other in-person payments, you can mark the order as paid from the booking list. You can also mark partial in-person payments.
To mark an order as paid:
Click Mark as paid.
Click Mark [$amount] as Paid to confirm.
To mark an order as partially paid:
Click Mark as paid.
Select the Mark a custom amount as paid checkbox.
Enter the amount.
Click Mark [$amount] as Paid to confirm.

Exporting Booking activity
Once you've found the relevant information, download it as a CSV file to keep as offline records or send it to the accountant in charge.
Important:
To provide the best experience possible, the booking list loads in sections. The total number of bookings relevant to the filters and statuses you select appear at the top of the list.
To ensure you export all relevant bookings, scroll down to the very end of the page so they all load. You can then click Download CSV.
To export the booking list:
Go to Booking List in your site's dashboard.
(Optional) Click Filters to show or hide services on the list.
Click the Export icon
 at the top right.
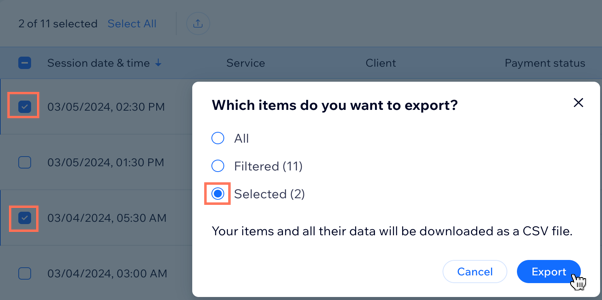
Choose how you want to export the data:All: Export all the items and their data.
Filtered: Export only the items and their data after applying the relevant filters.
Selected: Export only the selected items and their data.
Click Export.
Viewing orders and contacting participants from the booking list
You can use the booking list to review existing orders and message the participants directly. This is useful for checking and following up on unpaid orders in the booking list.
To view orders and contact participants:
Go to Booking List in the site's dashboard.
Click the More Actions icon
 next to the relevant booking on the list.
Choose what you want to do:Send message: Enter the message you want to send and click the Send icon
 .
.
View order: Click this option to review the entire order for the booking. This is useful for checking the details of multiservice appointments, as well as partially paid orders.