Customizing Wix Bookings pages
Wix Bookings: Customizing Your Weekly Timetable
Design your Weekly Timetable to suit your brand and make it easy for your clients to find the information they need. You can customize elements like the layout, text, and the buttons.
In this article, learn more about:
Adjusting the layout of your Weekly Timetable
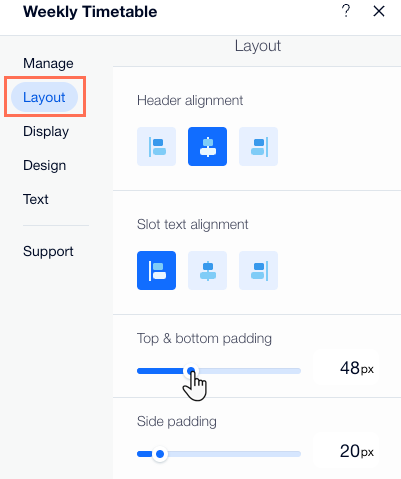
Adjust the layout of your Weekly Timetable to suit your clients' needs. Set the alignment for the main elements in the timetable. You can also adjust the amount of padding between elements to make the information as clear as possible for your clients.
To adjust the layout of your Weekly Timetable:
Click the Weekly Timetable element in your Editor.
Click Settings.
Click the Layout tab.
Choose what you want to adjust:Use the available formatting options to adjust the alignment of the header and slot text.
Use the sliders to adjust the amount of padding between elements in the Weekly Timetable.
Designing the Weekly Timetable
Make sure your Weekly Timetable is easy to read and fits your brand by customizing its background and design. For example, you can set the background color or image, add a border and round out the corners of your timetable.
To customize the design of your Weekly Timetable:
Click the Weekly Timetable element in your Editor.
Click Settings.
Click Design.
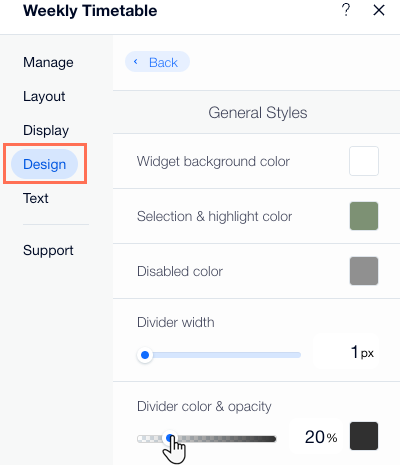
Click Styles and choose from the following options:Widget background color: Click the box to choose a color for the background.
Selection & highlight color: Click the box to choose a color for selected or highlighted buttons.
Disabled color: Click the box to choose the color for classes which clients cannot book.
Tip: Make sure the colors you choose contrast with the color of your Weekly timetable text so it is clear and easy to read.
Use the sliders to adjust the Dividers' width, opacity & color and corner radius.
Use the sliders to adjust the Table's Slot background color, Border width, and Border opacity & color.
Table Style: Use the sliders to adjust the opacity of each item. Click the color boxes to adjust the Slot background color and the Border opacity & color.
Customizing the design of the Weekly Timetable text
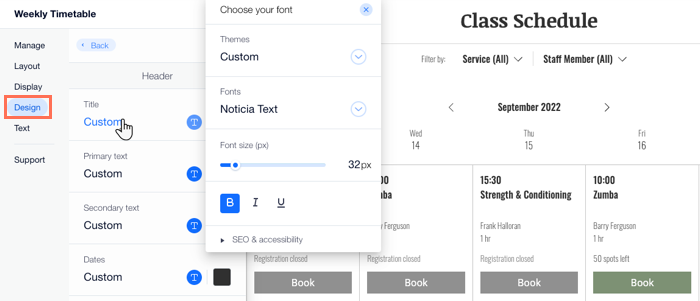
Customize any piece of text in the Weekly Timetable to suit your site design. This includes making the text bold, adjusting the size or color, and changing the font.
To adjust the design of the text on the timetable:
Click the Weekly Timetable element in your Editor.
Click Settings.
Click the Design tab.
Click Text.
Use the available formatting options to design the text (e.g. color, size, font).
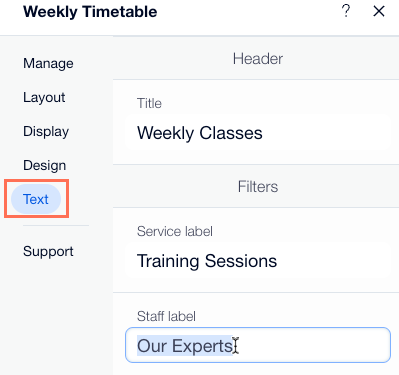
Customizing the Weekly Timetable text content
You can edit the text that appears throughout your Weekly Timetable. This is useful if you have specific ways of describing your services, staff or availability. You can also choose what call to action you put on your book and waitlist buttons.
To update the text in your Weekly Timetable:
Click the Weekly Timetable element in your Editor.
Click Settings.
Click the Text tab.
Click to edit any of the available options.
Designing the buttons on the page
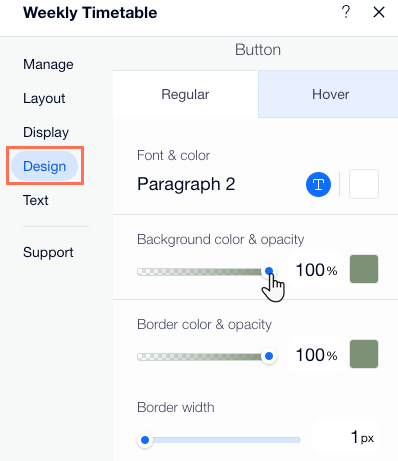
Your call to action buttons allow clients to book or to find out important information about your classes.
To customize the buttons on your Weekly Timetable:
Click the Weekly Timetable element in your Editor.
Click Settings.
Click the Design tab.
Click Button.
Choose what button state you want to customize:Regular: This is how the buttons look before visitors hover over them. Use the available formatting options to design the text (e.g. color, size, font).
Hover: This is how the buttons look when visitor hover over them. Use the available formatting options to design the text (e.g. color, size, font).