


Managing your calendar & bookings
Wix Bookings: Adding and Setting Up the Map Plugin on the Service Page
Add the Map Plugin to your Service Page to make it even easier for your clients to find where your services take place. This is also useful if you offer services in different locations, as clients can choose the place that's most convenient for them.
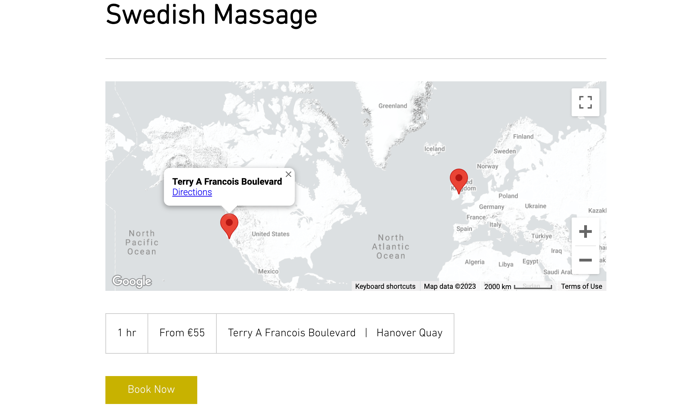
Step 1 | Add the Map Plugin to your Service Page
You can add the Map Plugin to your Service page from your editor.
To add the Map Plugin to your Service Page:
Wix Editor
Studio Editor
Go to your Service Page:Click Pages & Menu
 on the left side of the editor.
Click Bookings Pages.
Click the Service Page.
Click the Service Page element on your page.
Click the Plugins icon
 .
.Hover over Map Plugin and click + Add.
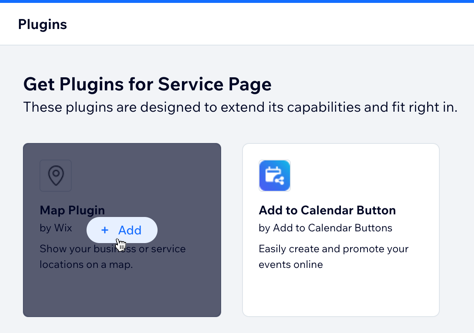
Click the Map Plugin element in your editor.
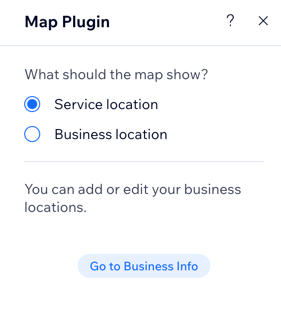
Click Manage Locations.
Choose whether to show the Service location or your Business location.
Note: You can add or update service locations in the service form. You can add business locations in Business Info in your site's dashboard.
Step 2 | Customize your Map Plugin settings
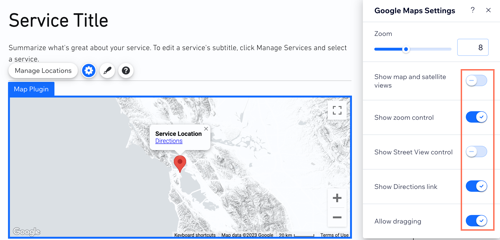
With the Map Plugin added to your Service Page, you can customize the views, zoom and controls available to your clients on the map.
To customize the map plugin settings:
Click the Map Plugin element in your editor.
Click the Settings icon
 .
.Use the slider to set the default zoom on your map.
Enable the Show map and satellite views toggle to allow your clients to switch map views.
Enable the Show zoom control toggle to allow your clients to zoom in and out. This is useful if your business locations are far apart or in different countries.
Enable the Show Street View control to allow clients to use street view on the map.
Enable the Show Directions link toggle to show a link to Google's directions service.
Enable the Allow dragging toggle to allow clients to move around the map by clicking and dragging with their mouse.
Step 3 | Choose where to place the map on the Service Page
By default, the map appears towards the bottom of the Service Page. You can place the map in a different section of the Service Page at any time.
To choose the section in which the map appears on your Service Page:
Click the Service Page element in your editor.
Click Settings.
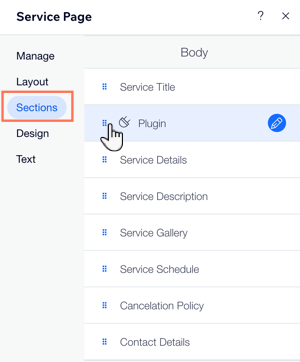
Click Sections.
Drag the Plugin section to your preferred location.
Step 4 | Choose your map design and pin
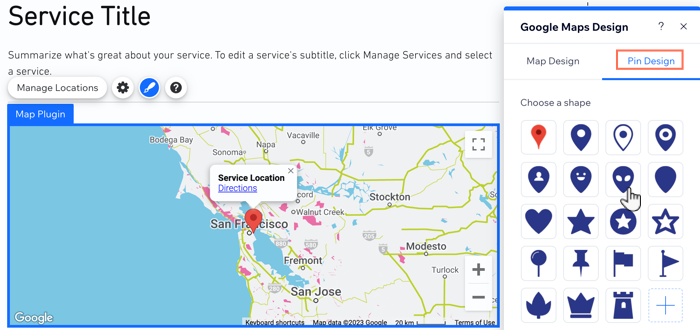
You can now choose a map design and pin that suits your site's design and branding. You also have several different pin shapes to choose from to further customize your Service Page map.
To choose the map design and pin:
Click the Map Plugin element in your editor.
Click the Design icon
 .
.Select a map design.
Click the Pin Design tab and choose what you want to do:Choose a preset pin: Select a shape for the pin. (When available) Click the Choose a color box and select a color.
Upload your own pin: Click the Add icon to upload your image to use as the pin.
Tips:
Preview mode may not display the most current version of your Map Plugin. Publish your site to see how the updates look on your live site.
Learn more about customizing your Service Page.