Customizing Wix Bookings pages
Wix Bookings: Adding and Setting up a Staff Members Widget on Your Site
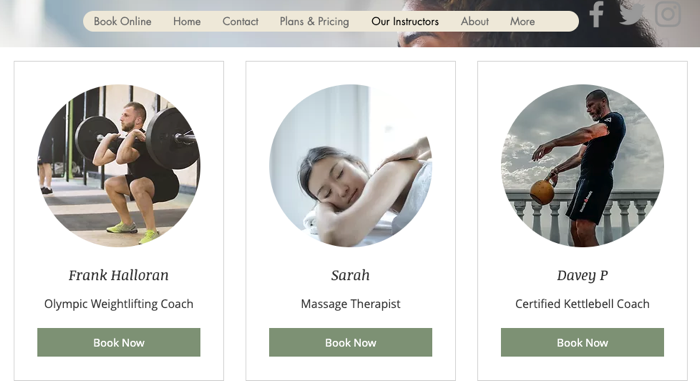
Let clients get to know your team by adding a staff members widget. From here, you can direct clients to the services each staff member provides, or to a personal profile page for each staff member.
Note:
The staff members widget is not yet available in Wix Studio.
Step 1 | Add a staff members widget to your site
A staff members widget is a great way for clients to get to know your team. It is also a useful way for any walk-in clients to book another session with a staff member after a great service.
To add a staff members widget to your site:
Go to the page where you want to add the staff members widget.
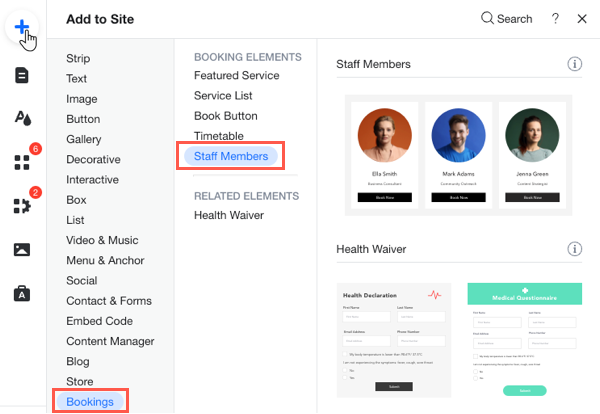
Click Add
 on the left side of your editor.
Click Bookings.
Click Staff Members.
Click or drag the staff members widget to add it to your page.
Step 2 | Organize the staff list in the staff members widget
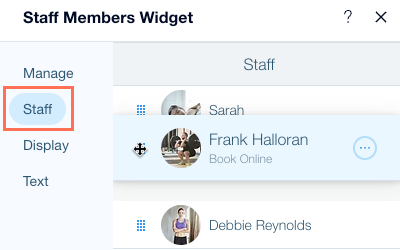
Now that the staff members widget is on the page, you can arrange the staff members in your preferred order. Your staff members automatically appear in the widget. You can then reorder or hide certain staff members, and customize the design of the widget.
To organize the staff list in the staff members widget:
Click the staff members widget in your editor.
Click Settings.
Click Staff.
Choose what you want to do:Reorder the staff list: Click and drag the panel next to each staff member to reorder the list.
Hide a staff member from the widget: Click the More Actions icon and select the Hide icon
  next to the relevant staff member.
Show a hidden staff member: Click the More Actions icon and select the Show icon  next to the relevant staff member.
Step 3 | Set up the links for each staff member
Once you have the staff in the correct order, you can manage their links on the staff members widget. You can send clients to a staff member's profile page, explaining their experience and credentials. Or you can link directly to their services.
Before you continue:
Make sure each staff member has a page to introduce them. You can do either of the following:
Create an "About" page for each of your staff members.
Create a new site page with detailed information about your staff member.
Tip: You can hide the pages from your site menu.
To set up the links for each staff member:
Click Staff in the Settings panel.
Hover over the relevant staff member, click the More Actions icon
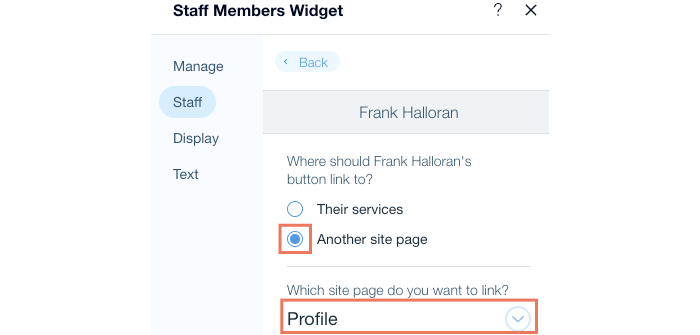
and select Manage Link.Choose where you want to link to:Their services: The staff member button takes clients to a filtered service page with only services offered by that staff member.
Another site page: Click the drop-down and select page you want to link to.
Repeat these steps for each of your staff members.
Step 4 | Edit the button text
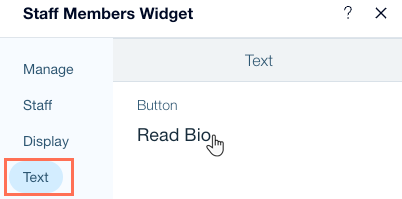
After setting up a link for each of your staff, you can change the text that appears on the button clients click to access the link (e.g. "Book Now", "Read Bio"). The button appears below the member's photo.
To edit the button text:
Click Text in the Settings panel.
Enter your custom button text in the field under Button.
Step 5 | Choose which details appear for staff members
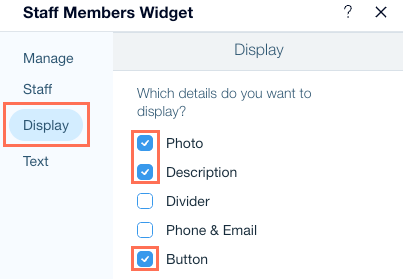
Choose which details you want to show or hide under each staff member profile in the staff members widget. You can display elements such as their photo, a brief description, their contact details, and more.
Note:
The information that appears about your staff members is taken directly from the Staff tab in your site's dashboard. To update these details, edit the relevant staff member.
To choose which details appear for staff members:
Click Display in the Settings panel.
Select the checkboxes next to the details you want to display about staff members.