


Previous Automation Builder
Wix Automations: Adding and Sending a Coupon
With Wix Automations, you can effortlessly send discount coupons to your contacts. This powerful tool aids in boosting your sales, promoting events, and enhancing customer engagement in a variety of ways.
For example, imagine a potential customer visits your online store, adds items to their cart, but leaves without completing their purchase. With Wix Automations, you can set up a system that automatically sends an email offering a 20% discount coupon to such visitors. This not only motivates them to complete their purchase but also builds a positive relationship with your brand.
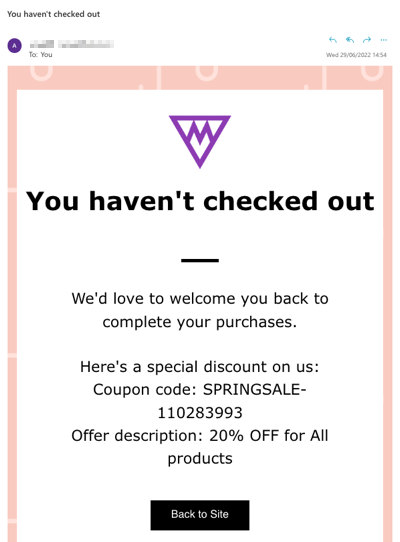
Step 1 | Set up an automation
To begin, start by creating a new automation from scratch. Select a trigger and decide if you'd like to limit frequency, include a delay, or add special conditions for your automation. Learn more about successfully creating an automation.
Step 2 | Choose the 'add a coupon' action
Next, click add a coupon for the action of your automation and choose which coupon will attach to this automation.
To add a coupon as an action:
Click Add a coupon.
Select whether to send a unique coupon each time in the Select the type of coupon code section.
Click the Select a coupon drop-down to choose the coupon you'd like to use or create a new one.
Important:
This automation will stop working if the coupon end date or use limit is reached.
Make sure your coupon has a clear coupon code and coupon name. This will be seen by your visitors when adding the coupon to an email etc.
Step 3 | Add the coupon to an email as a dynamic value
Lastly, attach the coupon to an email that sends to visitors once they trigger your automation. You attach the coupon by adding it as a dynamic value in the email.
Add the Coupon as a Dynamic Value
Click + Add Action.
Click Send an email.
(Optional) Click Edit in the Manage details section to edit your sender details.
Click Edit in the Create an email section to add your coupon dynamic value to your email template.
Click any text element or add a new one.
Click where you want to add the dynamic value.
Click + Add Personalized Content.
Search coupon to see the available options in the drop-down menu.Coupon ID
Coupon code
Coupon name
Coupon offer description
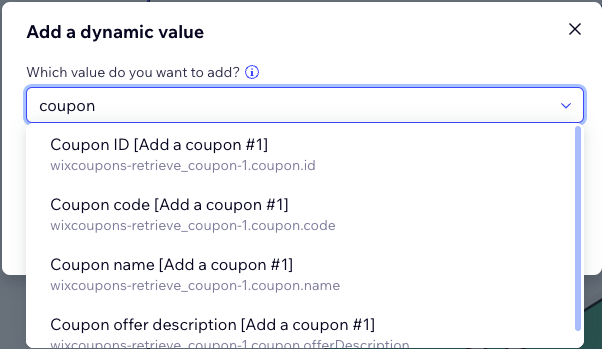
(Optional) Write a fallback text in the text box.
Under Set email type, select a type for your email to determine how or when your recipients can mute or unsubscribe from your emails:
Promotional: Non-essential business information or marketing content. Recipients who have unsubscribed or muted the selected notification topic will not receive this email.Select from the drop-down menu which email notification topic a recipient can choose to unsubscribe from.
Business transactional: Essential information to your customers, directly related to their activity on your site. Recipients who have muted the selected email notification topic will not receive this email.Select from the drop-down menu which email notification topic a recipient can choose to unsubscribe from.
Business critical: Only meant for critical cases. Recipients cannot mute these emails and they will be sent regardless of any unsubscribe preferences.
Under Set recipients, select all who will receive this automated email when it's triggered:Include trigger contact: Recipient who triggered this automation.
Include additional recipients: Additional recipients who didn't trigger this automation
Click Activate.