


File Share
Wix Apps: Customizing Login Settings in the File Share App
The File Share App allows you to customize login settings, giving you control over who can access your shared files. This helps you enhance security and manage user access effectively. For example, if you run an online course, you can ensure only enrolled students can download course materials, keeping your content secure and exclusive.
To access content and perform actions in your file sharing library, site visitors need to sign up and become site members.
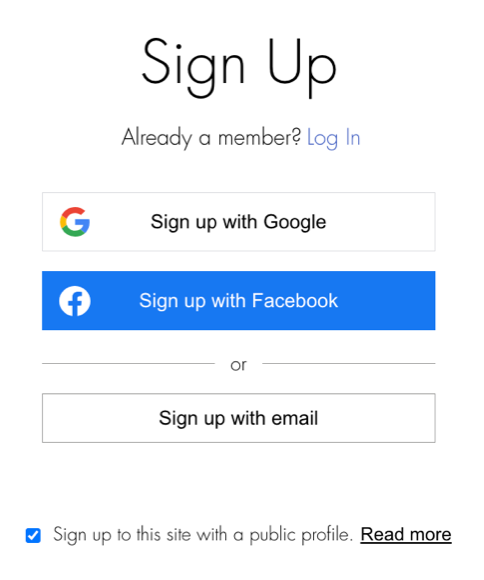
To customize your login settings:
Click the File Share app in your editor.
Click Settings.
Click the Settings tab.
Click Member Signup Settings.
Choose which option appears first in the signup window:New member signup: The signup option is displayed first.
Existing member login: The login option is displayed first.
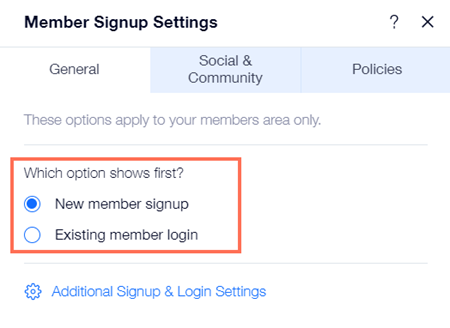
Click Additional Signup & Login Settings to manage who can become a member.
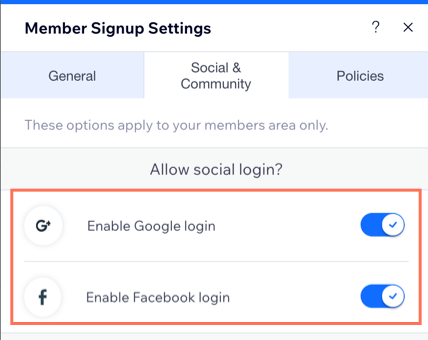
Click the Social & Community tab.
Select the social networks that members can use to log in under Allow social login?Enable Google login: Members can sign in using their Google credentials.
Enable Facebook login: Members can sign in using their Facebook credentials.
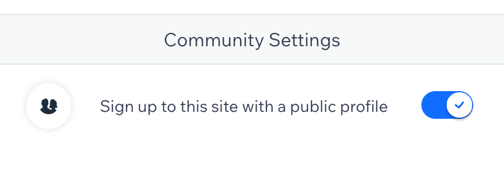
Click the Join the community is checked by default toggle to choose whether or not the "Join the community" checkbox is selected by default.
Click the Policies tab.
Click the Terms of Use toggle to enable or disable the Terms of Use link:Enabled: A link to your Terms of Use page is added in the signup window. Click the Link icon
 and select the page containing your Terms of Use.
Disabled: A link to your Terms of Use page is not added in the signup window.
Click the Privacy Policy toggle enable or disable the Privacy Policy link:Enabled: A link to your Privacy Policy page is added in the signup window. Click the Link icon
 and select the page containing your Privacy Policy.
Disabled: A link to your Privacy Policy page is not added in the signup window.
Click Done.