Setting up Pricing Plans
Pricing Plans: Setting Up Tax Collection
Depending on where you're located, you may be required to collect tax when selling pricing plans. You can choose whether to include tax in the price or add it at checkout.
Important:
Different tax rules apply in different regions. Consult with an accountant or with your local tax authority for specific information relevant for your business.
After setup, tax is applied to all plan buyers, regardless of location.
You can only set one fixed tax rate for all of your plans.
In this article, learn more about:
Adding tax to pricing plans
You can add tax to your pricing plans at any time. This is useful for complying with local, state or federal laws, depending on your location. You can choose to include the tax in the price of your plans, or add it to the total at checkout.
To add tax to pricing plans:
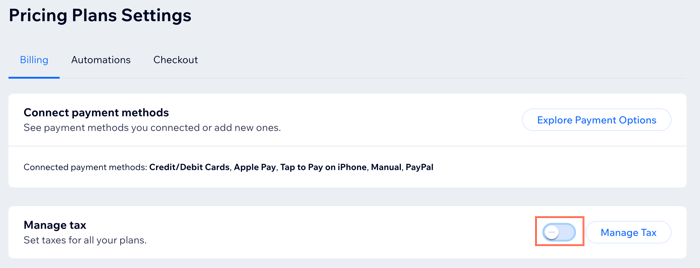
Go to Pricing Plans Settings in your site's dashboard.
Click Add Tax next to Manage tax.
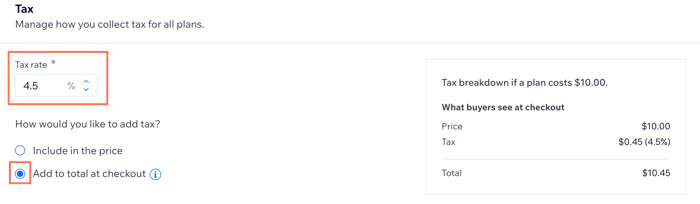
Enter the Tax rate (e.g. 10%).
Select how you want to add the tax:Include in the price: Tax is included in the plan price. At checkout, your client sees the breakdown.
 Add to total at checkout: The tax is added on top of the plan price during checkout. At checkout, your clients see the tax that was added.

Click Save.
Managing tax on pricing plans
You can update how you charge tax on your pricing plans from the dashboard. This is useful when there are changes in the tax system where your business operates. You can also change how you display the taxes you charge your customers.
To manage the tax on your pricing plans:
Go to Pricing Plans Settings in your site's dashboard.
Click Add Tax next to Manage tax.
Choose what you want to do:Click to edit the Tax rate (e.g. changing from 10% to 7.5%).
Note: This rate applies to all of your plans. Make sure that the tax rate you use conforms to any relevant legal or financial requirements.
Click the relevant checkbox to either Include in the price or Add to total at checkout.
Click Save.
Disabling tax on your pricing plans
You can stop charging tax on your pricing plans if your business qualifies for a tax exemption or if there has been a change in tax regulations where your business operates. Make sure to check with your accountant or financial advisor before you stop charging tax on your pricing plans.
To disable tax on your pricing plans:
Go to Pricing Plans Settings in your site's dashboard.
Click to deselect the toggle next to Manage tax.