


Selling Pricing Plans
Pricing Plans: Selling Plans Offline
You can sell Pricing Plans in person or by phone (offline), rather than online. When you do, you can track them by manually adding the sale to your list of purchased plans.
In this article, learn more about:
Manually adding clients to Pricing Plans
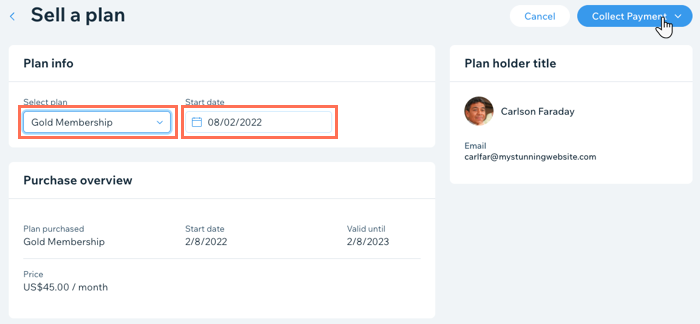
When you sell a Pricing Plan offline, make sure to select the right plan, set the right date and payment method. You can then accept payments offline until the plan expires.
To manually add a client to a Pricing Plan:
Go to Pricing Plans in your site's dashboard.
Click the More Actions icon
 at the top.
Click Sell a plan.
Add your client by doing any of the following:Select an existing contact from the list.
Click + Add New at the bottom and enter the person's details.
Click Next.
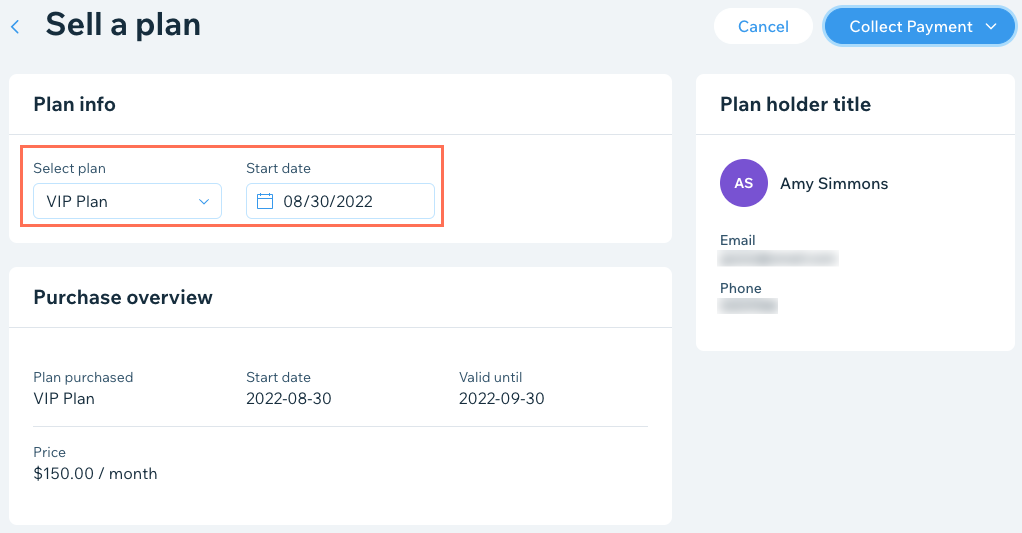
Select the relevant plan from the drop-down.
Choose the start date for the plan.
Click Collect Payment at the top right.
Choose the relevant option, depending on the status of the payment:Charge with credit card
Mark as paid
Mark as unpaid
Click Confirm.
Tracking offline payments for Pricing Plans
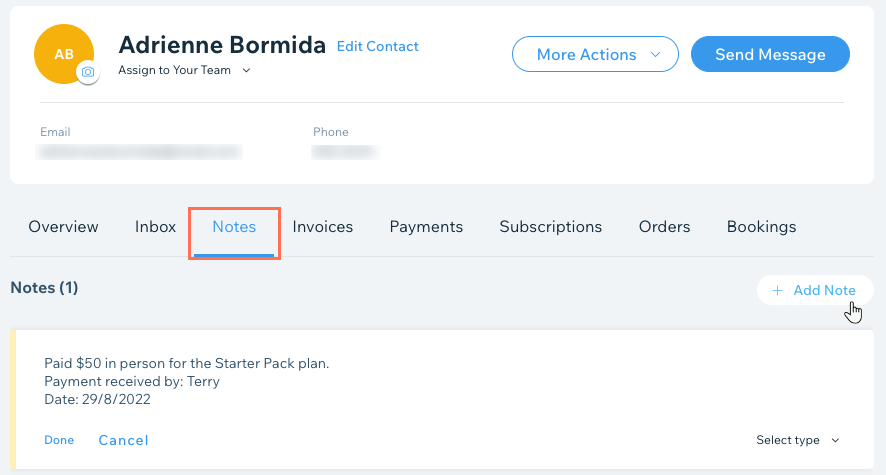
When you sell recurring Pricing Plans offline, you can keep track of each payment using notes in clients' contact cards.
To track offline payments for your Pricing Plans:
Go to Contacts in your site's dashboard.
Hover over the relevant contact and click View.
Click the Notes tab at the top.
Click + New Note.
Enter the details for the offline payment received.
Click Done.
Manually updating the status of a plan
Whenever a client makes an offline payment for a Pricing Plan, you can manually update the status from your site's dashboard. Each time you change the status, the total number of payments received also updates.
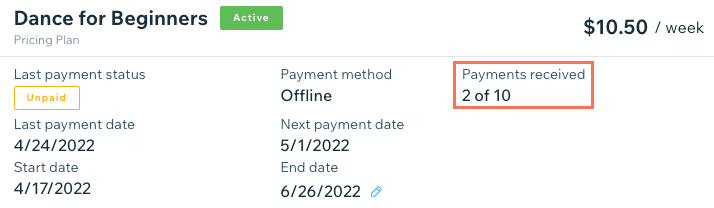
To manually update the status of a plan:
Go to Subscriptions in your site's dashboard.
Click the relevant the plan.
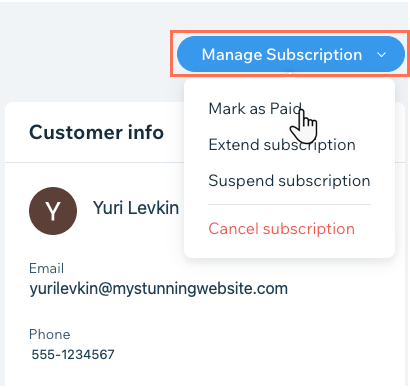
Click Manage Subscription.
Click Mark as Paid.
Tip:
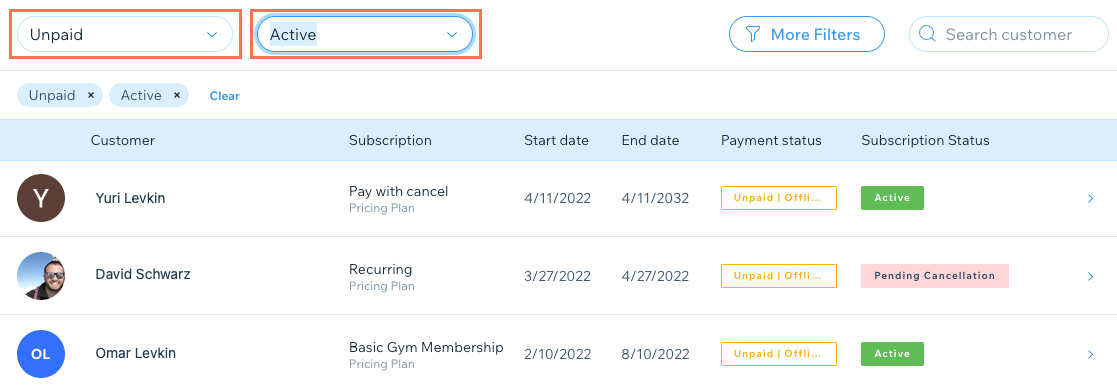
Filter your Subscriptions list by status (Unpaid or Active subscriptions) to track which clients are not up to date with their payments.
Making credit card payments on a client's behalf
You can make credit card payments for clients so they can buy pricing plans over the phone, by email, or in-person. This is a great option for walk-ins or when you are at events on the road.
This option is currently only available for merchants using a payment provider that supports manual card entry.
Important:
Entering credit card details manually is the least secure way of accepting card payments. We recommend accepting manual payment only from buyers you trust. Note that in case of fraud, it is the merchant who is liable. Click here to learn more.
To minimize the fraud risk, as soon as the value of your transactions adds up to over 30% of your gross payment volume (GPV), they start to be declined. If you want to make changes to this limitation, contact Wix Customer Care.
To make a credit card payment on a client's behalf:
Go to Pricing Plans in your site's dashboard.
Click More Actions at the top.
Click Sell plan offline.
Add your client by doing any of the following:Select an existing contact from the list.
Click + Add New at the bottom and enter the person's details.
Click Next.
Choose the relevant plan and start date.
Click Collect Payment at the top right.
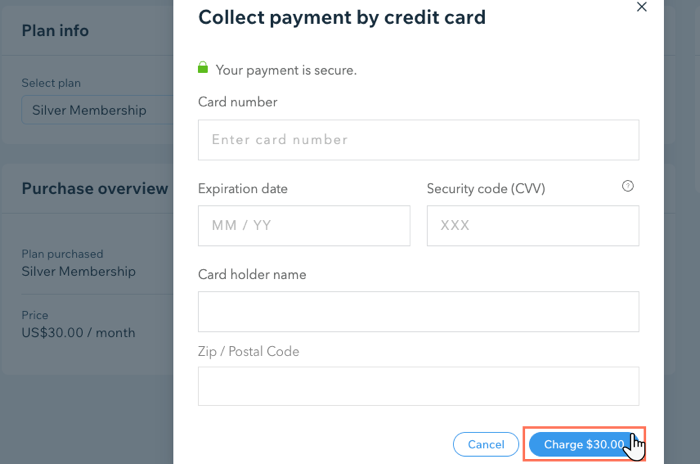
Click Charge with credit card.
Enter your client's credit card information.
Click Charge.
Tip:
You can also make credit card payments for Pricing Plans on a client's behalf from the Subscriptions tab in your site's dashboard.
FAQs
Can I sell Pricing Plans using a POS card reader?
For information about selling pricing plans using your phone and a Wix POS card reader, click here.
What happens when I manually add a client to a Pricing Plan?
When you manually add a client to a plan, they receive an email confirming the purchase. The email contains a link which brings the client to the plan in their Wix Members app. When they click the link, they need to set up a password to join your site as a paid member, if they have not done so already.
My client pays in cash but their Pricing Plan status is "Unpaid | Offline", how do I update this?
We are currently updating Pricing Plans to allow you track and register recurring offline payments.
You may start to see clients' payment status change from "Paid | Offline" to "Unpaid | Offline" at the beginning of a new billing cycle.

When a new billing cycle starts, click the relevant subscription to update the status manually each time the client pays offline.