


Creating your plans
Pricing Plans: Allowing Clients to Cancel Plans
You can allow clients to cancel subscriptions by themselves through their personal My Subscriptions page. You'll still need to manually refund them through your payment provider if this is part of your cancellation policy.
To offer this option, you need to add a Wix Members Area to your site, and add a My Subscriptions page within your Members Area. Then you can enable cancellations in your pricing plan.
Tip:
You can enable a grace period for your recurring subscriptions. This gives customers more time to resubmit payment before their subscription cancels.
In this article, learn more about:
Allowing clients to cancel a plan
Allowing clients to cancel their own subscriptions is a great way to offer them more flexibility and better service.
To allow clients to cancel a plan:
Go to Pricing Plans in your site's dashboard.
Create a new plan or edit an existing one.
Scroll down to the Settings section.
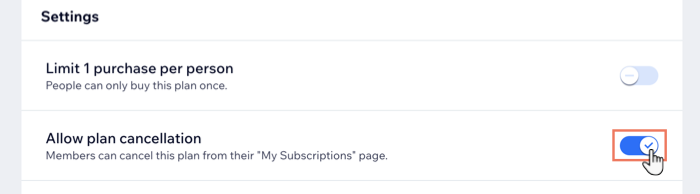
Click the Allow plan cancellation toggle to decide if members can cancel their own subscription:Enabled: Members can cancel this plan from their "My Subscriptions" page.
Disabled: Members won't be able to cancel their plan.
Note: We recommend to only disable cancellation if it complies with all relevant rules and legislation (e.g. payment network rules).
Click Save to update the plan.
Repeat steps 2 - 5 to enable cancellation for other plans.
Important information about refunding clients:
Canceling a subscription does not trigger a refund.
One-time payment: To issue a refund, contact your payment provider (e.g. PayPal, Stripe, etc.).
Recurring payment: When a client cancels a recurring payment, such as a monthly payment, the purchased plan and payment does not continue for the next cycle (e.g. for the next month).
How a client can cancel a plan
Once you allow clients to cancel a plan, you can direct them to their members area on your site to cancel their plan using the instructions below.
To cancel a plan through the Members Area:
Log in to the site.
Click your member profile at the top of the site.
Click My Subscriptions in the drop-down menu.
Click the More Actions arrow
 next to your plan.
Click Cancel Subscription.
Click Yes, Cancel to confirm.

Refunding canceled pricing plans purchased with Wix Payments
You can issue refunds for canceled plans purchased using Wix payments through your dashboard.
You can refund a customer for all or part of a payment they've made through Wix Payments. Refunds can take up to 3-5 business days to reach your customer's credit card/bank account, depending on the financial institution.
Important:
For all other payment providers, you can only issue refunds through their websites, not through Wix.com.
To refund canceled plans purchased using Wix Payments:
Go to Payments in your site's dashboard.
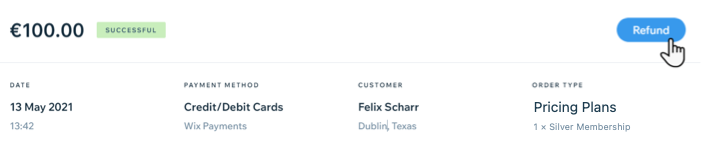
Click on the payment to refund.
Click Refund.
Enter the amount to refund and a note (if needed).
Click Refund.
Notes:
You cannot cancel or reverse a refund.
After providing a partial refund to a customer, you can still refund them for the remaining amount at a later point in time.
From Nov 16, 2020, Wix Payments no longer provides free processing for refunded payments (a grace period for existing Wix Payments users will continue until Dec 1, 2020). Standard Wix Payments processing fees apply. For example, in the U.S., if you issue a $100 refund to your customer, the original processing fee of $2.90 + $0.30 for that customer's purchase will not be paid back to your Wix Payments account. No additional refund fees will be charged.