top of page

Customizing Online Programs

Online Programs: Reordering and Hiding Your Programs from the Program List

Optimizing your program order is key to highlighting recent or popular offerings first, showcasing the most relevant content upfront. You can also hide programs temporarily to keep your list focused and impactful for visitors.

Tip:

Reordering or hiding programs on the Program List page only affects its display there; use the Program List Add-on to display programs on different pages throughout your site.

In this article, learn how to:

Reordering your programs in the Program List

Arrange your programs to emphasize key features. By reordering your programs, you can showcase new additions, prioritize popular programs, or feature seasonal promotions.

Wix Editor

Studio Editor

  1. Go to your editor.

  2. Click Pages & Menu  on the left side of the editor.

  3. Click Program Pages.

  4. Click your Program List page.

  5. Click the Program List element on your page.

  6. Click Settings.

  7. Click Programs.

  8. (For categorized programs) Click the Category drop-down and select the relevant one.

  9. Click and drag a program to reorder it in the list.
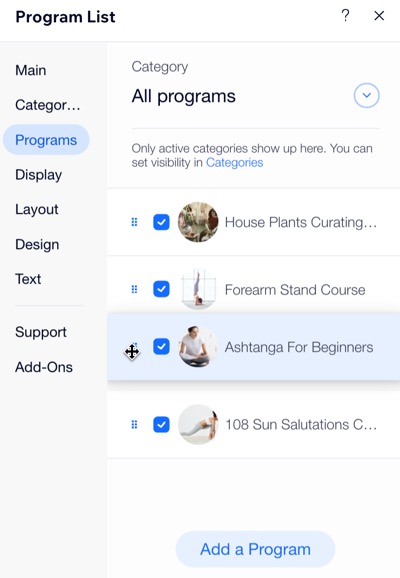
A screenshot of reordering programs on the Program List in the Wix Editor.

Hiding programs in the Program List

Hide a program when you no longer want it to appear as an active offering, ensuring that visitors see only current and relevant offerings.

Wix Editor

Studio Editor

  1. Go to your editor.

  2. Click Pages & Menu  on the left side of the editor.

  3. Click Program Pages.

  4. Click your Program List page.

  5. Click the Program List element on your page.

  6. Click Settings.

  7. Click Programs.

  8. (For categorized programs) Click the Category drop-down and select the relevant one.

  9. Deselect the checkbox next to the program(s) you want to hide.
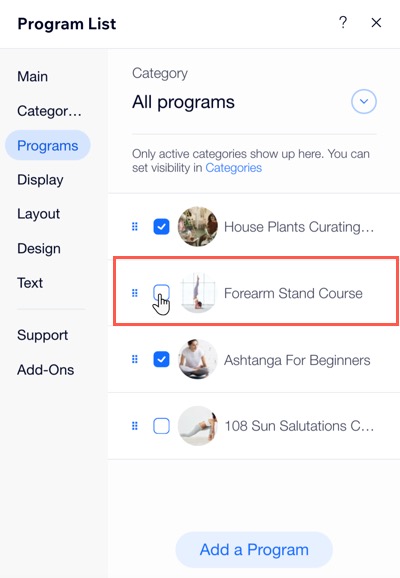
A screenshot of hiding a program from the Wix Editor.

Want to display a program again?

Follow steps 1-8, then select the checkbox next to the relevant program(s) you want to show.

Need A Professional Website?
Contact Us 
Today!

Wix Automations: Adding and Sending a Coupon

Wix Automations: Sending Automated Emails to Contacts After Form Submissions

Wix Automations: Customizing Automated Emails

Wix Automations: Creating a New Automation

Wix Automations: An Overview

The New Automation Builder: Understanding Email Types

The New Automation Builder: Creating a Multi-Action Automation

The New Automation Builder: Sending Data via Webhook

The New Automation Builder: Adding and Sending a Coupon

The New Automation Builder: Troubleshooting Wix Automations

The New Automation Builder: Understanding Conditions Operators

The New Automation Builder: Setting Up a 'Scheduled Time' Trigger

The New Automation Builder: Sending Data to Google Sheets

The New Automation Builder: Using the Property Picker

The New Automation Builder: Viewing and Managing Automations Installed for You

The New Automation Builder: Customizing Automated Emails

The New Automation Builder: Managing Your Automations

The New Automation Builder: Creating an Automation

The New Automation Builder: Overview

Microsoft Office 365 Mailbox Limits

Resetting the Password for Additional Office 365 Mailboxes

Resetting Your Admin Password for Your Office 365 Mailbox

Accessing Your Microsoft Office 365 Mailbox Through Your Wix Account

Accessing Your Microsoft Office 365 Mailbox Through Your Wix Account

Accessing the Microsoft Office 365 Admin Center

Activating Your Microsoft Office 365 Mailbox Purchased from Wix

Google Workspace: Troubleshooting Login Issues

Google Workspace: FAQs

Google Workspace: Contacting Google Support

Google Workspace Error Message: "You do not have access to Email"

wix experts
Graphic2Traffic web design
©
bottom of page