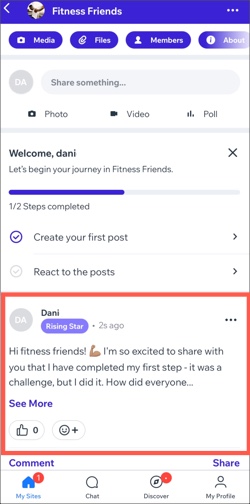
Managing program participants
Online Programs: Creating a Group for Your Program
Create a group for your program and build a sense of community with your participants. They can use the group to share their progress, easily connect with one another, and get important updates.
In this article, learn how to:
Before you begin:
If you haven't added the Wix Groups app yet, it will automatically install when you create a group for a program.
Creating a group for your program
Create a group for participants to make it easy for them to meet and share information. This encourages participants to come together in a group where they can create polls, post, comment and share with each other.
Notes:
If you set up the group after people have joined your program, existing participants need to be added manually or join on their own.
When new people join your site, you can set up an automation to enable them to join your group automatically.
To create a group:
Go to Online Programs in your site's dashboard.
Click the More Actions icon
 next to the relevant program.
Select Edit Settings from the drop-down.
Click Group.
Click Connect Group.
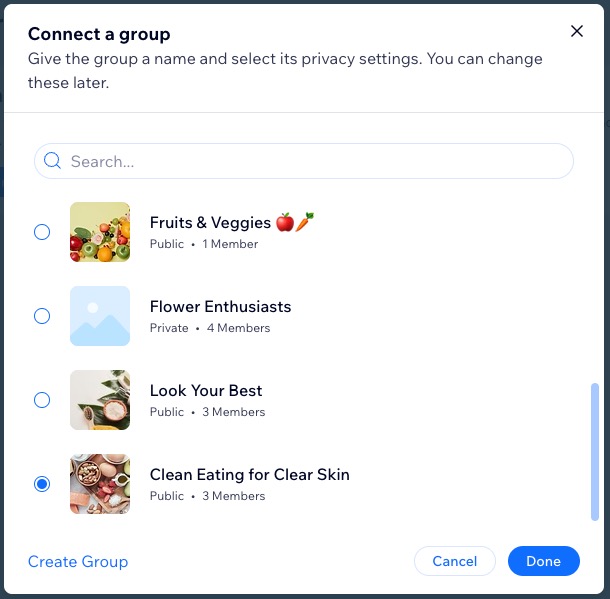
Choose what you want to do:Connect an existing group: Select the relevant group.
Create a new group:Click Create Group at the bottom.
Enter the desired group name.
Choose who can see and join this group under Privacy:
Tip: Existing site members can join any group, regardless of whether they have a public or private profile.Public: Anyone can view this group.
Private: Only members can view the group's content. Click the Visibility drop-down to decide if the group appears on your site.
Only paying members: Only members who purchase the relevant Pricing Plan can view this group.
Click Create.
Click Done.
Click Save at the top right.
Managing your group settings
Once you've created a group for your program you can manage the settings. Start by customizing the details of your group, the member list and the information in each tab like group discussions and media.
You can also disconnect the group if you no longer need it or if you want to connect a different one to your program.
To manage your group settings:
Go to Online Programs in your site's dashboard.
Click the More Actions icon
next to the relevant program.Select Edit Settings from the drop-down.
Click Group.
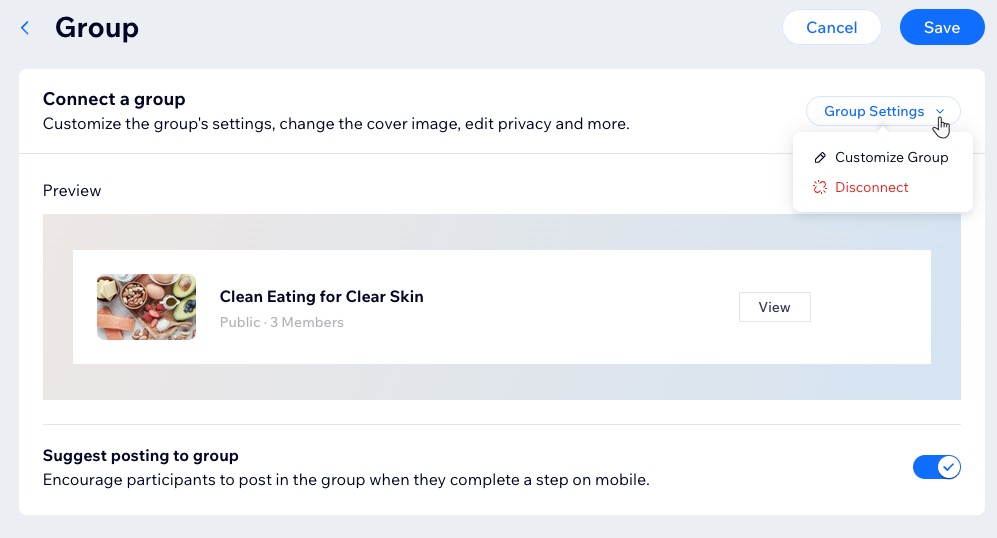
Click the Group Settings drop-down and choose what you want to do:Customize Group: Manage the settings of your group such as its info, posts and a variety of admin tools.
Disconnect: Remove the group from your program.Click Disconnect.
Click Disconnect to confirm.
Note: When you disconnect a group, the group is not deleted and no members are removed. However, new program participants are no longer automatically added to the group.
Click Save.
Tip:
Enable the Suggest posting to group toggle to show participants a suggestion to share their progress on the step they completed. This lets them post in the program's group using the relevant members app.