


Setting up Online Programs
Online Programs: Adding Sections and Steps to Your Program
Enrich your program by adding steps for participants to follow and reach their goal. For self-paced programs, you can group steps into sections to help maintain organization and ensure a clear path for progression. For scheduled programs, you can add steps to specific days or dates.
In this article, learn more about:
Adding steps to your program
There's no limit on the number of steps you can add to your online program. Each step should inspire participants, enriched with multimedia like videos, images, audio, and code embeds. This caters to diverse learning styles, deepening comprehension.
Note:
Steps added for future days go into the program curriculum. Steps added for past days are marked as "missed" for existing participants, and are hidden from those who have completed the program.
Dashboard
Wix app
Go to Online Programs in your site's dashboard.
Click the relevant program.
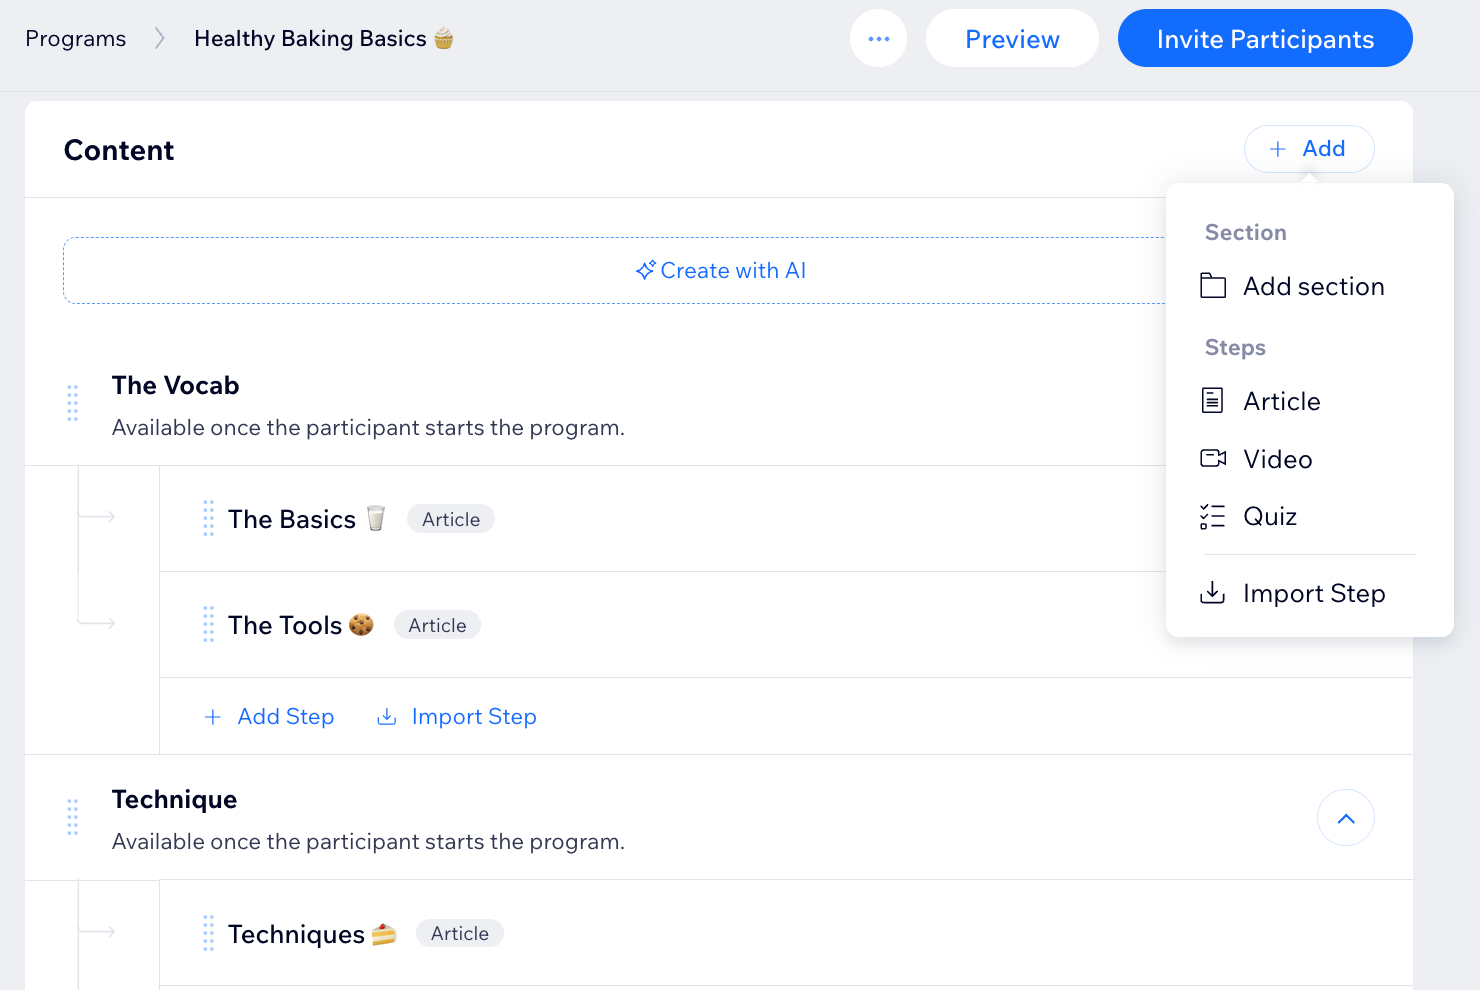
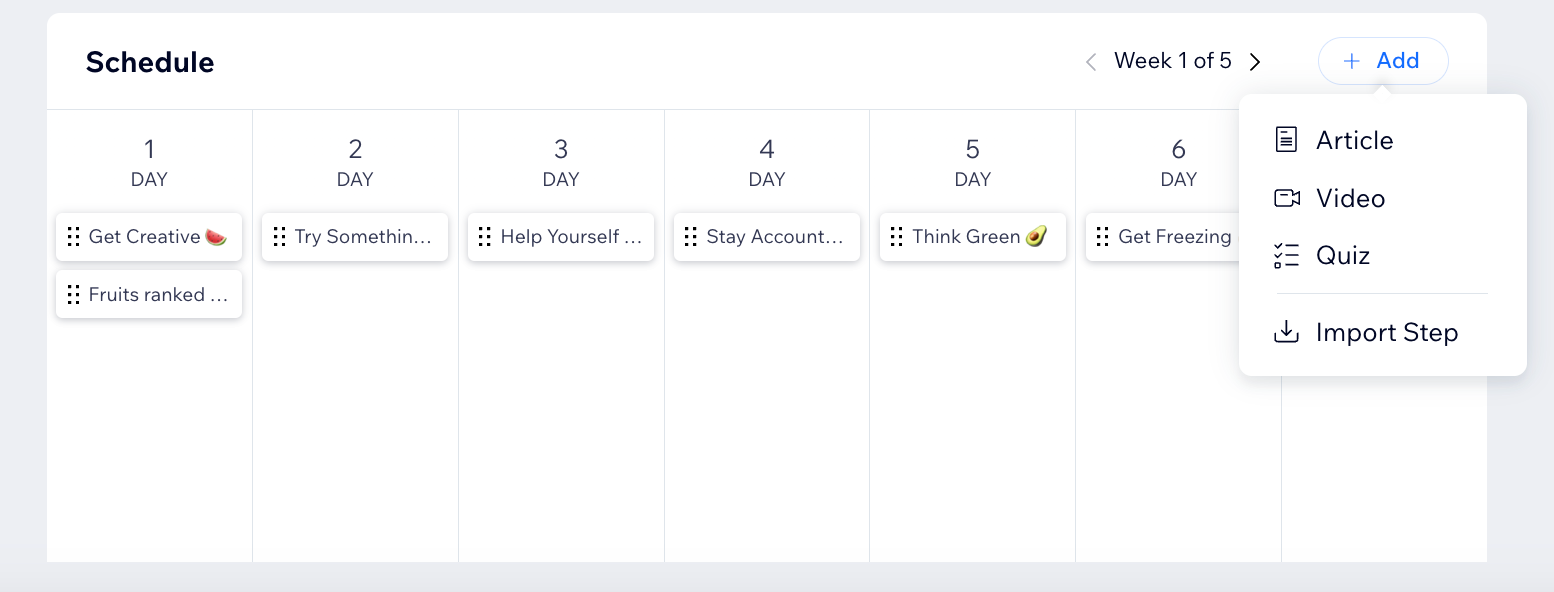
Click + Add next to Content or Schedule.
Select the relevant content type:Section: Add a new section to your program.
Article: Add a text-based step to a section.
Video: Add a video-based step to a section.
Quiz: Add a quiz to keep participants engaged while completing this step.
Import Step: Add a step from one of your existing programs for quick editing.
Customize the step you created.
Click Save.
Repeat steps 3-6 to add more steps to your program.
Adding sections to your program
Organize your online program by splitting it into sections that contain the steps. You can create all the sections first to build the program outline, or create sections as you go.
Important:
Sections are only available for self-paced programs.
Dashboard
Wix app
Go to Online Programs in your site's dashboard.
Click the relevant program.
Scroll down to Content.
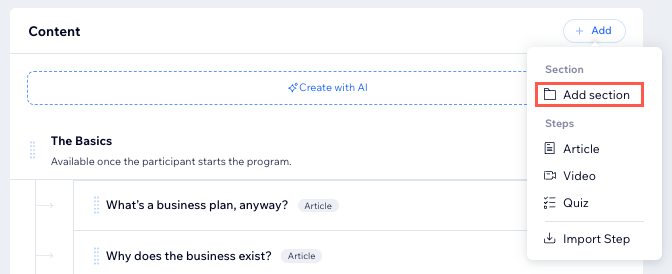
Click + Add and select Add section.
Add information to tell participants what your section is about.
Click the Section Dripping toggle to allow participants to complete the section on a specific day.Enabled: You choose when participants complete the section. Click the Select Day drop-down and select the week and day.
Disabled: Participants can complete the section whenever they want.
Click Save.
What's next?
Reorder, edit and delete sections any time you need to update your program.
FAQs
Click a question below to learn more about adding sections and steps to your program.
Can I add steps to published programs that already have participants?
Yes. You can add steps at any time to a program that is live and has participants.
What happens when I add steps for past or future days in a program?
Creating steps for future days adds them to the program curriculum. However, if you add steps for days that have passed, they will be marked as missed (in red) for participants.
What happens to newly added steps for participants who have completed a program?
Newly added steps won't be visible for those participants who have already finished the program.
What is the maximum number of steps and sections that I can add?
You can add a maximum of 2,000 steps and 1,000 sections to a single program.
What if I need more than 2,000 steps or 1,000 sections for my program?
While these limits are in place to maintain optimal program performance, we understand the need for flexibility. We recommend breaking your program into multiple smaller programs. This allows you to create a more focused program experience.