


Wix AI Site-Chat FAQ
Designing and Customizing Wix AI Site-Chat
Note:
Wix AI Site-Chat is currently available for Wix Editor only.
Wix AI Site-Chat allows you to reflect your brand's voice and style by designing and customizing your chat interface. You can adjust colors, text, layout, and more directly in your editor, making it easy for visitors to use. This personalized touch can make them feel more connected to your brand and more likely to complete their purchase. By encouraging site visitors to get in touch, you increase engagement and provide better service.
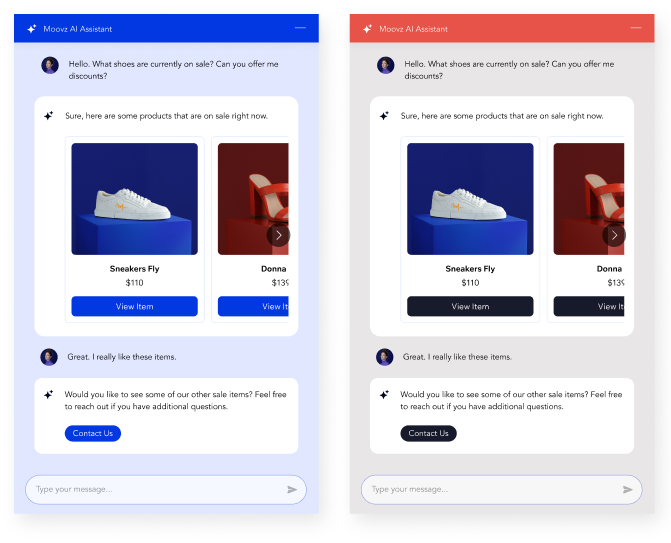
Designing your AI Site-Chat
Design each component of your AI Site-Chat in your editor.
To design your AI Site-Chat:
Click the Wix AI Site-Chat.
Click Settings.
Click the Design tab.
Choose what you want to design:
Header
Customize your chat box header:
Background, font and button colors: Select a color from your site's theme or choose a custom color.
Font: Choose a style and font using the drop-down menus, and adjust the size using the slider.
Display AI icon: Click the toggle to display or hide the AI icon from the header.

Background
Choose how you want your chat box background to look:
Change colors: Select a color from your site's theme or choose a custom color.
Apply shadow: Click the toggle to display or hide shadow. Use the sliders to adjust the shadow opacity, blur, spread and direction.

Messages
Choose whether you want to design messages from Visitors, the AI Site-Chat or Cards, and customize their elements:
Colors: Select a color from your site's theme or choose a custom color.
Font: Choose a style and font using the drop-downs, and adjust the size using the slider.
Apply shadow: Click the toggle to show or hide the shadow. Use the sliders to adjust the shadow opacity, blur, spread and direction.
Customize borders: Use the sliders to adjust the border opacity, width and radius.

Input Field
Customize how the text input field looks for your users when they open the chat, hover over the field or focus (click) on it:
Customize borders: Use the sliders to adjust the border opacity, width and radius.
Colors: Select a color from your site's theme or choose a custom color.
Font: Choose a style and font using the drop-downs, and adjust the size using the slider.

Minimized Chat
Customize how your chat box looks when it's minimized:
Design: Choose a chat box design:Floating: The chat floats above the bottom corner of your site.
Sticky: The chat is attached to the bottom border of your site.
Icon: The chat only shows your chosen AI icon without text.
Display: Choose a style for your minimized chat box: Text & icon, Text, or Icon.
Colors: Select a color from your site's theme or choose a custom color.
Font: Choose a style and font using the drop-downs.
AI icon: Choose an icon style from the available options.
Apply nudge animation: Click the toggle to enable a nudge animation that plays when the AI Site-Chat sends a new message while the chat box is minimized.
Apply shadow: Click the toggle to show or hide the shadow. Use the sliders to adjust the shadow opacity, blur, spread and direction.

Customizing your AI Site-Chat layout
Choose which pages you want to display your AI Site-Chat on, where on those pages it appears, and how new messages appear to visitors.
To customize your layout:
Click the AI Site-Chat.
Click Settings.
Click the Layout tab.
Choose what you want to customize:Position: Decide whether you want your chat box to appear in the bottom left or bottom right of your site.
Width and height: Choose your chat width and height, you can use default settings or customize it using the slider.

Configuring the AI Site-Chat's text settings
Enter the text you'd like to appear when the AI Site-Chat is minimized or offline. Give your visitors upfront information such as its typical response time.
To configure your text settings:
Click the AI Site-Chat.
Click Settings.
Click the Text tab.
Choose what you want to customize:Chat Box: Enter the name you'd like to appear in the header when the chat box is open. Then set the default text prompting visitors to enter a message (e.g. "Type your message...").
Chat Minimized: Enter the text that site visitors see when your chat box is minimized, both when you appear online and available to chat and when you appear offline and unavailable.
Note: This option is only available if you've selected a minimized chat layout that includes text.
