


wix studio
Designing Across Breakpoints
The Studio Editor lets you tailor sites per breakpoint, so they always look great. Breakpoints are screen size ranges, representing the possible screens and devices that visitors tend to use (e.g. tablet, mobile).
The design you create on desktop trickles down to tablet and mobile. However, you can create overrides to make the design fit smaller screens. Click a breakpoint icon at the top to get started.
Go to our Wix Studio Academy to check out additional Wix Studio webinars, tutorials, and courses.
In this article, learn more about:
Tip:
You can set a default editing size (screen width) for each breakpoint on every page of your client's site.
Defining breakpoints
The Studio Editor comes with 3 built-in breakpoints, which you can customize and re-define at any point:
Desktop: 1001px and up
Tablet: 751px - 1000px
Mobile: 320px - 750px
You can add up to 3 additional breakpoints to make your design even more precise to certain screen sizes.
You define the breakpoints separately for every site page and every global section. This means that a global section and the page it's on can have completely different breakpoints.
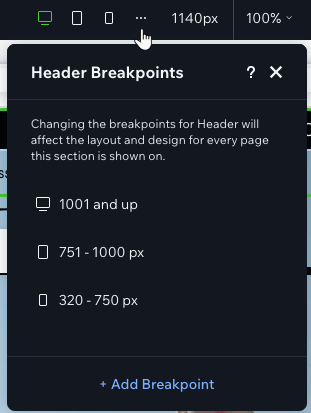
For example, the page below has 5 breakpoints defined:
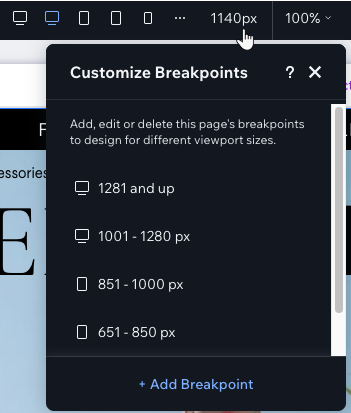
... While the global header on that page has 3 breakpoints defined:
Tip:
The breakpoint a site visitor sees depends on their viewport width. For example, an iPad Pro user (i.e. 1024px width) would see the desktop breakpoint (1001px and up). This also varies with portrait or landscape mode, as each mode has a different screen width that may fall into different breakpoint ranges.
Cascading design
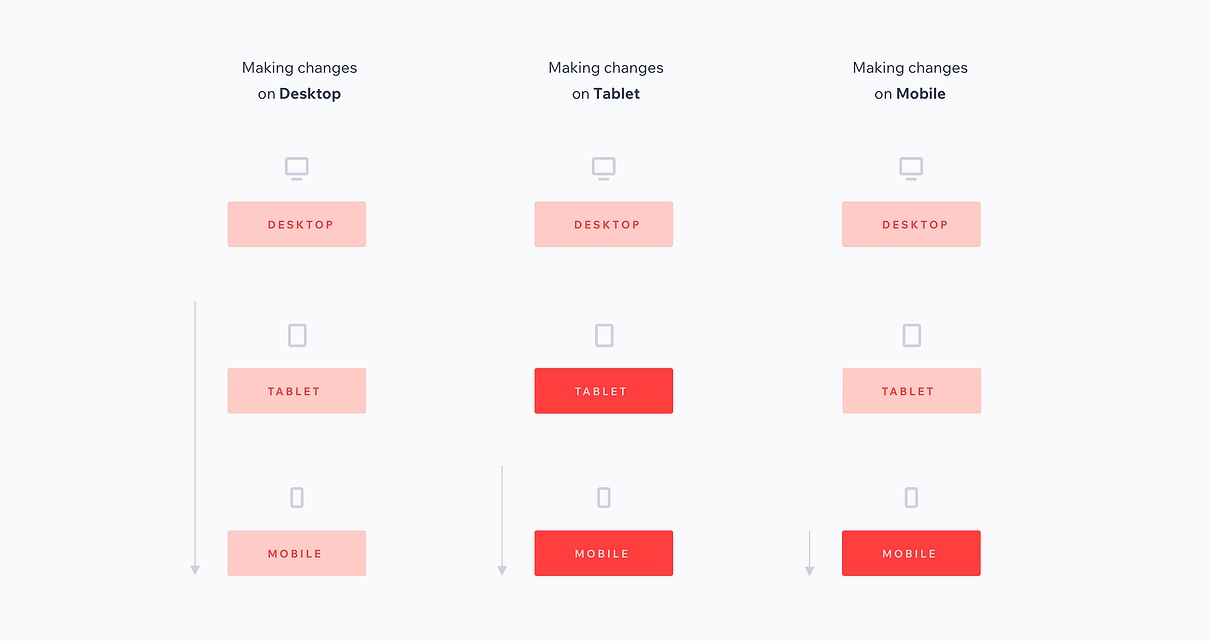
The Studio Editor uses a cascading concept when it comes to designing across breakpoints. Changes you make on larger breakpoints trickle down to smaller breakpoints, but changes on smaller breakpoints don't affect larger breakpoints.
For example, a button that is designed to be purple on desktop is automatically purple on tablet and mobile. If you change its color on mobile, the button is still purple on tablet and desktop.
Note:
Some changes apply to all breakpoints – for example, when you replace or delete elements. Learn more about these changes in the section below.
Created additional desktop breakpoints?
If you delete the 2nd largest breakpoint, settings from the largest breakpoint automatically trickle down to the smaller ones – even if you have already created overrides. For example, elements that were only hidden from the largest breakpoint would become hidden on the smaller breakpoints as well. To resolve this, create the overrides again.
Changes that apply to all breakpoints
Some types of actions automatically apply to all breakpoints, and cannot be customized to a certain viewport.
Data changes
When editing the content of an element, you're effectively changing its data. For example, changing an element's link or the source of an image applies to all breakpoints.

Another example is when you replace or delete elements from the page – the element is automatically replaced / deleted on all breakpoints.
Did you know?
You can hide elements from specific breakpoints. Go to the relevant breakpoint, right-click the element and select Hide.
Structural changes
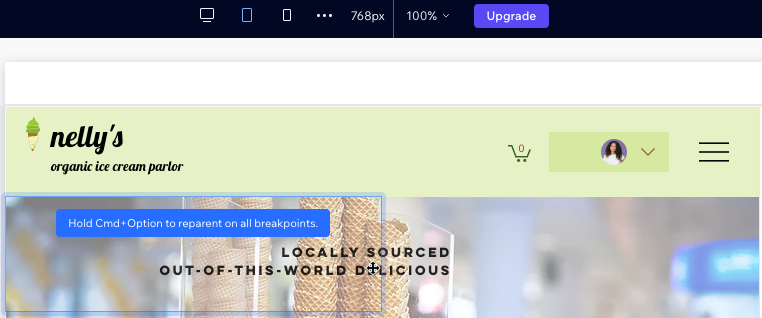
Changes to an element's place in the hierarchy of your page. For example, when you stack elements together or move an element to a different cell, you're changing the page structure and it is reflected across all breakpoints.
Creating overrides with breakpoints
An override occurs when you make changes to an element's design on a specific breakpoint. Meaning, it no longer draws design values from the larger breakpoint above it. However, these overrides do trickle down to smaller breakpoints.
There are 2 types of overrides you can create:
Design: Changes to an element's properties, such as coloration, border and font.
Layout: Changes to an element's position and size, as long as it does not move to a different parent element.
Tip:
Elements and sections in the Studio Editor come with a built-in responsive behavior. This controls the way they are resized on smaller breakpoints, so you don't have to worry about setting it all manually.
Removing design overrides on a specific breakpoint
You can always reset the design and layout of an element back to its properties on the largest breakpoint.
The properties of the element on smaller breakpoints are not affected, just the breakpoint that contains the element that you are reverting back. For example, if you're removing overrides on tablet, it does not affect mobile.
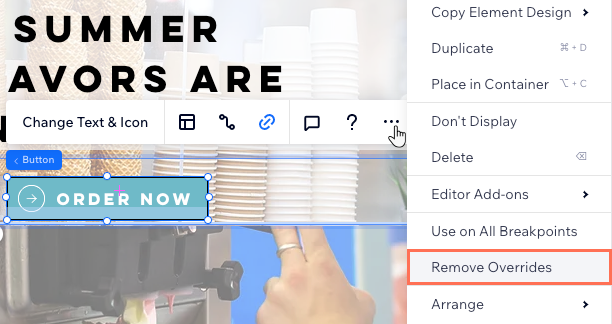
To remove design overrides on a breakpoint:
Select the relevant element.
Tip: You can select it directly on the canvas, or the Layers panel.Click the More Actions icon
 .
.Click Remove Overrides.
Did you know?
You can use the responsive AI tool to quickly optimize the layout of sections across all breakpoints.