top of page

Dayful by Wix

Dayful by Wix: Customizing Your Booking Page

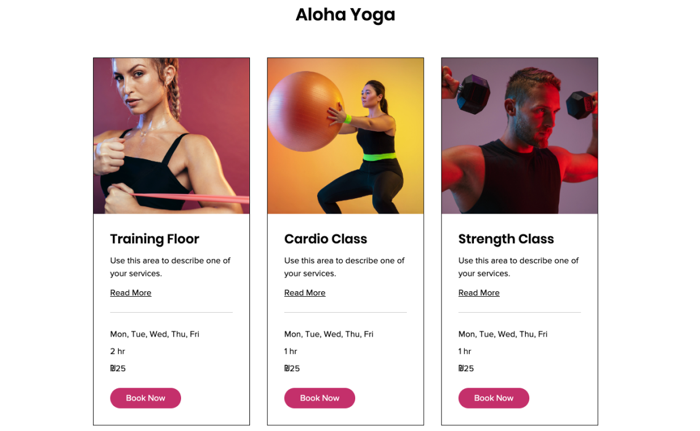
After setting up your services on Dayful by Wix, customize the page your clients use to book them. This is what they see when you share a link to the service or embed the widget on your website, so make sure it fits your brand.

Important:

To customize the design of your Booking Page, upgrade your Dayful plan.
Need help with Dayful?

Send a message to our Experts and they will get back to you as soon as possible.

To customize your Booking page:

  1. Go to the Channels tab in your Dayful dashboard.

  2. Click Booking Page.

  3. Click Edit Design.

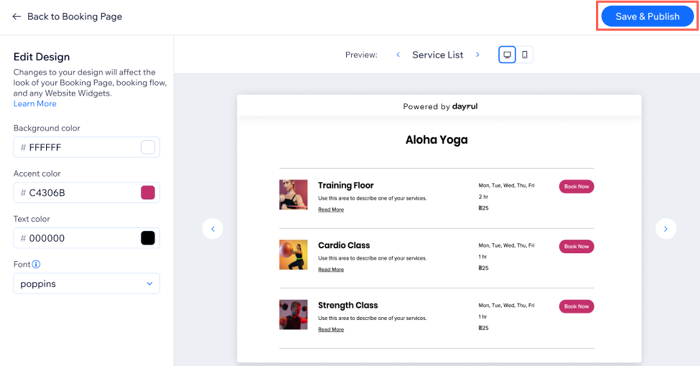
  4. Choose what version of your Booking Page to edit, using the arrows next to Preview:Service List: What your clients see when you display your service page. This can include any of your services.
    Calendar: Show clients the full weekly timetable for specific appointments or classes.
    Memberships and packages: Show clients your pricing plans or membership packages.

  5. Set the colors of your Booking Page on the left:Background color: Choose an appropriate background for your services.
    Accent color: Choose the color for your Booking Page buttons.
    Text color: Choose the color for your font, make sure it stands out from the background color and easy to read.
    Font: Choose the font for the text on your Booking Page.

  6. Click Save & Publish.

Note:

The design settings you choose for the Booking Page apply to all links you share and all website widgets you embed.
Tip:

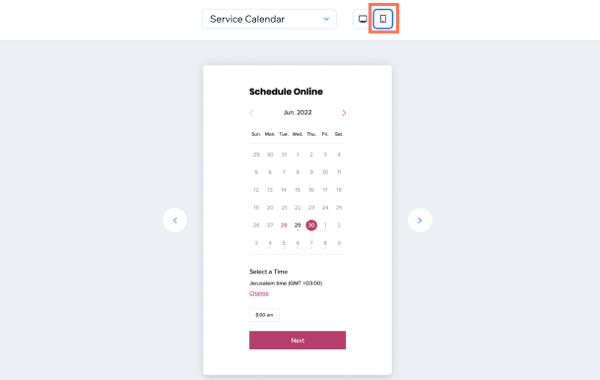
Click the Mobile Preview button to make sure your Booking Page design is optimized for mobile as well. 
Need A Professional Website?
Contact Us 
Today!

Wix Automations: Adding and Sending a Coupon

Wix Automations: Sending Automated Emails to Contacts After Form Submissions

Wix Automations: Customizing Automated Emails

Wix Automations: Creating a New Automation

Wix Automations: An Overview

The New Automation Builder: Understanding Email Types

The New Automation Builder: Creating a Multi-Action Automation

The New Automation Builder: Sending Data via Webhook

The New Automation Builder: Adding and Sending a Coupon

The New Automation Builder: Troubleshooting Wix Automations

The New Automation Builder: Understanding Conditions Operators

The New Automation Builder: Setting Up a 'Scheduled Time' Trigger

The New Automation Builder: Sending Data to Google Sheets

The New Automation Builder: Using the Property Picker

The New Automation Builder: Viewing and Managing Automations Installed for You

The New Automation Builder: Customizing Automated Emails

The New Automation Builder: Managing Your Automations

The New Automation Builder: Creating an Automation

The New Automation Builder: Overview

Microsoft Office 365 Mailbox Limits

Resetting the Password for Additional Office 365 Mailboxes

Resetting Your Admin Password for Your Office 365 Mailbox

Accessing Your Microsoft Office 365 Mailbox Through Your Wix Account

Accessing Your Microsoft Office 365 Mailbox Through Your Wix Account

Accessing the Microsoft Office 365 Admin Center

Activating Your Microsoft Office 365 Mailbox Purchased from Wix

Google Workspace: Troubleshooting Login Issues

Google Workspace: FAQs

Google Workspace: Contacting Google Support

Google Workspace Error Message: "You do not have access to Email"

wix experts
Graphic2Traffic web design
©
bottom of page