top of page

Managing your Store in Retail POS

Wix Retail POS: Creating Product Categories

Important:

  • This article is about Wix Retail POS tablet for brick & mortar businesses.

  • For info on using POS on a mobile device, click here.

Using product categories, you can organize your store products to help you locate them more quickly at your point of sale.

Note:

Product categories were previously called product collections.

All your products are automatically added to the "All Products" category. You can also add products to other categories so that they appear in more than one category. For example, if you have a pet shop, you can create a "Dog" category and a "Cat" category, that contain dog and cat food respectively. You can also create a general "Pet Food" category that includes the same products that are in the other categories.
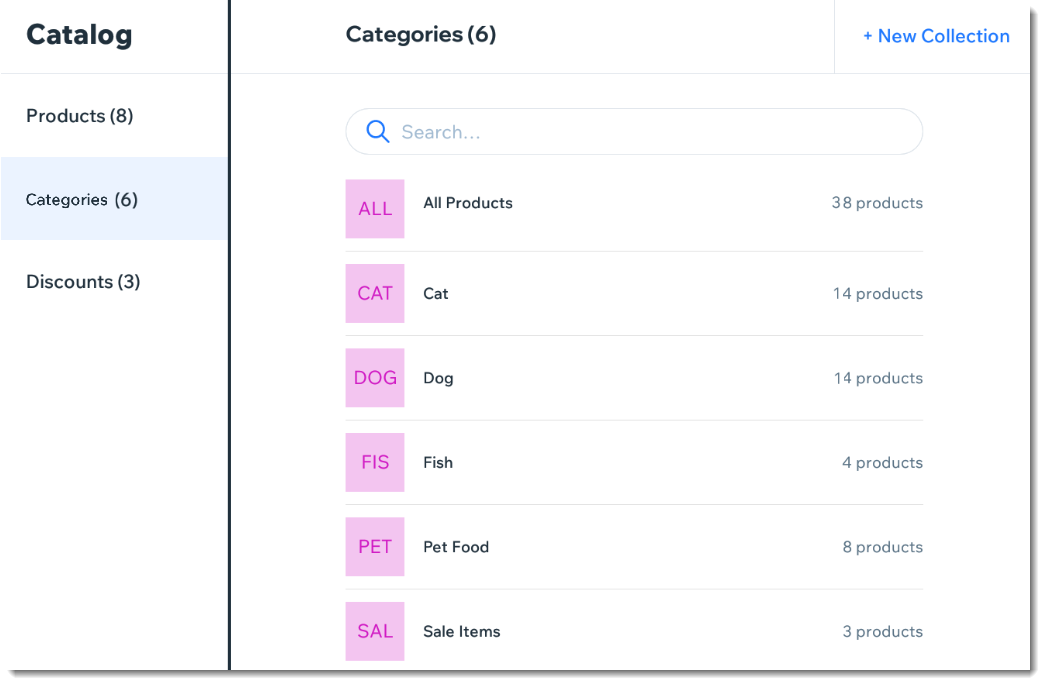
Screenshot of the Categories page in the Wix Retail POS tablet

Note:

Any product categories you create on the POS tablet also appear in your dashboard on desktop and vice versa. You can use categories in your live site to display different types of products on different pages.

To create a product category:

  1. Open the POS tablet.

  2. Tap the Menu icon  at the bottom left.

  3. Tap Catalog.

  4. Tap Categories.

  5. Tap + New Category.

  6. Enter a name for your category and tap Save.

  7. Add products to your new category:Tap Add Products.
    Select the checkboxes next to the products you want to add.
    Note: You can use the search bar to find specific products.
    Tap Add.

Notes:

  • To delete a product category, select the category and tap Delete at the top right. Deleting a category does not delete the products.

  • To remove a product from a category, tap the Remove iconnext to the product.

Need A Professional Website?
Contact Us 
Today!

Wix Restaurants: Setting Up Your Restaurant Address and Phone Number

Wix Restaurants: An Overview

Pricing Plans: Creating Coupons Using the Wix App

Pricing Plans: Customizing Your Plans on the Wix Mobile Apps

Pricing Plans: Enabling Invoices for Plan Purchases in the Wix App

Pricing Plans: Setting Up Tax in the Wix App

Pricing Plans: Connecting a Plan to Content & Services in the Wix App

Pricing Plans: Creating an Introductory Offer Using the Wix App

Pricing Plans: Selling Plans Offline Using the Wix App

Pricing Plans: Managing Purchased Plans in the Wix App

Pricing Plans: Creating Plans in the Wix App

Pricing Plans: Adding Pricing Plans in the Wix App

Pricing Plans: Updating the Payment Method on a Customer Subscription

Pricing Plans: Changing the Payment Date for Recurring Subscriptions

Pricing Plans: Understanding Wix Analytics Subscriptions Reports

Pricing Plans: Viewing and Downloading Analytics Reports

Pricing Plans: Viewing and Editing Your Client Information

Pricing Plans: Limiting Your Blog to Members Who Purchased a Pricing Plan

Pricing Plans: Viewing a Client's Subscription and Payment History

Pricing Plans: Canceling Client Plans

Pricing Plans: Checking How Many Package Sessions Were Used

Pricing Plans: Managing Your Clients' Subscriptions

Pricing Plans: Temporarily Suspending a Plan

Pricing Plans: Creating Discount Coupons

Pricing Plans: Selling Plans Offline

Pricing Plans: Displaying Different Plan Types Using Tabs

Pricing Plans: Customizing Your Thank You Page

Pricing Plans: Customizing the Mobile View of the Pricing Plans Page

Pricing Plans: Displaying Plans on Multiple Site Pages

Pricing Plans: Customizing the Look of Your Pricing Plans Page

wix experts
Graphic2Traffic web design
©
bottom of page