


Wix Inbox FAQ
Wix Inbox: Sending Messages and Attaching Items
Wix Inbox allows you to send messages and attach items directly to your customers. This helps you grow customer relationships by making communication more efficient and personalized. You can send attachments, payment requests, coupons, and links to your products or services, all within the same platform. Additionally, you can speed up your response time by using saved replies.
Imagine a customer inquiring about a product. You can quickly respond with detailed information, attach a product brochure, and even send a payment request—all in one seamless interaction. This not only saves you time but also enhances the customer experience, making it more likely they’ll make a purchase.
Sending a message
Without leaving Wix Inbox, send messages to contacts via email, chat or additional channels such as Facebook and SMS. Learn more about Wix Inbox channels.
Note:
The channels available to you depend on the contact information you hold for that person.
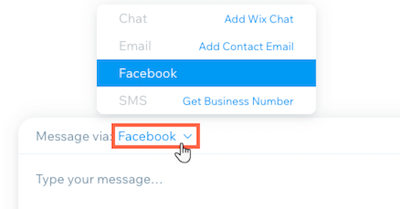
To send a message:
Go to Inbox in your site's dashboard.
Click an existing conversation, or click Compose at the top right to start a new one.
Click the text box at the bottom to start typing your message.
Click the Message via drop-down to select the channel to send your message through.
Note: If you've attached items to your message and decide to change channels (e.g. from email to chat), you'll lose the attached items and will have to attach them again.Click Send.
Note:
If you haven't connected Gmail to your Wix Inbox or purchased a business email, messages you send to your contacts will feature a sender address such as "[message ID]@[crm].wix.com", as below.

Sending a saved reply
Create saved replies for easy access to frequently sent messages (e.g. a 'welcome' message) and general information (e.g. your refund policy).
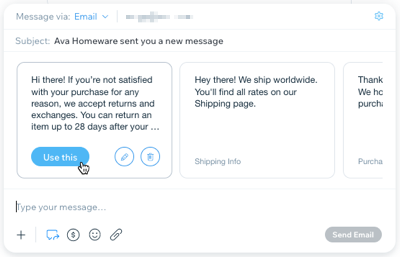
To create or send a saved reply:
Go to Inbox in your site's dashboard.
Click an existing conversation, or click Compose at the top right to start a new one.
Click the text box at the bottom to start typing your message.
Click the Message via drop-down to select the channel to send your message through.
Note: The channels available to you depend on the contact information you hold for that person.Click the Saved Replies icon
 .
.Choose what you want to do:
Create a custom saved reply:Scroll to the right in the saved replies panel and click + Create Saved Reply.
Enter a name for your saved reply.
Enter the text of your reply under Your Message.
Click Create.
Hover over the reply you just created and click Use this.
Send an existing saved reply:Hover over the reply you want to use.
Click Use this.
Click Send to send your message.
Tip:
Hover over a saved reply and click the Edit icon  to modify it, or the Remove icon
  to delete it from your list.
Requesting a payment
Send a payment request to share a convenient payment link. Your contact can use their credit card or PayPal account to make this payment.
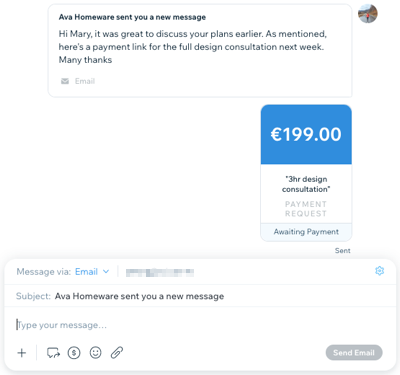
To request a payment:
Go to Inbox in your site's dashboard.
Click an existing conversation, or click Compose at the top right to start a new one.
Click the text box at the bottom to start typing your message.
Click the Message via drop-down to select the channel to send your message through.
Note: The channels available to you depend on the contact information you hold for that person.Click the Request Payment icon
 .
.Set the amount and write a short description for your request.
Click Send Request.
Make sure you're ready to accept payments through Wix Inbox:
Connect a payment method to your site
Sending a coupon
Promote your products and services by creating coupons to offer store discounts, free shipping and more.
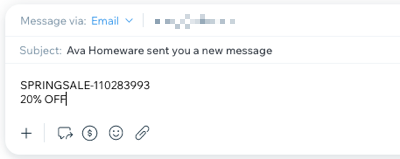
To send a coupon:
Go to Inbox in your site's dashboard.
Click an existing conversation, or click Compose at the top right to start a new one.
Click the text box at the bottom to start typing your message.
Click the Message via drop-down to select the channel to send your message through.
Note: The channels available to you depend on the contact information you hold for that person.Click the Add items icon
 and click Coupons.
Do one of the following:
Create a new coupon:Click + Create New.
Select the type of coupon you want to offer.
Enter your coupon details (code, name, etc.).
When ready, click Create Coupon at the bottom right.
Select the coupon you just created and click Add.
Click Send to send your message.
Send an existing coupon:Select the relevant coupon from the list and click Add.
Click Send to send your message.
Note:
When you send a coupon, it is sent as text.
Sending a link to a store product
Help your users choose a product or promote a new one by sending a direct link to a product on your site.
Note:
You must add Wix Stores to your site to send product links.
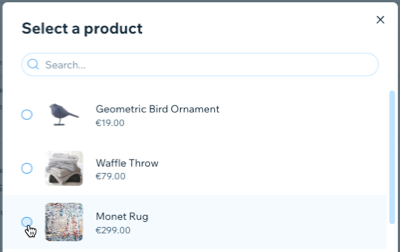
To send a link to a store product:
Go to Inbox in your site's dashboard.
Click an existing conversation, or click Compose at the top right to start a new one.
Click the text box at the bottom to start typing your message.
Click the Message via drop-down to select the channel to send your message through.
Note: The channels available to you depend on the contact information you hold for that person.Click the Add items icon
and click Products.Select the relevant product and click Add.
Click Send to send your message.
Note:
A product will not be listed if it's out of stock or hidden from your store page. Go to the Products page in your dashboard to manage the visibility of your store products.
Sending a link to a service
Promote services offered on your site by sending links that bring your contacts straight to your sign-up pages.
Note:
You must add Wix Bookings to your site to send links to services.
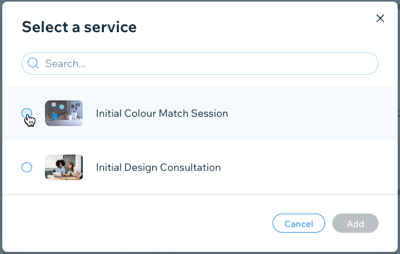
To send a link to a service:
Go to Inbox in your site's dashboard.
Click an existing conversation, or click Compose at the top right to start a new one.
Click the text box at the bottom to start typing your message.
Click the Message via drop-down to select the channel to send your message through.
Note: The channels available to you depend on the contact information you hold for that person.Click the Add items icon
and click Services.Select the relevant service and click Add.
Click Send to send your message.
Sending an attachment
Share files and images with contacts to keep them up to date with invoices, designs or other documentation.
To send an attachment:
Go to Inbox in your site's dashboard.
Click an existing conversation, or click Compose at the top right to start a new one.
Click the text box at the bottom to start typing your message.
Click the Message via drop-down to select the channel to send your message through.
Note: The channels available to you depend on the contact information you hold for that person.Click the Files icon
 .
.Select the attachment you want to send. You can attach the following file types: .png, .jpg, .jpeg, .xlsx, .xls, .doc, .docx, .ppt, .pptx, .pdf
Click Open.
Click Send.
Note:
You can send multiple attachments with written messages. You can attach up to 10 items per message and there is a maximum file size of 15MB.
Note:
You can also send messages and attach items from the Wix app on a mobile device.
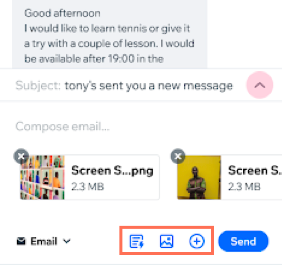
Line break errors in Outlook for Mac:
If you've included paragraph/line breaks in your message, any recipients viewing them in Outlook for Mac will not see them. Other versions of Outlook do not experience this issue.