top of page

Wix Contacts FAQ

Wix Contacts: Adding and Managing Custom Contact Fields

Add custom fields to store additional information about your contacts. Custom fields can be either text, number, date or URL, and can have any name you choose.
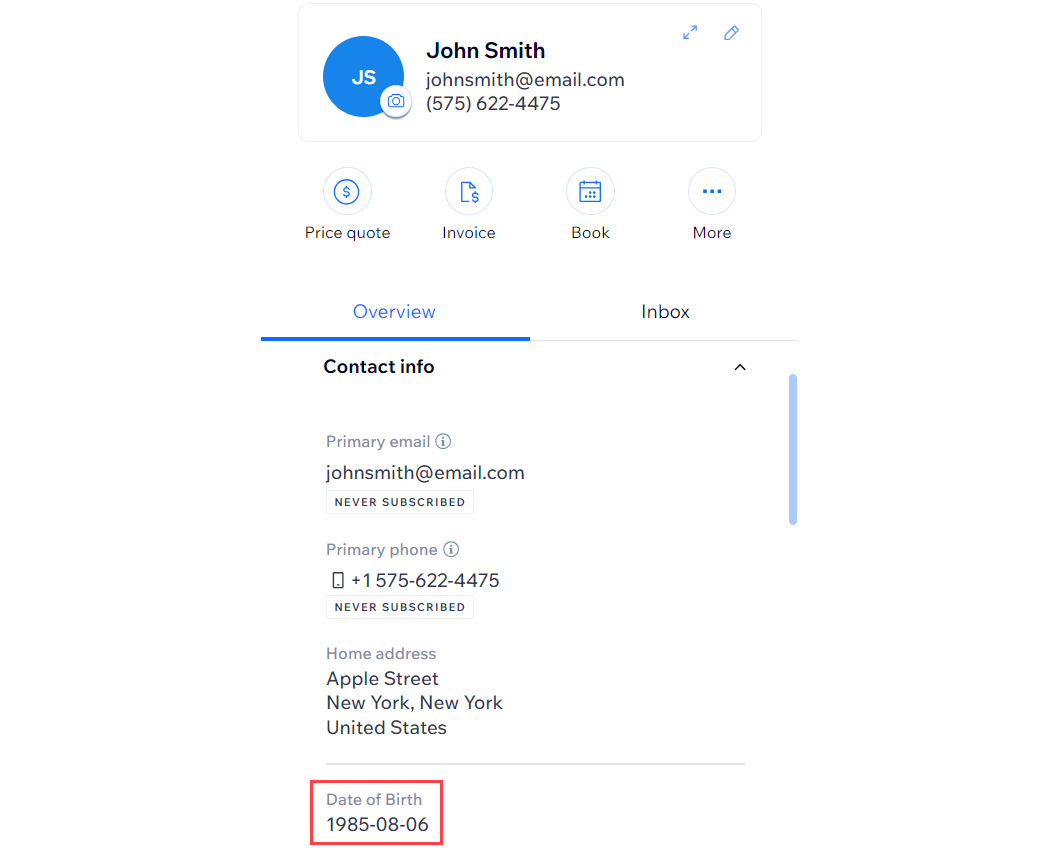
A screenshot of the contact panel with the date of birth custom field highlighted.

Adding custom fields to contacts

Any custom field that you add is automatically added to all contacts in your Contact List. This way, you do not have to fill in this field for every contact.

Tip:

Sync custom fields from your contacts to Wix Forms to collect this information from your visitors from a form on your site.

To add a custom field:

  1. Go to Contacts in your site's dashboard.

  2. Click the More Actions icon at the top and select Custom fields.

  3. Click + Add New Field.

  4. Click the Field Type drop-down and select the type of content: Text, Number, Date, or URL

  5. Enter the name of the new field (e.g. "Date of Birth") in the Field Name field.

  6. Click Add.

A screenshot of the custom field menu with the text field type selected, and Date of Birth entered as the custom field.

  1. Click Done.

Renaming custom contact fields

You can change the name of a custom field without affecting any of the information stored in the field.

To rename a custom contact field:

  1. Go to Contacts in your site's dashboard.

  2. Click the More Actions icon at the top and select Custom fields.

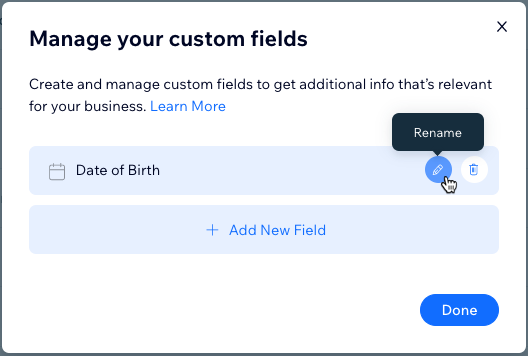
  3. Hover over the field you want to rename and click the Rename icon .

  4. Edit the name of the field and click the checkmark to save.

  5. Click Done.

A screenshot of the Manage your custom fields menu, with the mouse hovering over the Rename option on a custom field.

Deleting custom contact fields

Clean up your contacts by deleting custom fields that you no longer need. Deleting the custom field removes it, and the information it contains, from all your contacts.

To delete a custom field:

  1. Go to Contacts in your site's dashboard.

  2. Click the More Actions icon at the top and select Custom fields.

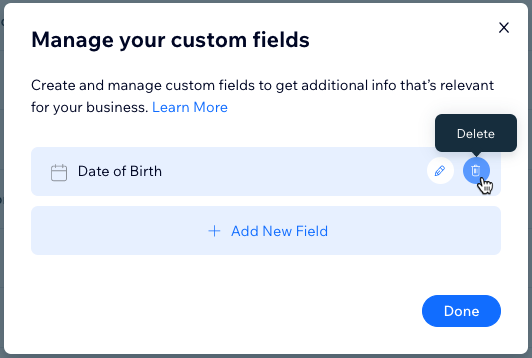
  3. Hover over the field you want to delete and click the Delete icon .

  4. Click Delete to confirm.

  5. Click Done.

A screenshot of the Manage your custom fields menu, with the mouse hovering over the Delete option on a custom field.

Need A Professional Website?
Contact Us 
Today!

Marking a Reservation as 'Paid' in Wix Hotels

Editing Your Confirmation Email in Wix Hotels

Receiving Notifications for Wix Hotels Reservations

Cancelling a Reservation in Wix Hotels

Marking Rooms as 'Not Available' in Wix Hotels

Manually Adding Reservations in Wix Hotels

Editing Your Reservations in Wix Hotels

Viewing Your Reservations in Wix Hotels

Upgrading Wix Hotels

Setting Up Tax in Wix Hotels

Setting Minimum and Maximum Stays for Seasonal Rules in Wix Hotels

Editing Your Property Rates Using Quick Rates

Setting Up PayPal as a Payment Method for Wix Hotels

Creating Coupons in Wix Hotels

Setting up Your Payment Method in Wix Hotels

Displaying Room Rates on Your Reservation Calendar

Adding a Deposit Fee to Reservations in Wix Hotels

Adding Extra Charges in Wix Hotels

Charging for Additional Guests in Wix Hotels

Charging Per Person in Wix Hotels

Adding Seasonal Rates in Wix Hotels

Setting a Weekly or Monthly Rate in Wix Hotels

Setting Weekend Rates for Rooms in Wix Hotels

Customizing Your Hotel Availability Calendar

Adding a Hotel Availability Calendar to Your Site

Adding a Hotel Search Bar to Your Site

About Wix Hotels Add-Ons

Customizing Your Room List in Wix Hotels

Removing the 'Kids' Option in Wix Hotels

Editing the Text in Wix Hotels

wix experts
Graphic2Traffic web design
©
bottom of page