


Setting up sales tax
Tax Collection: An Overview
Important:
This tax solution is currently available for Wix Stores, Wix Bookings, and Wix Restaurants Orders (New) & Wix Table Reservations. Using a different app? Click an option below:
Whether it's called sales tax, value-added tax (VAT) or something else, the idea is the same. When a customer buys an item - if needed - the merchant collects tax. They must then remit (pass along) the tax they collected to the local tax authority.
Before you start setting up tax, we suggest you take the time to figure out which tax rules apply to your particular business. That way, you won't tax your customers unnecessarily or fail to collect taxes from those you are supposed to collect from.
Important considerations
Tax locations: Different tax rules apply in different locations. Consult with an accountant or with your local tax authority for specific information relevant for your business.
Tax changes: Tax regulations change from time to time. Make sure to check for updates.
Merchant accounts: If you previously set up tax (and shipping) in a merchant account (e.g. in PayPal), remove these settings before starting.
Step 1 | Figure out who you need to collect tax from
In most cases, you're required to collect taxes from:
Customers in your location: This means customers located in a region where you have a physical presence, including where you have:A business registered with tax authorities
A physical brick and mortar business
An office
An employee
Customers in locations where you passed a minimum threshold: In some places, merchants are required to collect tax in a location if they exceed a certain threshold of sales (in money or in the number of transactions).
In most cases, if you only have an online business with no other physical presence, you'll only need to collect taxes from your location (e.g. your U.S. state, your own country or state, province, etc.)
Step 2 | Select manual or automatic tax
To get started, go to your site's tax settings.
Show me how to access my tax settings

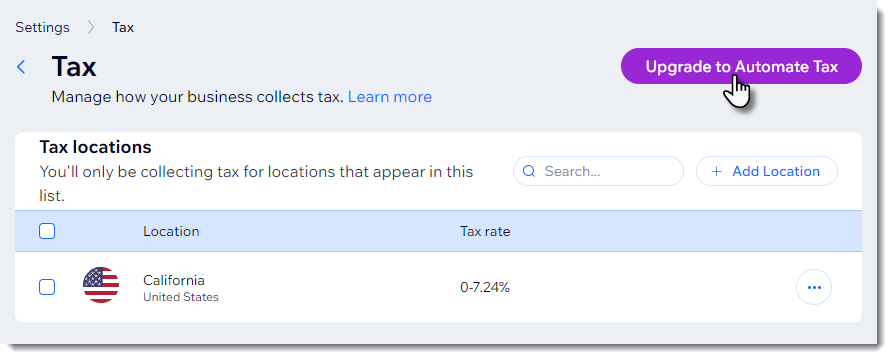
Wix offers two methods of tax collection. You can set tax rates manually or automate tax collection using Avalara.
Automatic tax collection with Avalara
Avalara is a third-party app that calculates tax based on up-to-date tax rules. When rates change, your tax updates automatically.
Learn more about automatic tax collection.
Note:
Avalara is available for use in sites that have upgraded to a Premium plan or Studio plan that supports automated sales tax.
Calculating tax with Avalara is not currently available for users in Brazil and India.
Manual tax collection
With manual calculation, you select the location or locations where you need to collect tax and manually enter the relevant tax rates. If the rates changes, it's up to you to update it.
Learn more about setting up manual tax calculation.
Step 3 | (Optional) Create tax groups
If you sell items that are taxed at different rates, you can create tax groups to stay in compliance with local tax regulations.
For example, if the default tax rate in your location is 10%, but children's clothes are tax free, you can set up a tax group for children's clothes and assign it a 0% rate.
You can create tax groups whether you're managing tax manually or using the automatic method.
Learn more about creating tax groups with Avalara.
Learn more about creating tax groups using manual tax calculation.
Step 4 | Include tax in the price or add it at checkout
In some countries, such as the US, price tags show only the price of the item itself - the tax is added during checkout. In other countries, the price already includes tax.