


Setting up sales channels
Wix Stores: Adding and Setting Up Google Merchant Solutions
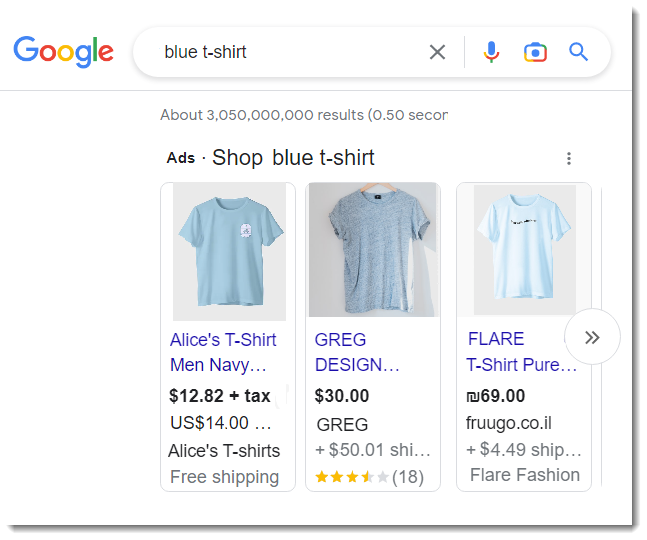
Expose your store products to relevant shoppers by displaying them in Google search results. When customers click, they're directed back to your shop to complete the sale.
Tip:
Eligible YouTubers can also connect their Wix store to their YouTube channel and start tagging and displaying products. Learn more about connecting your Wix store to YouTube.
Step 1 | Connect to a Google Merchant Center account
To get started, you need to connect to a Google Merchant Center account.
Before you begin:
If you previously created a Google Merchant account (even if it's for the same site), you must remove the old account and feeds before you can connect the new one.
To connect to a Google Merchant Center account:
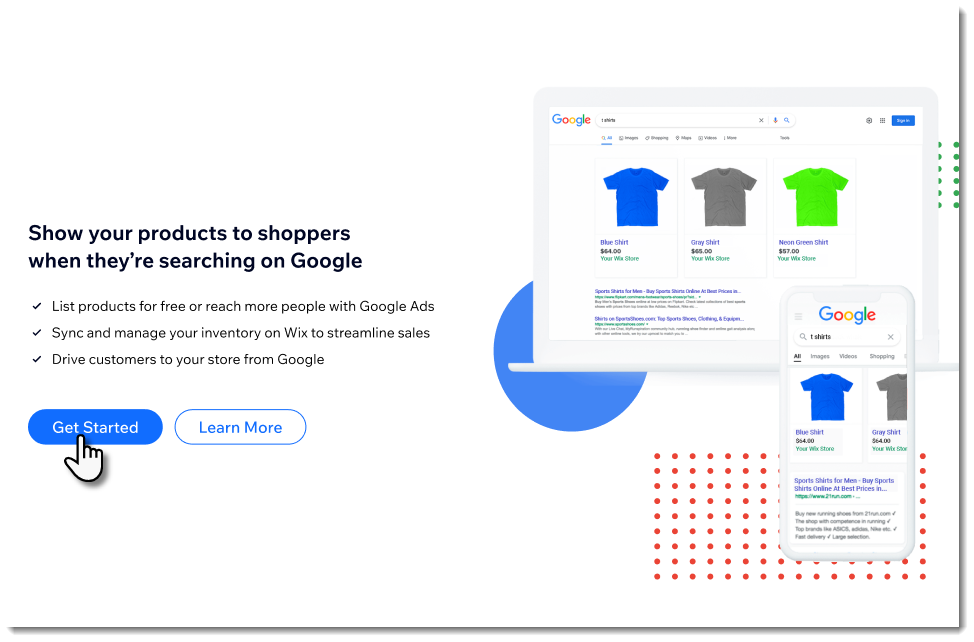
Go to Google Merchant Solutions in your site's dashboard.
Click Get Started.
Click Sign Up With Wix and complete the form to create a new account.
Click Allow.
Note: Your Google Merchant Center account is now connected to your Wix site.Click Continue.
Step 2 | Fulfill Google's basic requirements
Google has a series of requirements you need to meet before you can start selling on Google. After creating a Google Merchant Center account with Wix, you'll see a list including some or all of the items below. Before you can continue, you need to click each step and complete it.
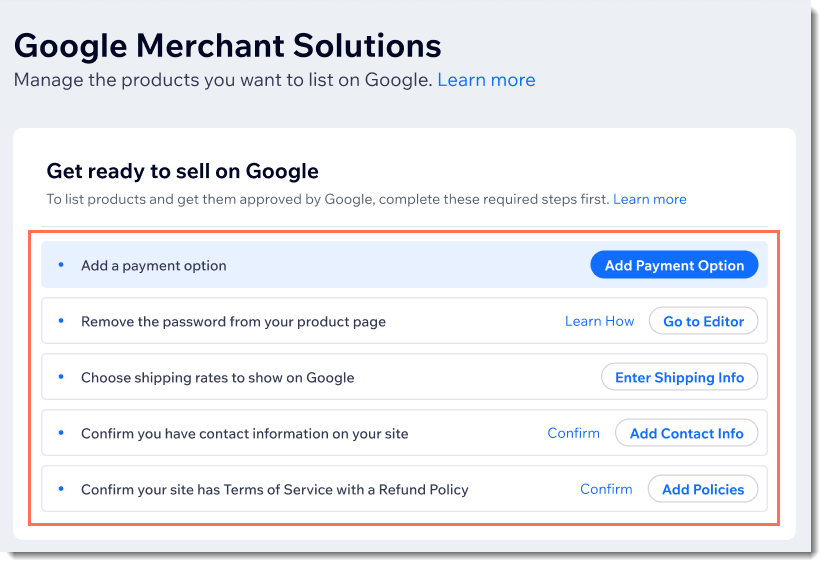
Click a step below to learn how to complete it.
Add a payment option
Click Add Payment Option to set up a provider that allows you to accept credit card payments.
Remove the password from the product page
Your store's Product Page cannot require a password to access it. Click Go to Editor to remove the password from your Product Page.
Choose shipping rates to show on Google
Customers who find your products on Google go to your store to complete the purchase. Since this is the case, your regular store shipping rules apply to these sales.
However, to help Google decide what shipping info to display and which shoppers should see your ads, you need to click Enter Shipping Info. There, enter shipping information for Google Merchant Solutions.
Confirm you have contact information on your site
If you haven't done so already, click Add Contact Info and make sure you clearly display at least 2 of the following on your site:
Your phone number
Your email address
Your physical address
Important: You need to come back and click Confirm when you're done.
Confirm your site has Terms of Service with a Refund Policy
If you haven't done so already, click Add Policies to create a Terms of Service agreement and a refund policy.
Learn how to add store policies.
To learn more about how to write terms of service for your business, click here.
Important: You need to come back and click Confirm when you're done.
Step 3 | Match your terminology to Google's terminology
Google aims to connect shoppers with the products they're searching for. To do so, Google uses attributes to understand what merchants are selling.
For example, Google needs to know that the t-shirt you're selling is blue and for men, so they can display it to a shopper that searches for "blue men's t-shirts".
To start, make sure the terminology you're using to describe product options in Wix aligns with the terminology Google uses for attributes.
To align terminology:
Go to Google Merchant Solutions in your site's dashboard.
Click the Settings icon
 at the top right.
Select the Product attributes tab.
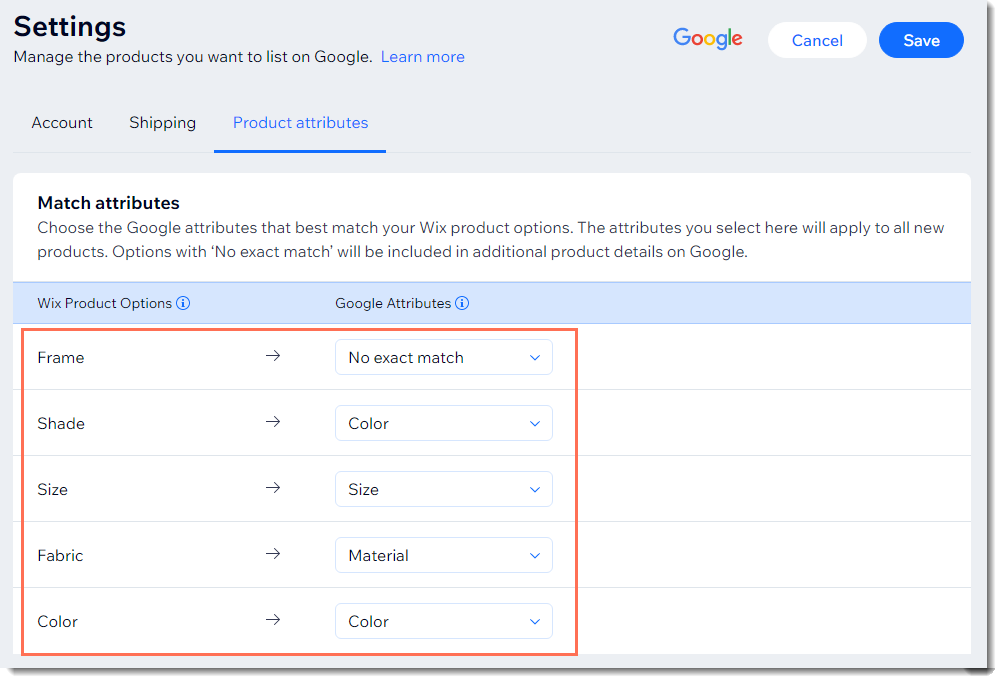
Match each of the terms you've used to label your product options to a Google Attribute from the drop-down.
Tips:
Sometimes a match is automatically suggested. In the example below, "Shade" was automatically matched to "Color". You can override these selections.
If your option doesn't match any Google's attribute, select No exact match.
Step 4 | Prepare your products
Now you can prepare each of your products so they are ready to be listed. This involves updating the overview and adding attributes (e.g. material, age group) that help Google display your products to relevant shoppers.
To prepare products and list them on Google:
Go to Google Merchant Solutions in your site's dashboard.
Click to select the first product.
Add or update any of the following if you are prompted to do so:Product image: Go to Products in your Wix dashboard and upload at least 1 image of a minimum of 100 x 100 pixels for non-apparel products and 250 x 250 pixels for apparel products. Learn more about Google requirements for images.
Product description: Go to Products in your Wix dashboard and enter a description of at least 500 characters. Learn more about Google requirements for product descriptions.
Select an option from the Condition drop-down.
(Optional) Select the This product is for adults only checkbox, if your product contains adult content.
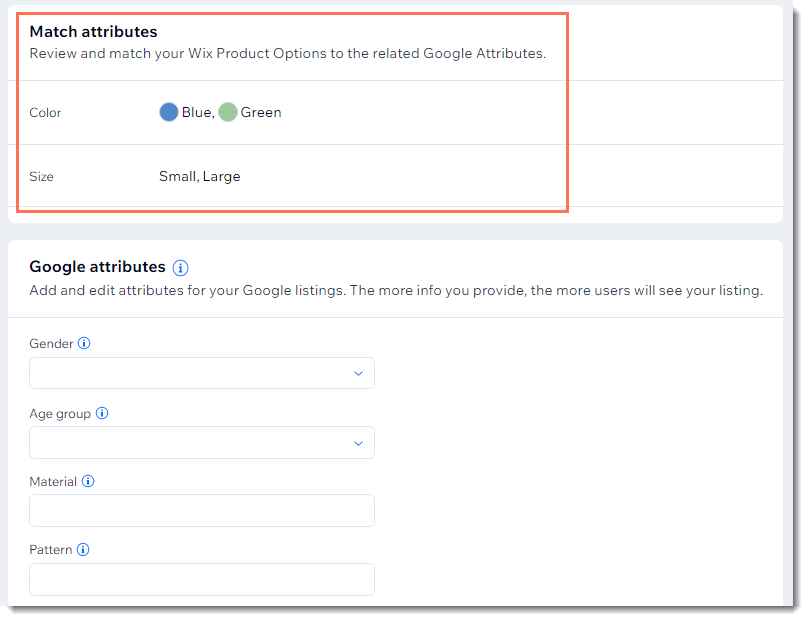
Add Google attributes:
Tip: Read Google guidelines for each attribute. Make sure to checkout the minimum requirements for each so the product doesn't get rejected by Google.Color: Learn why to add Google's color attributes.
Size: Learn how to add Google size attributes.
Gender Learn how to add Google's gender attributes.
Age group: Learn how to add Google's age group attributes.
Material: Learn how to add Google's material attributes.
Pattern: Learn how to add Google's pattern attributes.
(Recommended) Enter a GTIN, ISBN, or UPC code if your product has one:Select the This product has a GTIN, ISBN or UPC Code checkbox.
Enter your code.
Click Save.
Tip:
If your product has product options, you'll see them at the top of the attributes section.
Step 5 | List your products on Google
When your products are ready, you can list them on Google. They are then reviewed by Google. This usually happens quickly but can take up to 3 days.
Tip:
You can list up to 100 products at a time.
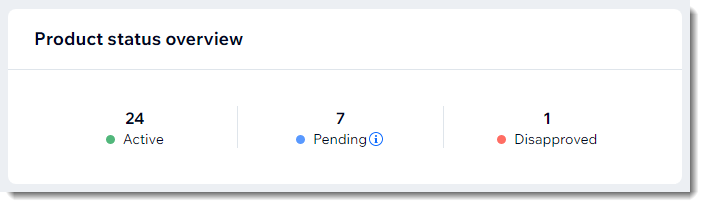
You can see an overview of the status of your products at the top of the page. Products you listed but haven't yet been reviewed are pending. Active products are those that appear on Google.
To list product on Google:
Go to Google Merchant Solutions in your site's dashboard.
Select what you want to list:
All products:Select the checkbox at the top left to select all products.
Click List Products.
Multiple products at once:Select the checkbox next to the products you want to list.
Click List Products.
One product at a time:Click the More Actions icon next to the relevant product.
Click List on Google.
Tips:
You can also list a product as soon as you finish updating it by selecting Save & List instead of Save.
Learn about shopping content that Google doesn't support and the types of products that are prohibited by Google.
Automatic product improvements are automatically enabled. These reduce the chances of products being rejected due to image watermarks or products with variants at different prices. To turn off automatic product improvements, click the Settings icon
, scroll down, and click the Automatic product improvements toggle to disable it.
Step 6 | Update products Google hasn't approved
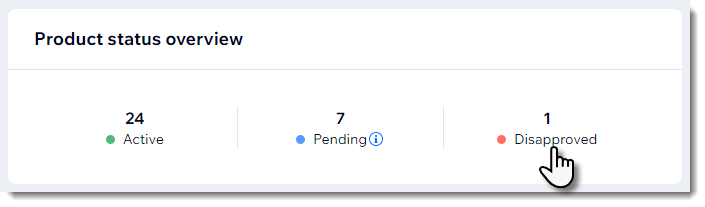
Products that Google hasn't approved and listed can be accessed by clicking Disapproved.
Check to see why these products weren't approved. If these problems can be fixed, update your settings and list the product again.
Step 7 | (Optional) Accessing the Google Merchant Center
Now that you've completed setup, you can manage your Google Merchant Account right in your Wix dashboard. However, if you want to access the Google Merchant Center directly to take advantage of some more advanced capabilities (e.g. advanced shipping settings, connecting to a standalone Google Ads account), you can do so by adding your Gmail account.
To add your Gmail account:
Go to Google Merchant Solutions in your site's dashboard.
Click the Settings icon
at the top right.Click Add Google Account.
Follow the instructions to add your Gmail address.