


Using the Wix app for Wix Stores
Wix Stores: Managing Your Orders from the Wix App
Process your store orders directly from your phone using the Wix app. You can add tracking numbers, mark an order as fulfilled or paid, contact your customers, and more.
In this article, learn more about:
Accessing your orders
View and manage all your store orders directly from your mobile using the Wix app.
To access your orders:
Go to your site in the Wix app.
Tap Manage
 at the bottom.
Tap Orders under Sales.
(Optional) Use the search function to find a specific order using the customer's name or order number, or tap the Filter icon
 to view specific order types (e.g. unfulfilled orders).
Need to contact a customer?
Tap the Message or Call icons next to a customer's name on an order to contact them directly.
Marking an order as "Paid" or "Fulfilled"
Mark an order as "Paid" (for manual payments and eChecks) or "Fulfilled" (shipped and completed).
To mark an order as "Paid" or "Fulfilled":
Go to your site in the Wix app.
Tap Manage
at the bottom.Tap Orders under Sales.
Tap the relevant order.
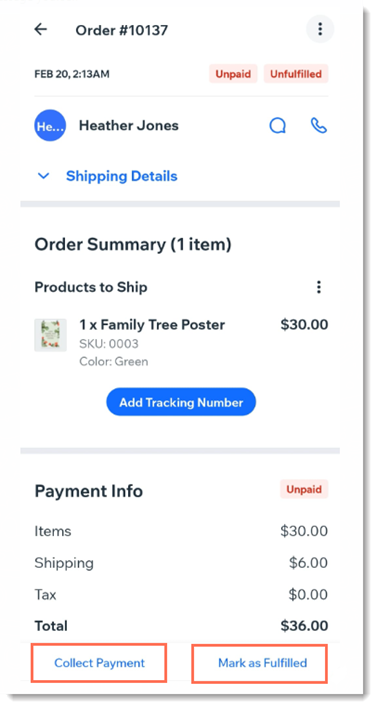
Do any of the following:Collect payment: Select a payment method. Learn more
Mark order as paid: Tap Collect Payment and select Mark as Paid.
Mark order as Fulfilled: Tap Mark as Fulfilled at the bottom.
Fulfilling dropshipping orders:
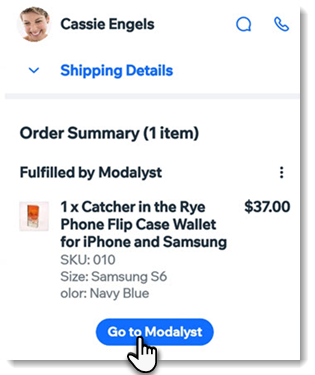
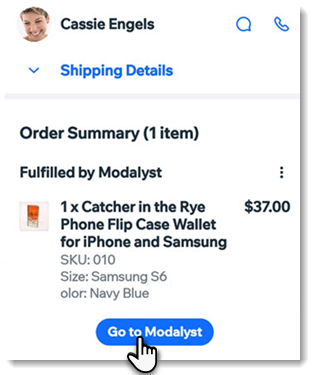
To fulfill a dropshipping order, click Go to dropshipper button (the actual button displays the name of your dropshipper) and then pay the supplier. Learn more about fulfilling products from: Modalyst, Printful, Printify, Spocket.
Adding tracking numbers
If you have more than one item you need to ship, you can ship them together and add a single tracking number. Alternatively, you can ship items separately and add a different tracking number to each shipment.
To add tracking number(s) to products you need to ship:
Go to your site in the Wix app.
Tap Manage
at the bottom.Tap Orders under Sales.
Tap the relevant order.
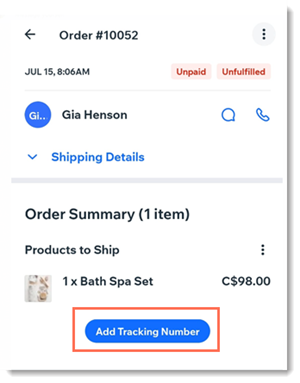
Tap Add Tracking Number at the bottom of the Product to Ship section.
If you have more than 1 product to ship, select how the tracking number is applied:To all items
To some items
Scan the barcode or manually type the tracking number and select the carrier.
Follow steps 5-7 to add a different tracking number to one or more additional items.
Tracking numbers on dropshipping items:
Dropshipping items are fulfilled by the dropshippers and tracking numbers are added by them. You can manually add tracking numbers to dropshipping orders by tapping the More Actions icon  next to the product and tapping Add Tracking Number.
Printing packing slips
Connect your mobile device to a printer and print packing slips directly from the Wix app.
To print a packing slip:
Go to your site in the Wix app.
Tap Manage
at the bottom.Tap Orders under Sales.
Tap the relevant order.
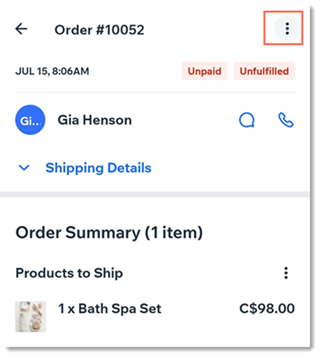
Tap the More Actions icon
 at the top right.
Tap Print packing slip.
Additional options
From the Wix app, you can also cancel orders, issue refunds, send shipping confirmation, print orders and more.
The available options vary according to the status of the order. For example, if an order has not yet been fulfilled, you can cancel it. However, if it was paid and fulfilled, you'll have the option of issuing a refund.
To see additional options for your orders:
Go to your site in the Wix app.
Tap Manage
at the bottom.Tap Orders under Sales.
Tap the relevant order.
Tap the More Actions icon
 at the top right.
Tap an option.
Updating multiple orders at once
You can save time by selecting multiple orders and making changes to them at the same time.
To update multiple orders:
Go to your site in the Wix app.
Tap Manage
at the bottom.Tap Orders under Sales.
Tap and briefly hold each order you want to select.
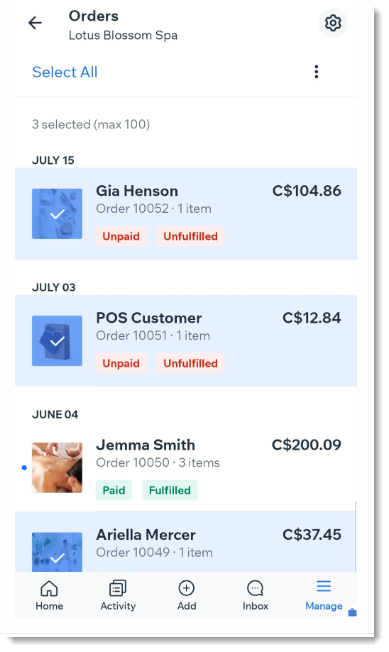
Tap the More Actions icon
 at the top right.
Select any of the available options.