top of page

Setting up shipping & fulfillment

Wix Stores: Integrating with Envia

Important:

To print shipping labels, you must first enter your business's address in the Business Info page. Learn how

Envia is a third-party app that integrates with Wix Stores so you can create domestic and international shipping labels with reliable couriers - all at a great price.
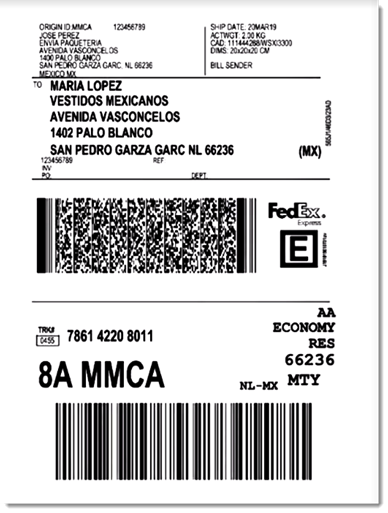
Sample shipping label created through Envia

Choose from a wide variety of shipping carriers, including:

  • FedEx

  • DHL

  • iVoy

  • Redpack

  • UPS

  • Sendex

  • Carssa

  • Paquete Express

  • 99 Minutos

  • Quiken

Notes:

  • Envia is currently available for stores located in the US, Mexico, Colombia, Spain, Brazil, Argentina, Chile, Guatemala, Canada, India, and Australia.

  • Envia is free to use. You pay only for the shipping labels you purchase.

  • You can connect one Wix store to one Envia account.

To integrate with Envia:

  1. Click here to access the app.

  2. Click Add to Site.

  3. Click Agree & Add.

  4. Click Continue.

  5. Enter your email address and click Continue.
    Note: You will be logged into your existing account or a new one will be created.

  6. For new accounts: Fill in the required information and click Continue.

  7. Select an address from the Saved addresses drop-down or complete the fields to add a new one.
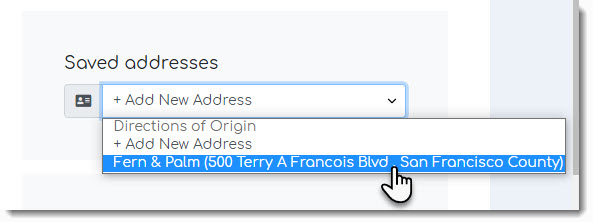
Screenshot of the address list drop-down in the Envia dashboard

  1. Click See Orders.

After integration, new Wix store orders appear in the Envia dashboard every time you make a sale. In the Envia dashboard you can manage your shipments, printing labels and track orders.

When a shipping label is created, the order in your Wix dashboard is updated so that the order status changes to "Fulfilled" and the tracking number is added.

To learn more, check out the Envia help center.

Need A Professional Website?
Contact Us 
Today!

Receiving Your Payouts from Wix Payments

Wix Payments: Receiving Your First Payout

Wix Payments: Viewing Your Payouts

Managing Business Owners in Wix Payments

Wix Payments: Updating Your Account Settings

Wix Payments: Understanding the Status of Your Account

Wix Payments: Accessing Your Account Dashboard

Wix Payments: Troubleshooting Site Access Issues

Wix Payments: Adding Klarna as a Payment Method

Wix Payments: Adding Affirm as a Payment Method

Wix Payments: Adding Afterpay as a Payment Method

Wix Payments: Assigning Payments Roles

Wix Payments: Adding Tap to Pay on Mobile as a Payment Method

Wix Payments: Adding Google Pay as a Payment Method

Wix Payments: Enabling Point of Sale (POS)

Wix Payments: Adding Apple Pay as a Payment Method

Wix Payments Terms of Service

Wix Payments: Service Fees

Customizing Your Wix Payments Statement Descriptor

Wix Payments: Ensuring Your Business is Ready for Sales

Best Practices for Merchants Using Wix Payments

Wix Payments: Prohibited Products and Services

Wix Payments: Guidelines for Uploading Documentation

Wix Payments: Verifying Your Employer Identification Number (EIN)

Adding Business Owners to Your Wix Payments Account

Wix Payments: The Difference Between Account Types

Wix Payments Verification Process

Completing Your Wix Payments Account Setup

Switching to Wix Payments

Wix Payments: Creating an Account

wix experts
Graphic2Traffic web design
©
bottom of page