


Promoting stores sales
Wix Stores: Creating a Promotional Video for a Product in Your Store
Select a product and let Wix automatically create a promotional video about it in just a few clicks. If you want to make your own customizations, you can change the music, adjust the colors, and more.

Creating and customizing a promo video
Go to Store Products in your site's dashboard.
Click the relevant product.
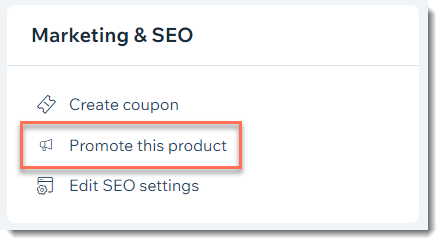
Click Promote this product on the right.
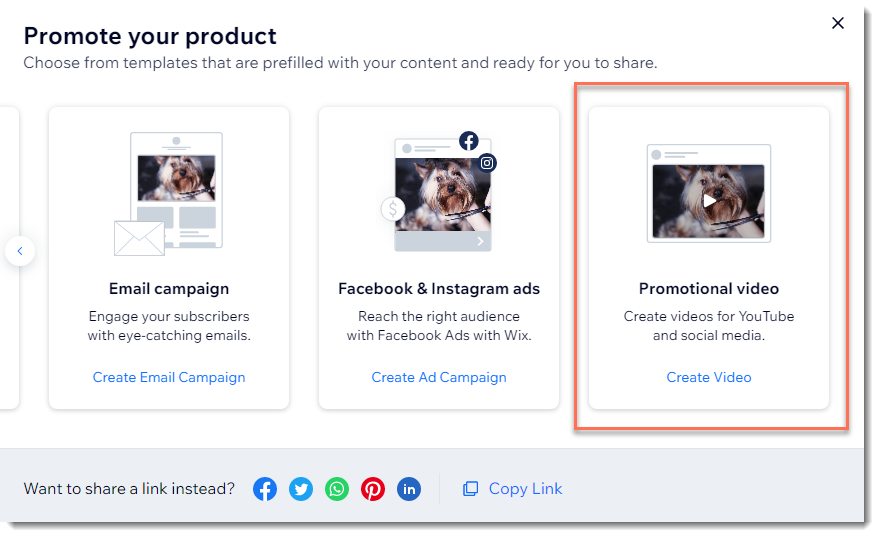
Click the right arrow and select Promotional Video.
Do one of the following:
Save a video as is:Preview the video or videos created for you and click to select the video you want to save.
Click Save & Share.
Customize the video:Preview the video or videos created for you.
Click Customize Video.
Customize the video content:Click the Plus icon add additional media.
Product Name: Edit the name of the product.
Business Name: Add the name of your business.
Price: Edit the price that you want to display.
Call to Action: Add a text to drive potential customers back to your store.
Click Next.
Customize the video design:Video Style: Select the look and feel of your video.
Layout: Select horizontal, vertical, or square.
Main Color: Pick the primary color for the text and graphic elements in your video.
Secondary Color: Pick a secondary color for the text and graphic elements in your video.
Font Style: Pick a font that reflects your product and brand.
Click Next.
Customize the background music:(Optional) Click the Music On toggle on the right to disable the background music.
Click Play to preview a track.
Click the track that you want to use to select it.
Click Next.
(Optional) Display business info at the end of the video:Click the Include info at the end of this video toggle to enable it.
Upload your business logo.
Enter the business info you want to display.
Click Apply & Preview to view your video.
Click Back to Editing to make more changes or Save & Share to save a high definition version of your video.
(Optional) To share your video on social media or download your video, click Upload / Download under the relevant option.
FAQs
How many videos can I create for free?
There is no limit to the number of videos you can create free of charge.
How can I share my video when it's done?
After you save your video, select any of these options:
Add the video to the Product Page
Post to Facebook
Note: You can upload videos to a Facebook Business Page, not your personal profile.Upload to YouTube
Download to your computer

How can I display my promotional video on a site page?
Go to the relevant site page.
Click Add
 on the left side of the Editor.
Click Video & Music.
Drag the Single Video Player to the relevant site page.
Click Change Video.
Click Change Video again.
Select the promotional video from the Video Maker file.
Click Add to Page.
Where can I find the videos I created?
Your videos are located in your Media Manager. To access them, click Media  on the left side of the Editor.

Can I make video about something other than a single store product?
Yes. With Wix Video Maker, you can create a variety of promotional videos.