


Setting up Retail POS sales
Wix Retail POS: Managing Discounts
Important:
This article is about Wix Retail POS tablet for brick & mortar businesses.
For info on using POS on a mobile device, click here.
You can offer customers a price discount (e.g. $10 off) or a percentage discount (e.g. 20% off) on any sale.
Alternatively, you can create a discount with variable amounts. For example, you can create a discount called "Employee discount" and enter the percentage discount during checkout.
Creating a saved discount
Save your most popular discounts so you do not have to recreate them each time.
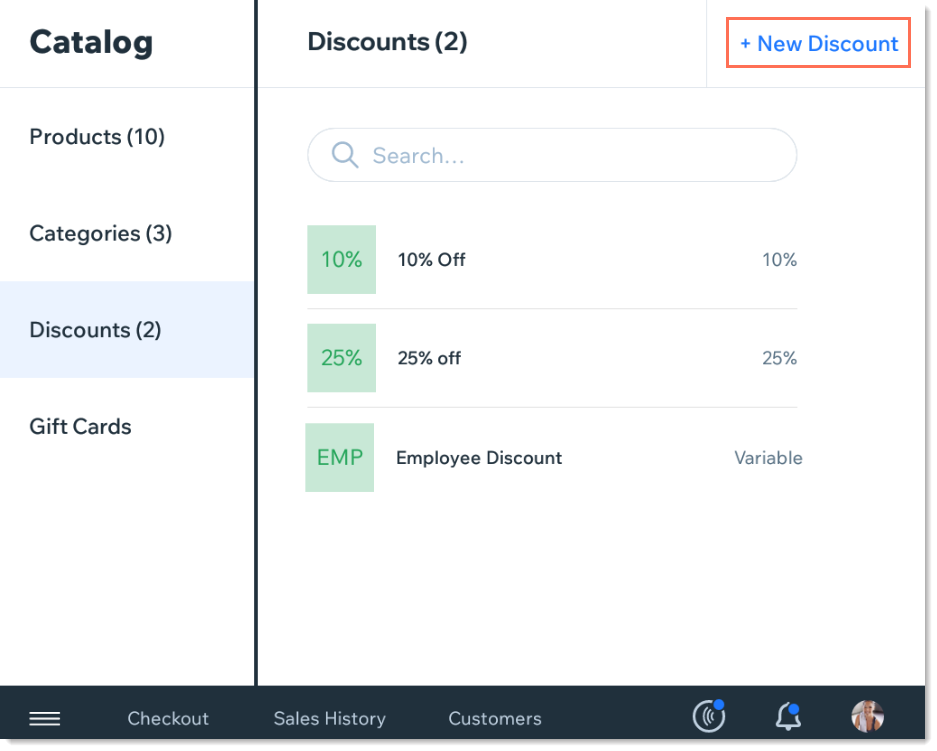
To create a saved discount:
Open the POS tablet.
Tap the Menu icon
 at the bottom left.
Tap Catalog.
Select Discounts.
Tap +New Discount.
Enter a name for your discount (e.g. First Time Customer, 10% Off)
Choose your discount type.Price discount: Tap the Dollar icon $.
Percentage discount: Tap the Percentage icon %.
Enter an amount or leave the amount open:Enter a fixed amount: Enter the percent (e.g. 20%) or the price discount (e.g. $20).
Leave the amount open and enter during checkout: Tap the Enter the amount during checkout toggle to enable it.
Tap Save at the top right.
Adding a discount to the Favorites screen
Add your most popular discounts to the Favorites screen for easy access.
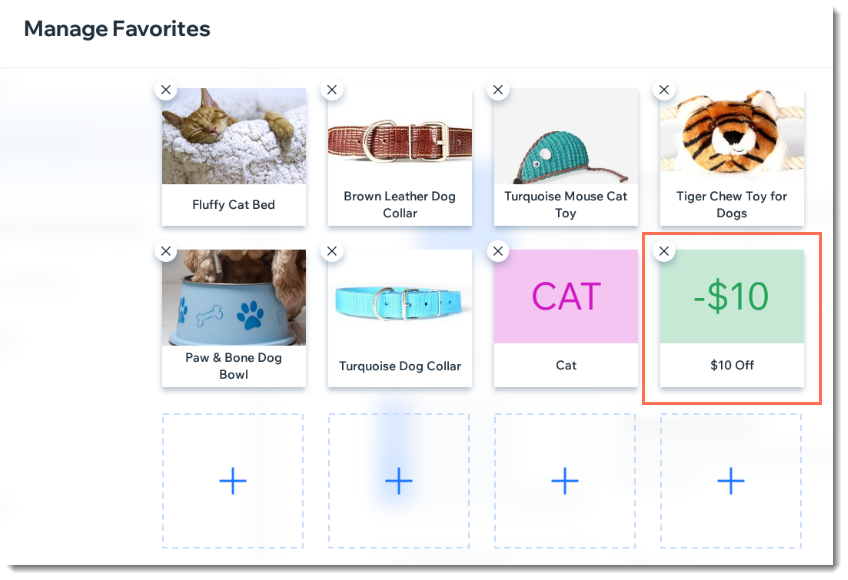
To add a discount to your Favorites:
Open the POS tablet.
Tap the Menu icon
at the bottom left.Tap Settings.
Tap Manage next to Favorites.
Tap a Plus icon
 .
.Select Discounts.
Select the discount you want to add to your favorites.
Adding a discount to a sale
You can enter any discount price or percentage you want to a sale. You can also apply an existing discount that you have saved.
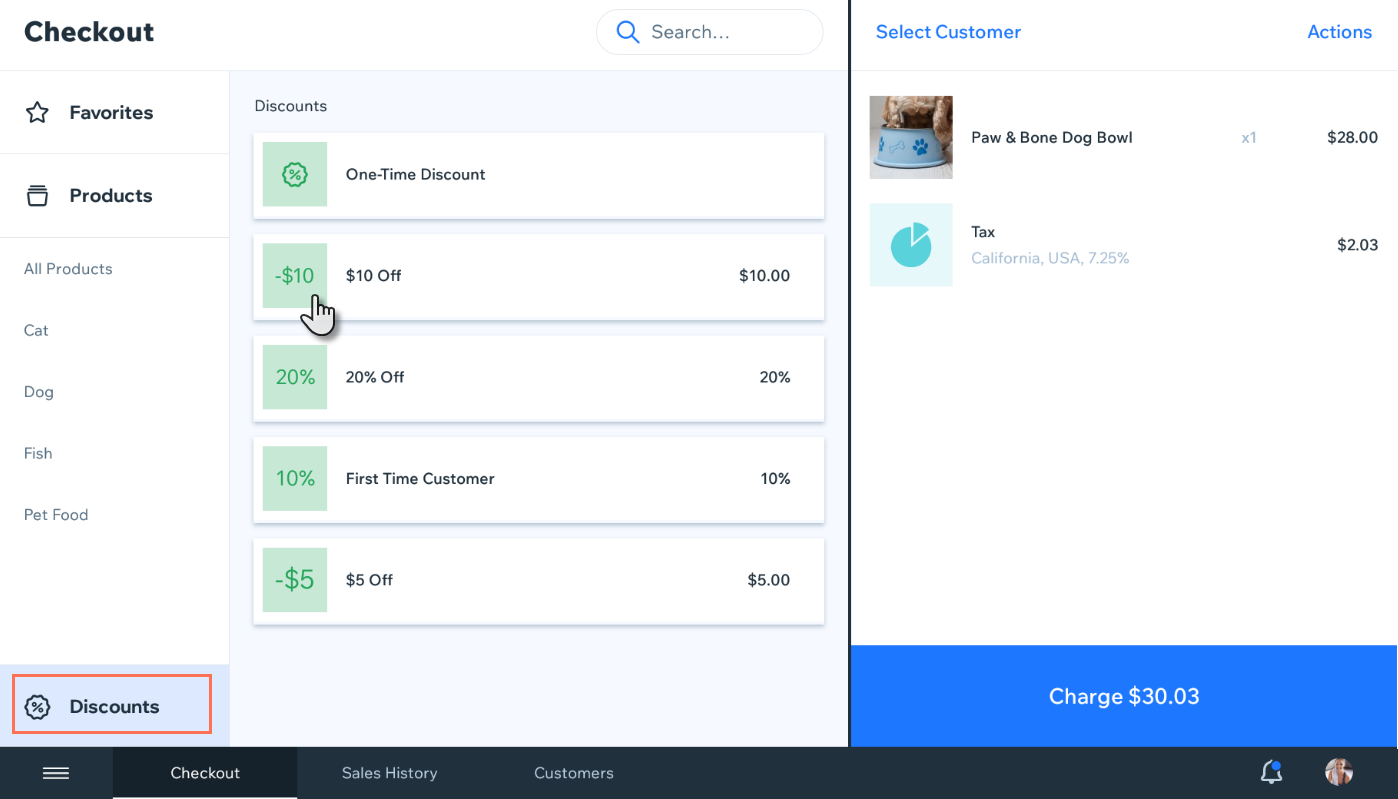
To add a discount to a sale:
Open the POS tablet.
Tap Checkout on the bottom bar.
Add products to the sale.
Select how you want to add a discount:
Add a one-time discount
Tap Discounts on the bottom left.
Select One-Time Discount.
Choose your discount type:Price discount: Enter the amount and tap the Dollar icon $.
Percentage discount: Enter the percentage and tap the Percent icon %.
(Optional) Enter a description.
Tap Add.
Select a saved discount from the Discounts tab
Tap Discounts on the bottom left.
Tap the saved discount you want to add to the sale.

If you selected a variable discount (one without a fixed amount), enter the percentage or price and tap Add.
Select a saved discount from your Favorites
Tap Favorites on the left.
Tap the discount you want to add to the sale.

Removing a discount from a sale
You can remove a discount by swiping left and tapping Remove.
To remove a discount:
Open the POS tablet.
Tap Checkout on the bottom bar.
Swipe left on the discount you want to remove.
Tap Remove.