


Taking online orders (NEW)
Wix Restaurants: Creating a Coupon
Important:
This article is about the new Wix Restaurants Orders app.
Attract customers and promote brand loyalty by offering a price discount coupon, e.g. $5 off. You control exactly what the coupon can be applied to – all menu items or only a specific section or menu.

In this article, learn more about:
Creating a coupon
You can create a new coupon directly from your site's dashboard. Choose the discount amount, set dates when the coupon is valid, and decide which menu item it applies to.

To create a coupon:
Go to Coupons in your site's dashboard.
Click + New Coupon.
Select a Discount type:Price - Reduce a fixed amount from items.
Percent - Reduce percent from items price.
Buy X get Y free - Create a sale like "Buy 3 drinks, get the 4th for free".
Enter the Coupon code customers need to enter.
Enter the Coupon name.
To create a price discount coupon
Enter the discount amount.
Decide which menus, sections or items it applies to, or decide on a minimum order subtotal. If you chose a specific item, section or menu, select which items get the discount.
Set when the coupon is valid:Enter the start date.
Enter the end date, or select the Don't set an end date checkbox.
(Optional) Select if you want to Limit the total number of uses for this coupon: Enter the total number of times the coupon can be used.
Click Create Coupon.
To create a percent coupon
Enter the discount percentage.
Decide which menus, sections or items it applies to, or decide on a minimum order subtotal. If you chose a specific item, section or menu, select which items get the discount.
Set when the coupon is valid:Enter the start date.
Enter the end date, or select the Don't set an end date checkbox.
(Optional) Select if you want to Limit the total number of uses for this coupon: Enter the total number of times the coupon can be used.
Click Create Coupon.
To create a buy X get Y free coupon
Set up the coupon offer:Buy: Enter the number of products customers must purchase to get free product(s).
Get: Enter the number of products customers gets free.
Select an option from the Apply to drop-down:All menu items
Specific menu
Specific menu section
Specific menu item
Set when the coupon is valid:Enter the start date.
Enter the end date, or select the Don't set an end date checkbox.
(Optional) Select limitations:Limit the total number of uses for this coupon.
Limit to one use per customer.
Click Create Coupon.
Note: This coupon does not require a minimum order amount.

FAQs
Click a question below to learn more about coupons.
What happens if the discount is more than the item price?
If you create a $10 discount coupon and a customer applies it to an $8 item, that item will be free. You need to make sure that you apply the price discount coupon only to items that cost more than the value of the discount.
How can I disable a coupon?
You have two options for managing coupons: You can either delete them permanently from the list, requiring you to recreate the same coupon if needed in the future, or you can deactivate them, allowing you to enable them again later by toggling the switch.
Go to Coupons in your site's dashboard.
Click the More Actions icon
 next to the relevant coupon.
Select Delete or Deactivate.
Are coupon codes case sensitive?
No, coupon codes are not case sensitive. Customers can enter your codes without using the same case.
Does the number of available coupons update in offline manual payments?
If you limited your coupon use to a set number (for example: Available for the first 100 shoppers), every time a coupon is used, it's counted.
When a customer pays you manually offline, the coupon count is updated once you mark the order as paid.
How can I promote or share my coupon?
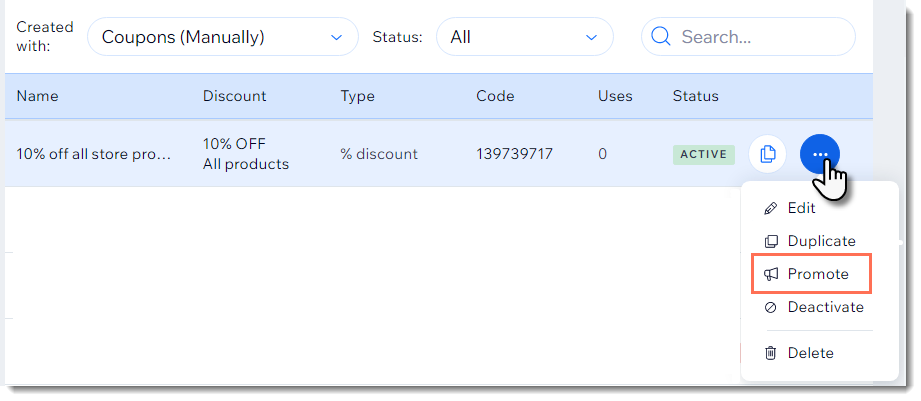
Use the Promote link to easily create an email marketing campaign or social post for any of your coupons.
To promote your coupon:
Go to Coupons in your site's dashboard.
Click the More Actions icon
next to the relevant coupon.Select Promote.
Select a promotion option:Create an email campaign.
Create a social post.
Can I create a coupon with unique coupon codes for each use?
Yes. You can use the Bulk Coupon Creator app to generate up to 1000 unique codes per coupon.