top of page

Setting up Photo Albums

Wix Photo Albums: Creating a Favorites List for Clients (Proofing)

You can use Wix Photo Album's proofing feature to let your clients and album visitors create lists of their favorite photos.

It also allows your clients to comment and specify any special instructions they have for the photos. For example, they can let you know how many copies they'd like, or if they'd like a particular photo in black and white.

Important:

Favorites lists are only available for new albums. They are not available for albums that you created in the past.

To create and share a list:

You can create a new favorites list and share it with your clients from Photo Albums in your site's dashboard.

  1. Go to Photo Albums in your site's dashboard.

  2. Create a new album. Learn how to create an album

  3. Click Publish Now.

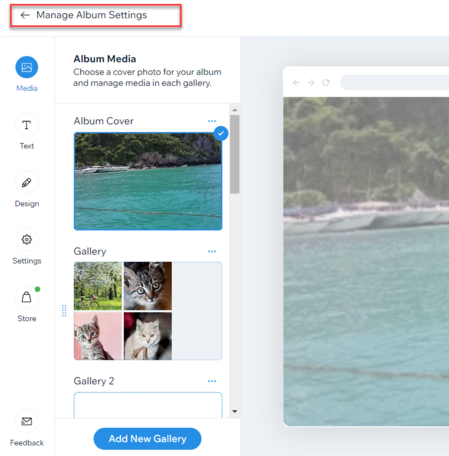
  4. Click Manage Album Settings.

A screenshot of a photo album in edit mode, with the Manage Album setting button highlighted.

  1. Click Get Started under Favorites lists on the right.

  2. Click +Create List.

  3. Add a name for your list.

  4. (Optional) Add instructions or additional information for your clients under Add a note.

  5. Select who can access your list under Privacy settings.Public: Anyone that can view your album can view this list.
    Secret: Only people with the link can access the list.

A screenshot of the edit favorite lists setting panel showing how to edit the list name and change privacy settings.

  1. Click Save.

  2. Choose how you want to share the link, or tap View List to see what it looks like.Copy link: Copy the link and send it to your client.
    Email: Send the link via email.
    WhatsApp: Send the link via WhatsApp.

Tip:

After you've created your list, you can view it on your live site, download the photos that your clients select, update your list's information, and manage your list's members. Learn more about managing your favorites list.

Need A Professional Website?
Contact Us 
Today!

Receiving Your Payouts from Wix Payments

Wix Payments: Receiving Your First Payout

Wix Payments: Viewing Your Payouts

Managing Business Owners in Wix Payments

Wix Payments: Updating Your Account Settings

Wix Payments: Understanding the Status of Your Account

Wix Payments: Accessing Your Account Dashboard

Wix Payments: Troubleshooting Site Access Issues

Wix Payments: Adding Klarna as a Payment Method

Wix Payments: Adding Affirm as a Payment Method

Wix Payments: Adding Afterpay as a Payment Method

Wix Payments: Assigning Payments Roles

Wix Payments: Adding Tap to Pay on Mobile as a Payment Method

Wix Payments: Adding Google Pay as a Payment Method

Wix Payments: Enabling Point of Sale (POS)

Wix Payments: Adding Apple Pay as a Payment Method

Wix Payments Terms of Service

Wix Payments: Service Fees

Customizing Your Wix Payments Statement Descriptor

Wix Payments: Ensuring Your Business is Ready for Sales

Best Practices for Merchants Using Wix Payments

Wix Payments: Prohibited Products and Services

Wix Payments: Guidelines for Uploading Documentation

Wix Payments: Verifying Your Employer Identification Number (EIN)

Adding Business Owners to Your Wix Payments Account

Wix Payments: The Difference Between Account Types

Wix Payments Verification Process

Completing Your Wix Payments Account Setup

Switching to Wix Payments

Wix Payments: Creating an Account

wix experts
Graphic2Traffic web design
©
bottom of page