


Creating your event
Wix Events: Translating Your Event
Showcase your events to international guests by offering them in multiple languages. Once you have finished creating your event in your main language, use Wix Multilingual to translate it into more languages.
Before you begin:
Add Wix Events to your site and set it up (e.g. add events, create tickets, customize your registration form, etc.).
Add and set up Wix Multilingual. You can add Wix Multilingual from your editor, your site's dashboard, or from the Wix App Market.
Step 1 | Translate your Events page
Begin by translating your events pages from the multilingual dashboard.
To translate your Events page:
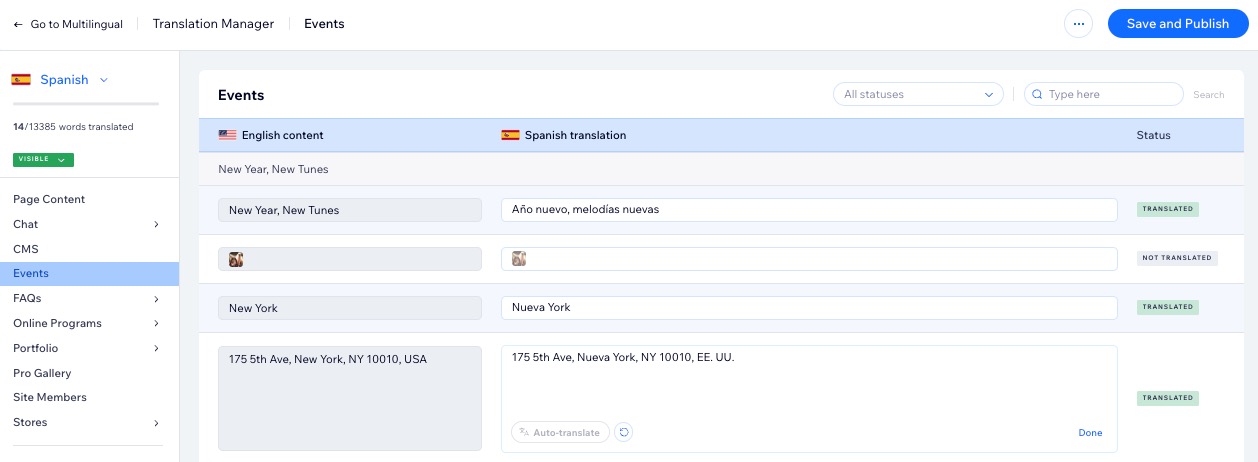
Go to Translation Manager in your site's dashboard.
Click Events on the left.
Choose the relevant option:If you auto-translated your site: Review the automated translations and edit if necessary.
If you didn't use auto-translation: Translate the custom fields and policies manually.
Click Save and Publish.
Step 2 | Translate your event's text elements in your editor
After translating your events via the multilingual dashboard (see step 1 above), you still have additional elements which need to be translated in your editor. By choosing which events you want to display on your site (between multiple events or a single event), you can edit the text fields displayed on your event list.
Some text may already be translated automatically. You can review it and make changes if needed.
Wix Editor
Studio Editor
Click the Switch languages drop-down menu at the top of the editor.
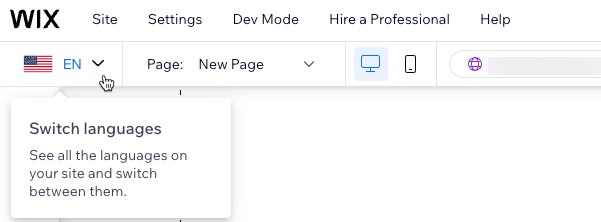
Select the language you want to edit.
Go to the Events page:Click Pages & Menu
 on the left side of the editor.
Click Event Pages.
Click your Events page.
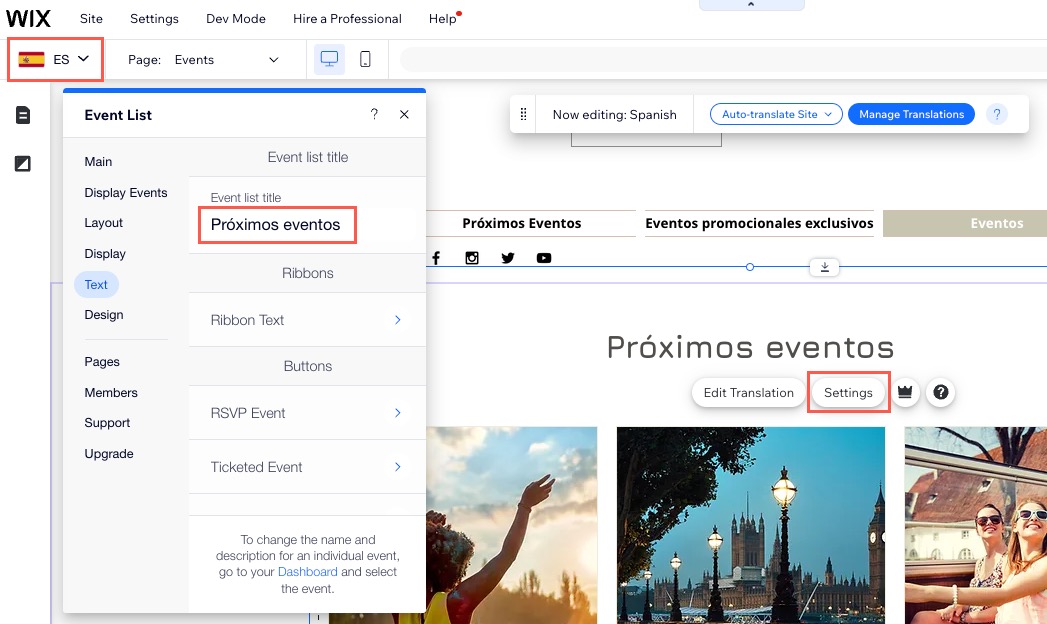
Click the Event List element on your page.
Click Settings.
Click the Text tab.
Update the relevant text as needed.
Step 3 | Translate your Event Details & Registration page
The Event Details & Registration page is an optional page for RSVP events. If you have enabled it, you'll need to translate it as well.
Note:
You can't disable this page for ticketed events.
Wix Editor
Studio Editor
Click the Switch languages drop-down menu at the top of the editor.
Select the relevant language.
Go to the Event Details & Registration page:Click Pages & Menu
on the left side of the editor.
Click Event Pages.
Click Event Details & Registration.
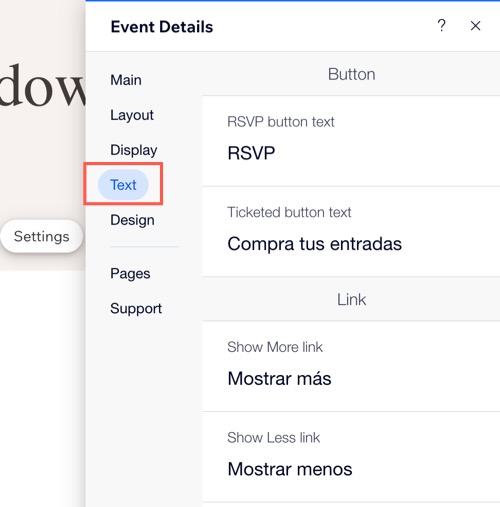
Click the Event Details element on your page.
Click Settings.
Click the Text tab.
Update the relevant text as needed.
Step 4 | Publish your site and test your event
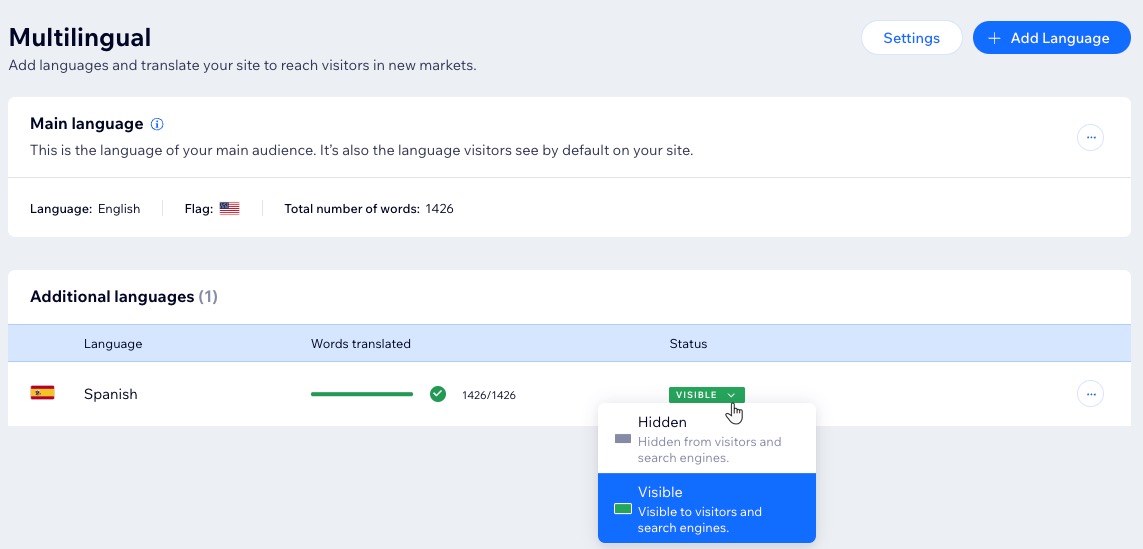
After you've finished translating your site in a particular language, including all parts of your event, you can unhide the language to make it accessible to site visitors.
Wix Editor
Studio Editor
Click the Switch languages drop-down menu at the top of the editor.
Click Manage Languages.
Click the Status drop-down next to the relevant language(s) and select Visible.
Go back to your editor, then click Publish.
Tip: It's a good idea to preview your site in each language to make sure the translation was successful for each one of your events.
What's next?
Continue translating the other pages in your site. We also recommend translating your automated emails into your site's languages. This allows you to speak to your audience in their language, offering a more local experience.
FAQs
Click a question below to learn more about translating your event with Wix Multilingual.
Is all text in the Wix Events app translatable?
Certain text in the Wix Events App is generated automatically and cannot be translated directly. However, in multilingual pages in the following languages, it translates automatically: Arabic, Bulgarian, Chinese (Traditional), Czech, Danish, Dutch, English, French, German, Greek, Hebrew, Hindi, Hungarian, Indonesian, Italian, Japanese, Korean, Malay, Norwegian, Polish, Portuguese, Romanian, Russian, Spanish, Swedish, Tagalog, Thai, and Turkish.
Can I translate my Events Schedule?
Currently, some text elements within the Events Schedule can be translated using Wix Multilingual through your editor.
However, not all text is currently translatable. If you'd like to see full translation capability as a future feature, you can vote for it here.
Can I create new events and edit existing ones after translating my site?
Yes. After you translate your site, you can still create new events as well as make changes to your existing ones.