Creating your event
Wix Events: Setting Registration Opening & Closing Times in Advance
Set the dates and times for when guests can RSVP or purchase tickets for an event. Scheduling the opening and closing of registration in advance is useful if you want to promote events well ahead of time but aren't ready to accept registrations yet.
Additionally, you may choose to close registration a few days before the event to allow sufficient time for preparation.

In this article, learn how to set registration dates for:
Setting registration dates for RSVP events
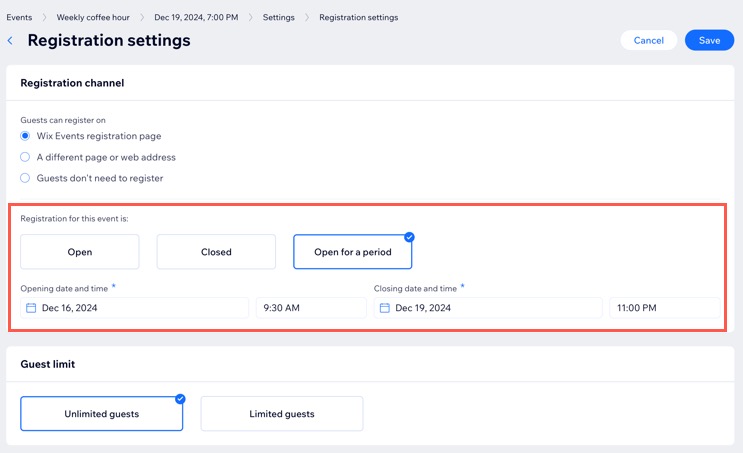
Manage when guests can register for your RSVP event by specifying custom registration periods, including start and end dates and times. This lets you determine the exact period during which registration is available, so it aligns with your event planning and preparation needs.
To set when registration opens and closes for an RSVP event:
Go to Events in your site's dashboard.
Click Manage next to the relevant event.
Click the Settings tab.
Click Edit next to Registration settings.
Click Open for a period under Registration for this event is.
Set an Opening / Closing date and time.
Click Save.
Setting registration dates for ticketed events
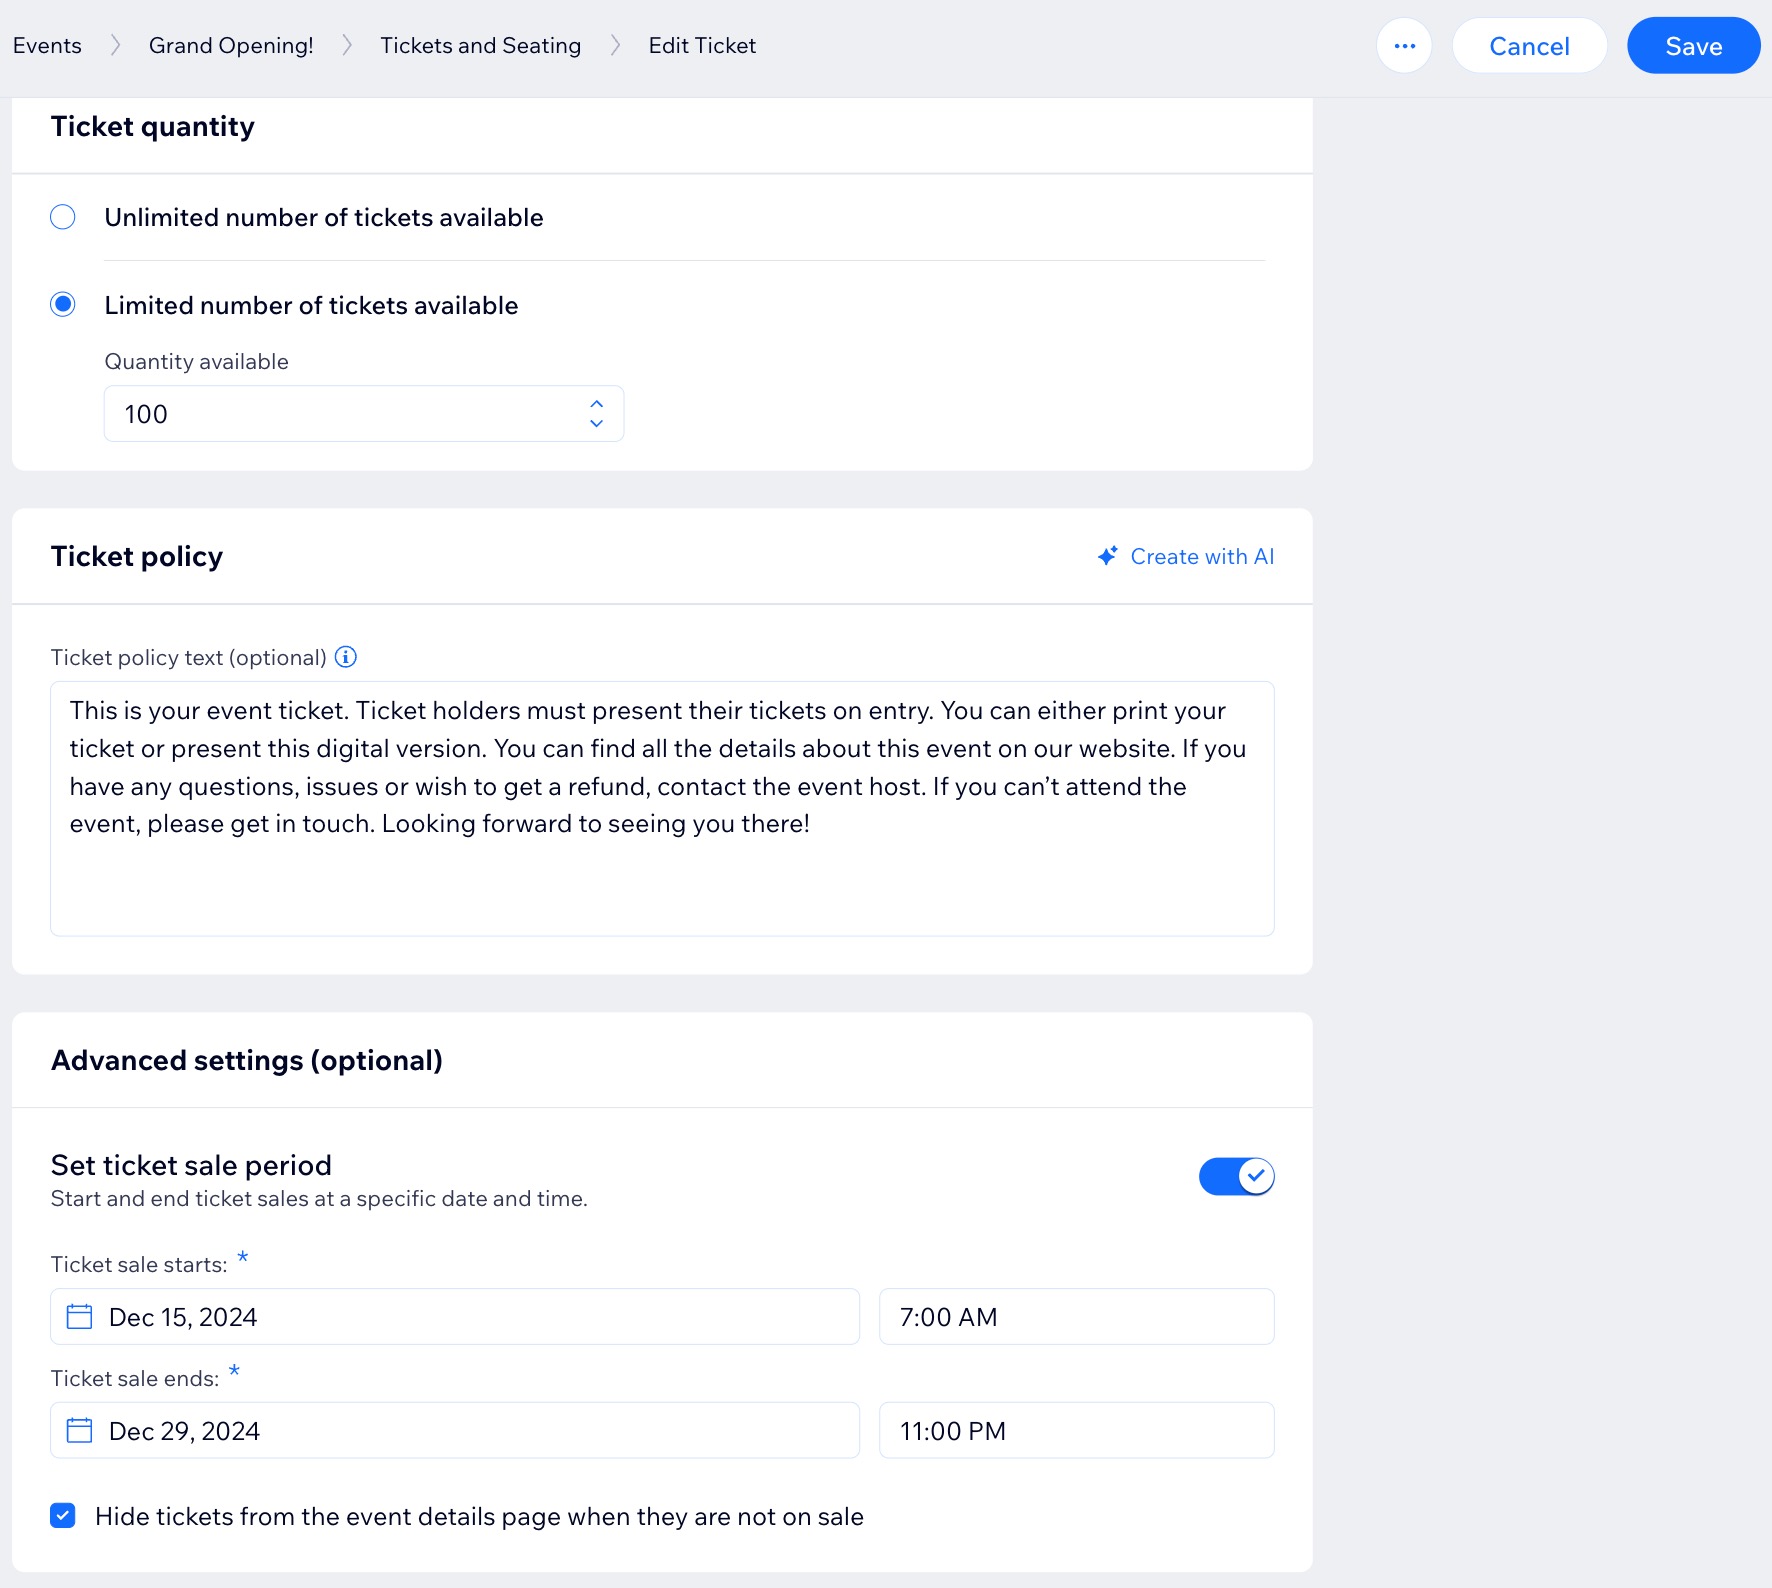
Create multiple ticket types for the same event (e.g. student tickets, regular tickets) and set specific opening and closing dates for registration for each ticket type individually.
To set when registration opens and closes for tickets:
Go to Events in your site's dashboard.
Click the Tickets and Seating tab.
Select a ticket or create a new one.
Scroll down to Advanced settings (optional) and click the Set ticket sale period toggle to enable it.
Set when your Ticket sale starts / ends.
Enter an end date and time.
(Optional) Select the Hide tickets from the event details page when they are not on sale checkbox.
Click Save.
Repeat steps 1-8 for any other ticket types.