


Designing Wix Events
Wix Events: Customizing the Event List Design
Display your events with eye-catching designs that entice site visitors to register. Your design options vary depending on whether you choose to display one event or multiple events.
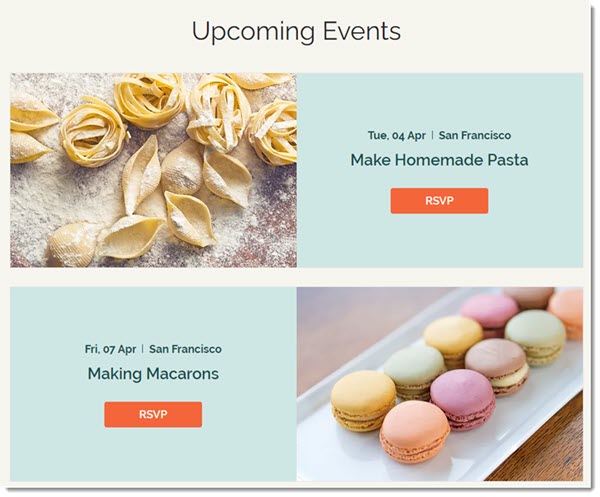
In this article, learn more about:
Important:
The available customization options depend on your selections in different tabs of the Settings panel.
Customizing the design for a single event
Customizing your event page helps attendees quickly understand the status, availability, and details of your event, creating a visually appealing and informative experience. From ribbons and other display elements, you can personalize the design to fit your event's needs.
Note:
Currently, customizing the layout for a single event is only available in the Wix Editor.
To customize a design for a single event:
Go to the Events page:Click Pages & Menu
 on the left side of the editor.
Click Event Pages.
Click your Events page.
Click the Event List element on your page.
Click Settings.
Choose what you want to customize:
Ribbons
Ribbons help event organizers and attendees quickly understand the status and availability of an event.
Click the Display tab.
Click Ribbons.
Click the relevant ribbon name and enable the Ribbon toggle:Sold Out Ribbon: All tickets for the event are sold out.
RSVP Closed Ribbon: Registration is closed.
Join Waitlist Ribbon: When an RSVP event has a waitlist.
Membership Ribbon: The event is exclusive to members only.
Multiple Dates Ribbon: The event occurs on multiple dates.

Tip: Click the Text tab to edit the text on the available ribbons.
General Info / Time and Location
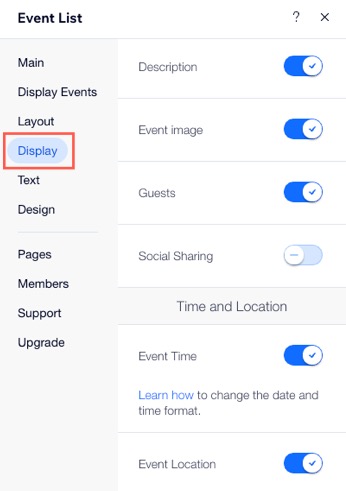
Click the Display tab.
Click the relevant toggle(s) to select which event details you want to show or hide:Countdown: The remaining time until the event starts.
Event Name: The title of the event.
Description: A brief teaser text that appears under the event title.
Event Image: A visual representation or photo associated with the event.
Guests: The avatars of people attending the event.
Social Sharing: Allow attendees to share your event on social media platforms.
Event Time: The specific date and time when the event will occur.
Event Location: The venue or place where the event will be held, displayed above the event title.
Design
When designing details for a single event, you can choose colors, font styles, and more to create a cohesive and visually appealing event page.
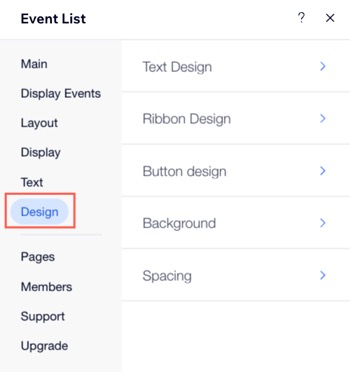
Click the Design tab.
Click the relevant design elements to customize the following:Text Design: Personalize the font style, size, color, and other text properties.
Ribbon Design: Draw attention to important aspects of the event such as:Membership Ribbon: Displayed when a ticketed event has memberships connected.
Multiple Dates Ribbon: Displayed when an event has multiple dates.
Button design: Customize the appearance of buttons, including their shape, color, and text.
Background: Customize the background color or image of the event page.
Spacing: Adjust the spacing between different elements on the event page to ensure a clean and organized layout.
Customizing the design for multiple-events
When choosing to display multiple events on a site page, you can customize different design elements.
For instance, you can choose a calendar layout to present events in a structured and chronological manner, providing visitors with an organized view of upcoming activities.
To customize the design for multiple events:
Wix Editor
Studio Editor
Go to the Events page:Click Pages & Menu
on the left side of the editor.
Click Event Pages.
Click your Events page.
Click the Event List element on your page.
Click Settings.
Choose what you want to customize:
Ribbons
Ribbons help event organizers and attendees quickly understand the status and availability of an event.
Click the Display tab.
Click Ribbons.
Click the relevant ribbon name and enable the Ribbon toggle:Sold Out Ribbon: All tickets for the event are sold out.
RSVP Closed Ribbon: Registration is closed.
Join Waitlist Ribbon: When an RSVP event has a waitlist.
Membership Ribbon: The event is exclusive to members only.
Multiple Dates Ribbon: The event occurs on multiple dates.
Event info
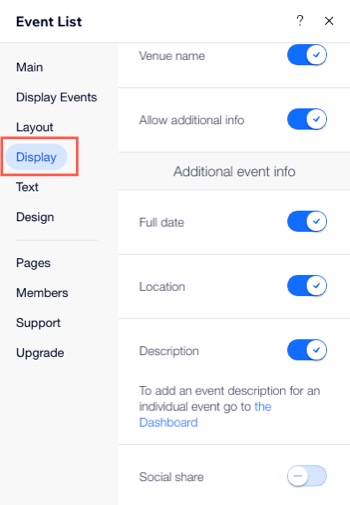
Click the Display tab.
Enable the relevant toggle(s) to select which elements you want to show or hide:Event list title: The heading or name of the event as it appears in a list format.
Event Image: A visual representation or photo associated with the event. Ribbons:
Date: The specific day(s) on which the event is scheduled to occur.
Guests: Individuals invited or attending the event.
Venue name: The name of the location where the event will take place.
Allow additional info: An option to add extra, relevant details to an event.
Full date: The exact date (day, month, year).
Location: The specific venue or place.
Description: A short summary or additional context.
Social share: Options to share the information on social media.
Design
When designing elements for a single event, you can choose colors, font styles, and more to create a cohesive and visually appealing event page.
Click the Design tab.
Click the relevant design elements to customize the following:Text Design: Personalize the font style, size, color, and other text properties
Ribbon Design: Draw attention to important aspects of the event.
Note: The Ribbons that appear on this tab depends on the ones you enabled from the Display tab.
Button Design: Customize the appearance of buttons, including their shape, color, and text.
Background: Customize the background color or image of the event page.
Hover:
Tip:
Go to the Text tab to edit the default button text for RSVP events, ticketed events, or events that require no registration.
Customize for mobile
To customize how your event list looks on mobile, click Switch to Mobile at the top of the Editor. There, you can click Wix Events and Settings to access mobile customization options.
Changes you make to the mobile design will not affect desktop.
To customize the design for mobile view:
Wix Editor
Studio Editor
Go to the Events page:Click Pages & Menu
on the left side of the editor.
Click Event Pages.
Click your Events page.
Click the Switch to Mobile icon at the top of the editor.
Click the Event List element on your page.
Click Settings.
Choose what you want to customize:
Ribbons
Ribbons help event organizers and attendees quickly understand the status and availability of an event.
Click the Display tab.
Click Ribbons.
Click the relevant ribbon name and enable the Ribbon toggle:Sold Out Ribbon: All tickets for the event are sold out.
RSVP Closed Ribbon: Registration is closed.
Join Waitlist Ribbon: When an RSVP event has a waitlist.
Membership Ribbon: The event is exclusive to members only.
Multiple Dates Ribbon: The event occurs on multiple dates.
Event info
Click the Display tab.
Enable the relevant toggle(s) to select which elements you want to show or hide:Event list title: The heading or name of the event as it appears in a list format.
Event Image: A visual representation or photo associated with the event. Ribbons:
Date: The specific day(s) on which the event is scheduled to occur.
Design
When designing elements for a single event, you can choose colors, font styles, and more to create a cohesive and visually appealing event page.
Click the Design tab.
Click the relevant design elements to customize the following:Text Design: Personalize the font style, size, color, and other text properties for ...(e.g. Event name, Event location).