


Creating your event
Wix Events: Creating a Recurring Event
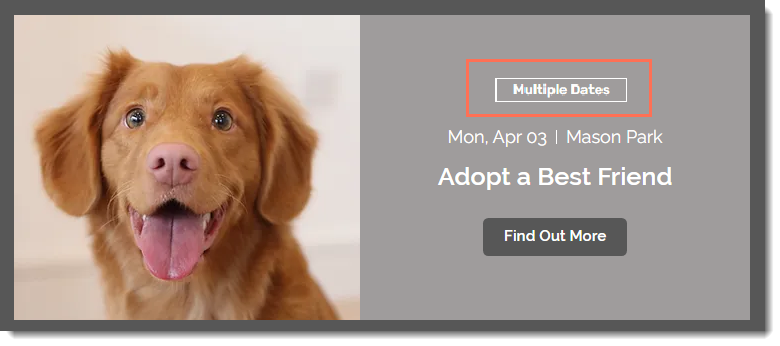
Save time by creating recurring events instead of recreating the same event from scratch again and again. When you're ready to display the events on your site, you can show each occurrence as an individual event or one event with multiple dates.
Step 1 | Create an event draft
Start by adding information to create a template event. Make sure to add all the information you want to appear in every occurrence of this event.
For example, include a standard "About the event" description to display consistently each time the event recurs. Alternatively, if you prefer to provide a distinct description for each occurrence, you can leave this field empty.
Important:
As long as the recurring event is in draft mode, you can edit the template event. However, once you publish, individual occurrences of the event are created and you can no longer do so.
To create an event draft:
Dashboard
Wix app
Wix Studio app
Go to Events in your site's dashboard.
Click + Add Event.
Select the Event type:Ticketed event: Sell event tickets or offer free tickets.
RSVP event: Collect RSVPs or set a guest waitlist.
Fill out the General info section:Enter the event name, a short teaser, and up to 10 event categories.
Tip: Learn more about creating and connecting categories.
Click the Event image and choose an image from your media manager.
Select Recurring event in the Date and time section, then set up the following:
(Optional) Edit the default date and time
Note: You must save at least one date and time. You can add additional times now or later.
(Optional) Edit the default date and time:Click the Edit icon
 next to the first date.
Edit the start date, end date and time.
Click the Timezone drop-down and select a time zone.
(Optional) Click the Display timezone checkbox.
Tip: For online events, we recommend displaying your time zone.
Click Done.

Add repeating dates in bulk
Schedule multiple occurrences of an event with repeated instances of an event, saving time and effort.
Click the Add Dates drop-down and select Repeating dates.
Choose the relevant date sequence:
Set the Event duration:Enter the start date, end date and time.
Click the Timezone drop-down and select a time zone.
(Optional) Click the Show timezone checkbox.
Set the Event recurrence:Click the Frequency drop-down and select how often the event should occur.
Select the relevant timeframe for the frequency to occur on (e.g. day or date).
Set the Event ending:Click the Ends drop-down and select the last date/day of the event recurrence.
Choose the relevant end date/number of events
Click Add.

Add a specific date
Add a specific date outside of the recurring schedule for special events or exceptions.
Click the Add Dates drop-down and select Specific dates.
Click the Timezone drop-down and select a time zone.
(Optional) Click the Show timezone checkbox.
Enter the start date, end date and time.
(Optional) click +Add more dates to add more.
Click Done.

6. Select the location of your event in the Location section:
If the location hasn't been set
Click the Location is TBD (to be determined).
(Optional) Edit the location message.
If the event has a physical location
Click Physical Location.
Start typing the address of the location and select it from the list.
(Optional) Enter a Venue Name (e.g. Carroll Gardens).
If the event takes place online
Click Online.
Enter an Online Location Title (e.g. Webinar).
Important: Later you'll be able to make this a Zoom video conferencing event.
7. (Optional) Add detailed event information about your event.
8. When ready, click Create Draft at the top right.
Step 2 | Create tickets (ticketed events only)
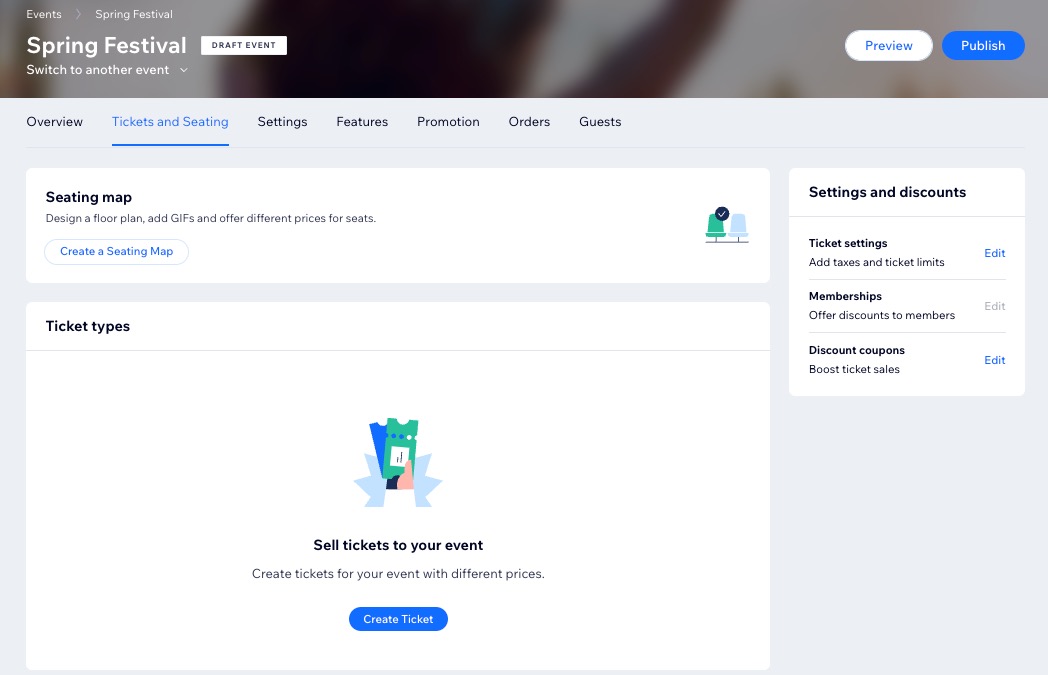
If your event requires tickets for entry, you have the option to create one or more ticket types (e.g. VIP, Early Bird, and Standard) and assign a price to each.
Once your event is published, visitors to the site registering for the event can choose the tickets they wish to purchase.
Creating a RSVP event?
Skip to the next step.
To create tickets:
Dashboard
Wix app
Wix Studio app
Go to Events in your site's dashboard.
Select the relevant ticketed event.
Click the Tickets and Seating tab.
Click Create Ticket and start to create one or more ticket types.
Step 3 | Customize your registration settings
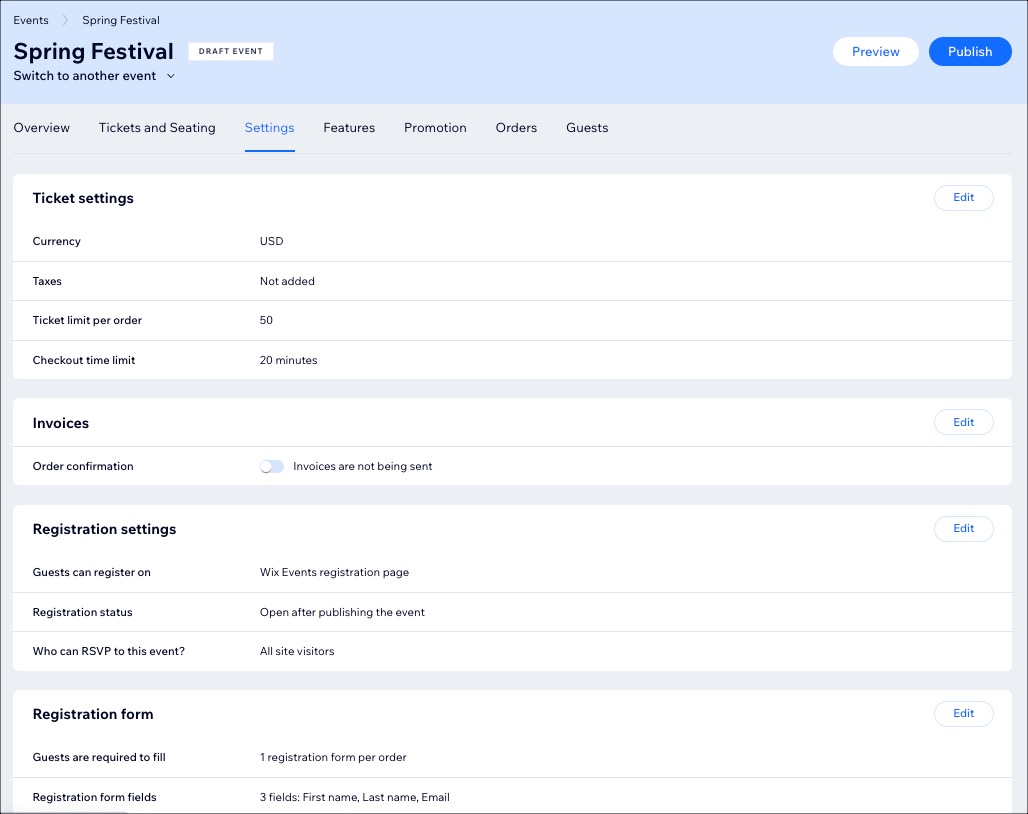
Next, customize your event's registration settings. You can limit the maximum number of guest who can register, customize the information you want guest to enter when they register, edit the text of various emails, and more.
Tips:
These settings apply to all occurrences of your recurring event. You can adjust registration settings for specific dates later.
Set up the desired settings for all occurrences before publishing to avoid repetitive adjustments for each event instance.
To customize event registration settings:
Dashboard
Wix app
Wix Studio app
Go to Events in your site's dashboard.
Click the Drafts tab.
Click Manage next to the relevant event.
Click the Settings tab.
Customize the registration details:Registration settings: Set where, when, and who can register and edit registration messages.
Registration form: Customize the fields that appear on the form:Customize the registration form for RSVP events
Customize the registration form for ticketed events
Event policies: Add a policy checkbox that guests can check when they register.
Emails: Manage emails you send and receive.
(Ticketed events) You can also customize:Ticket settings: Set your currency, taxation, and ticket limit per order.
Invoices: Create invoices for ticket purchases.
Step 4 | Publish the event
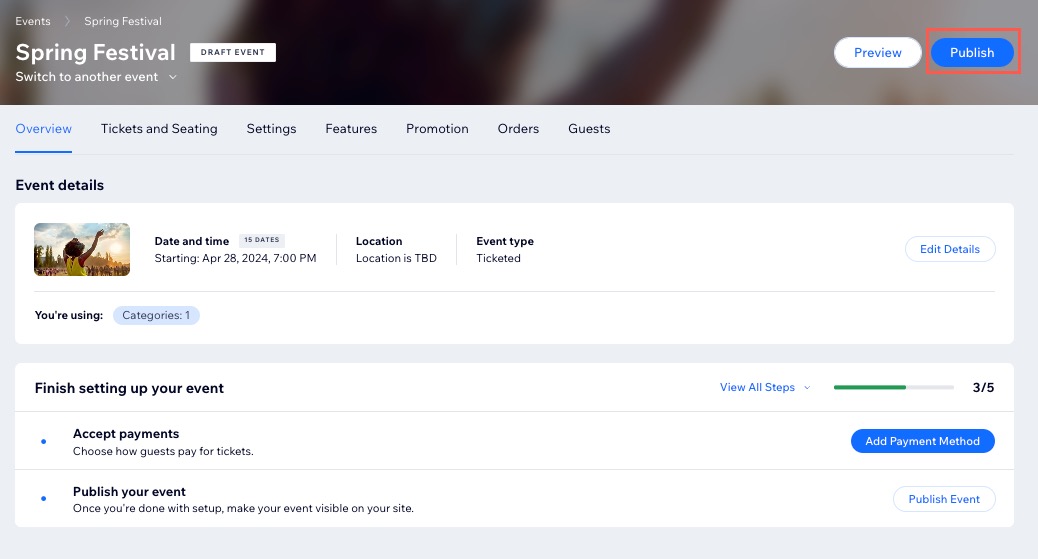
When your "template event" is ready and you're sure you don't want to make additional changes, you can publish your event. When you do, the recurring event appears on your site indicating that additional dates are available.
Dashboard
Wix app
Wix Studio app
Go to Events in your site's dashboard.
Click the Drafts tab.
Select the relevant event.
(Optional) Click Preview to see how your event looks on your site before you publish.
Click Publish.
Click Publish to confirm.
Open the editor.
Make sure the event is displayed on the relevant site page.
Step 5 | (Optional) Set how you display recurring events
Choose how to show your recurring events on your site. You can display each occurrence separately, or only show the closest upcoming date. Either way, guests who select the event can pick which date they want to attend.
Wix Editor
Studio Editor
Wix app
Wix Studio app
Go to the Events page:Click Pages & Menu
 on the left side of the editor.
Click Event Pages.
Click the Event List element on your page.
Click Settings.
Click the Display Events tab.
Click the Show recurring events and select how you want to display events:One Event: Only the occurrence of the closest upcoming date appears in the event list. The event is marked as having multiple dates.
Individual Events: Each occurrence of the event is listed separately. The event is marked as having multiple dates.