top of page

Using the Wix app for Wix Events

Wix Events: Checking-In Guests Using the Wix App

Use the Wix app to check guests in as they arrive at your event. For ticketed events, you can use the app to scan the QR code found on event tickets.
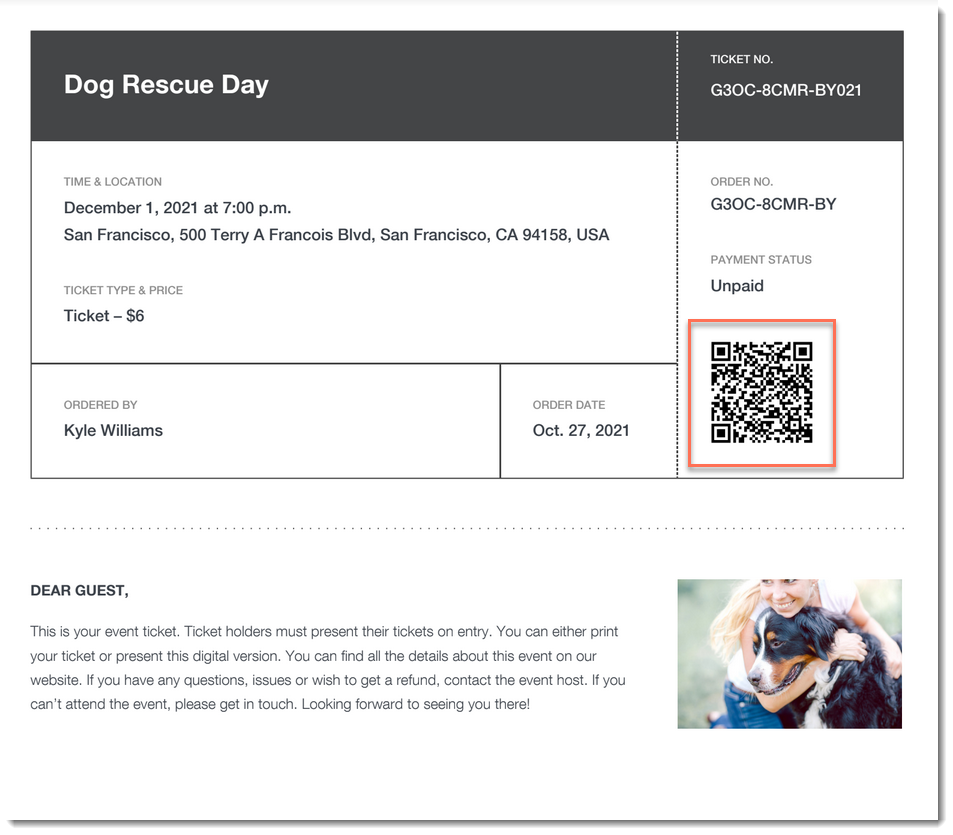
A screenshot of an event ticket PDF highlighting a QR code.

Important:

Go to your guest list in the Wix app shortly before you leave for the event, while you’re connected to the Internet. This ensures that you’ll be able to access the list and check guests in - even if you're offline during the event itself.

To check a guest in to an event:

  1. Go to your site in the Wix app.

  2. Tap Manage  at the bottom.

  3. Tap Events.

  4. Tap Published Events.

  5. Tap the event you want to view.

  6. Choose what you want to do:

Change a guest's status to "Checked In"

  1. Tap Guest List.

  2. (Optional) Filter your guest list:Tap the Filter  icon.

    Do any of the following:Select a status (e.g. Not checked in)
    Select one a payment status (ticketed events only).
    Select one or more a ticket types (ticketed events only).
    Select a sort option.
    Tap Save.

  3. Tap the checkmark next to a guest's name.
    A screenshot of a tapping a checkmark icon next to a guest's name in the Wix Owner app.

Scan a guest's ticket

  1. Tap Guest List.

  2. (Optional) Filter your guest list:Tap the Filter icon.

    Do any of the following:Select a status (e.g. Not checked in)
    Select one a payment status (ticketed events only).
    Select one or more a ticket types (ticketed events only).
    Select a sort option.
    Tap Save.

  3. Tap the QR icon at the top right.
    A screenshot of the QR icon in the Wix Owner app.

  4. Use your mobile device to scan the QR code that appears on the guest's ticket.
    A screenshot of an event ticket highlighting a QR code.

Tip:

You can also check in guests on desktop and on the Check-in by Wix app.

Need A Professional Website?
Contact Us 
Today!

Receiving Your Payouts from Wix Payments

Wix Payments: Receiving Your First Payout

Wix Payments: Viewing Your Payouts

Managing Business Owners in Wix Payments

Wix Payments: Updating Your Account Settings

Wix Payments: Understanding the Status of Your Account

Wix Payments: Accessing Your Account Dashboard

Wix Payments: Troubleshooting Site Access Issues

Wix Payments: Adding Klarna as a Payment Method

Wix Payments: Adding Affirm as a Payment Method

Wix Payments: Adding Afterpay as a Payment Method

Wix Payments: Assigning Payments Roles

Wix Payments: Adding Tap to Pay on Mobile as a Payment Method

Wix Payments: Adding Google Pay as a Payment Method

Wix Payments: Enabling Point of Sale (POS)

Wix Payments: Adding Apple Pay as a Payment Method

Wix Payments Terms of Service

Wix Payments: Service Fees

Customizing Your Wix Payments Statement Descriptor

Wix Payments: Ensuring Your Business is Ready for Sales

Best Practices for Merchants Using Wix Payments

Wix Payments: Prohibited Products and Services

Wix Payments: Guidelines for Uploading Documentation

Wix Payments: Verifying Your Employer Identification Number (EIN)

Adding Business Owners to Your Wix Payments Account

Wix Payments: The Difference Between Account Types

Wix Payments Verification Process

Completing Your Wix Payments Account Setup

Switching to Wix Payments

Wix Payments: Creating an Account

wix experts
Graphic2Traffic web design
©
bottom of page