


Managing your guests
Wix Events: About Automated Emails for Events
Wix Automations is a powerful tool that lets you set an action in motion whenever a specific trigger occurs.
How automated emails can help your events business
You can manage your interactions with event guests automatically. For example, you can send an email with information about an event any time someone RSVPs. You can also encourage guests to come back by offering a coupon and sending it a day after an event ends.
Important:
Clients always receive emails (not automations) when buying tickets. This email cannot be disabled because it contains the ticket.
Clients receive emails (not automations) when they RSVP for an event or join a waitlist. These emails can be disabled.
Tip:
Automations can also be used to send notifications or tasks to you or your team members.
Choose what triggers an automatic email
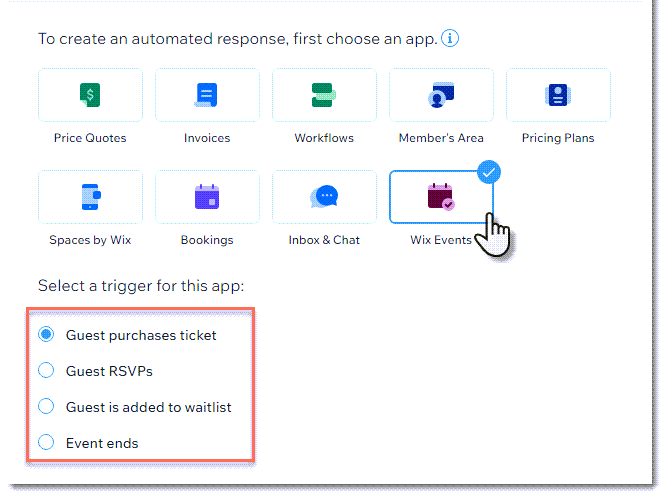
To create an automation, you need to select a trigger - the thing that sets the automation in motion. As a Wix Events user, you can select one of the triggers designed specifically to work with Wix Events.
Tip:
If you don't see this screen, click Create an Automation and then Start from Scratch.
You can apply the same automation to all your events. Alternatively, you can apply an automation to one or more specific events. This allows you to tailor your automation to the event.
Guest purchases ticket / Guest RSVPs
There may be information you want to share only after a guest registers for your event. By creating an automation that's triggered by a ticket purchase or RSVP reply, you can do so automatically.
Guest is added to waitlist trigger
You can allow guests to be added to a waitlist when registration to an RSVP event is full. By sending an automation after a guest adds themselves to the waitlist, you can let them know what to expect.
Event ends trigger
Keep in touch with your guests after an event has ended. Use the opportunity to review the past event or mention other events that are coming up.