


Wix Chat FAQ
Wix Chat: Automatically Sending Chat Messages or Responding to Chat Messages
Automations allow you to focus on the bigger picture by taking care of smaller tasks for you. With Wix Chat, you can set up automations to send or respond to chat messages.
For example, you could automatically send a chat message when a visitor submits a form, or automatically respond to a visitor's chat message by awarding loyalty points.
Automatically sending chat messages
All automations consist of a trigger and an action. To automatically send chat messages, you need to set up Wix Chat as the action (for example, a form submission triggers the action of sending a chat message).
To set up an automation with Wix Chat as the action:
Go to Automations in your site's dashboard.
Click + New Automation in the top right corner.
Click + Start from Scratch.
Note: To use a suggested automation, search and select from the options under Popular. You can edit the trigger and actions of a suggested automation.Click the title to give your automation a name.
Click the app you'd like to base your trigger on in the Trigger section.
Select your chosen trigger from the available options.
Note: These options will differ depending on the app you selected in step 5.Click the Limit frequency to drop-down to set trigger frequency:Don't limit (trigger every time): Your action will take place every time it is triggered by a visitor.
Once per contact: Your action will take place only once per contact.
Once per contact every 24hrs: Your action will take place only once per contact in any 24hr period.
Click Send a chat message in the Action section.
Note: Send a chat message will only be an action option for certain triggers.
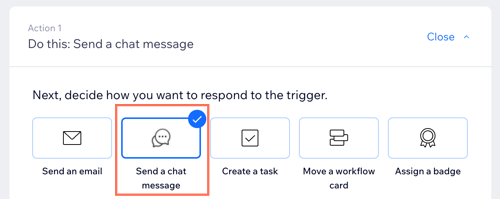
Enter the chat message you'd like to send in the Message field.
Click the Send this message only when I'm online to chat toggle to specify when these messages are sent:Enabled: This chat message will only be sent when your chat status is online.
Disabled: This chat message will be sent whether your chat status is online or offline.
(Optional) Set a delay and add a condition to specify the automation:
Add a delay
Set the delay between a trigger and its action, to have the action occur after a certain amount of time passes.
Click + Add Delay.
Click the drop-down and select when to perform the action (e.g. days, hours and minutes).
Note: If you don't add a delay, the action is performed as soon as the trigger occurs.
Add a condition
Add a condition to make the automation occur when certain conditions are met.
Click + Add Condition.
Click the Continue the automation if drop-down and select the criteria you want to use to decide whether this automation continues each time it's triggered.
Click the drop-down that appears next to your criteria drop-down to select your operator (e.g. "is", "is not").
Click the drop-down or text box that appears next to the operator drop-down to complete your condition.
Note: The logical statement you've created will determine whether the automation continues.(Optional) Click + Add Criteria to add more conditions.
12. (Optional) Click + Add an Action at the bottom to set up a multi-action automation.
13. Click Activate to save your new automation.
Automatically responding to chat messages
All automations consist of a trigger and an action. To automatically respond to chat messages, you need to set up Wix Chat as the trigger (for example, receiving a chat message triggers the action of awarding loyalty points).
To set up an automation with Wix Chat as the trigger:
Go to Automations in your site's dashboard.
Click + New Automation in the top right corner.
Click + Start from Scratch.
Note: To use a suggested automation, search and select from the options under Popular. You can edit the trigger and actions of a suggested automation.Click the title to give your automation a name.
Click Inbox & Chat in the Trigger section.
Select your trigger:Chat message sent: Any message you send from your Inbox triggers the action.
Inbox message received (chat or email): A visitor sending you a message to your inbox triggers the action.
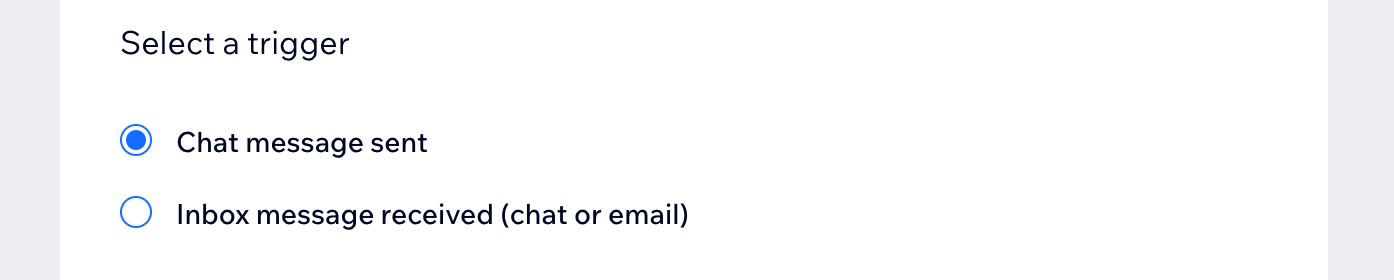
Click the Limit frequency to drop-down to set trigger frequency:Don't limit (trigger every time): Your action will take place every time it is triggered by a visitor.
Once per contact: Your action will take place only once per contact.
Once per contact every 24hrs: Your action will take place only once per contact in any 24hr period.
Select your chosen action in the Action section and set up the action using the available options.
(Optional) Set a delay and add a condition to specify the automation:
Add a delay
Set the delay between a trigger and its action, to have the action occur after a certain amount of time passes.
Click + Add Delay.
Click the drop-down and select when to perform the action (e.g. days, hours and minutes).
Note: If you don't add a delay, the action is performed as soon as the trigger occurs.
Add a condition
Add a condition to make the automation occur when certain conditions are met.
Click + Add Condition.
Click the Continue the automation if drop-down and select the criteria you want to use to decide whether this automation continues each time it's triggered.
Click the drop-down that appears next to your criteria drop-down to select your operator (e.g. "is", "is not").
Click the drop-down or text box that appears next to the operator drop-down to complete your condition.
Note: The logical statement you've created will determine whether the automation continues.(Optional) Click + Add Criteria to add more conditions.