


Managing your staff
Wix Bookings: Adding Staff Permissions
You can allow staff members to manage their own clients and sessions in the Wix calendar by assigning them the role of Bookings Staff Member. With this role, staff members can:
Manage their own appointments, classes and courses (e.g., edit session details, mark attendance, add participants or mark a session as "paid")
Email all participants in any of their sessions
Block their own time on the calendar
Access the Agenda tab in the Wix mobile app
Tips:
You can also assign roles to let others manage your site.
The number of staff you can give permission to collaborate on your site depends on your Wix site or Wix Studio plan.
Check out the full course on Wix Learn about setting policies and adding roles for your staff members.
In this article, learn more about:
Assigning the role of Bookings Staff Member
Allow your staff to manage their own bookings by making them Bookings staff members on your site. This frees you up to focus on other aspects of your business and affords your employees more freedom.
To assign the role of Bookings staff member:
Make sure you add the relevant person as a staff member.
Go to Staff in your site's dashboard.
Hover over the relevant staff member.
Click Manage or Edit.
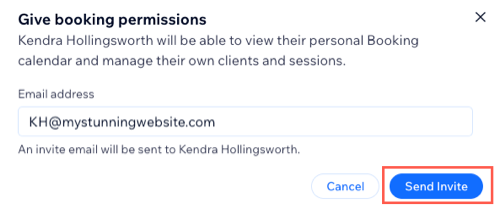
Click Give Permissions next to Booking permissions.
Click Send Invite.
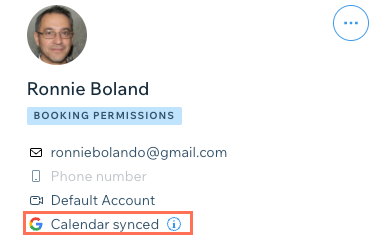
(Optional) After the staff member accepts the invite, click Invite to Sync Calendar to send a second email to allow your new Bookings staff member to sync their personal calendar.
Accepting role invites
Encourage your staff to manage their own clients and sessions by explaining how to become a Bookings staff member. This saves you time in future and allows them to manage their own schedule.
To accept a Bookings staff member role invite:
Your staff member clicks Accept Invite in the email they receive.
They sign in to their existing Wix account or register a new Wix account, if needed.
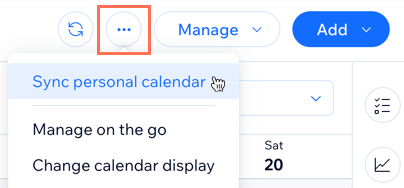
They click the More Actions icon
in the Booking Calendar.
They click Sync personal calendar.
They click Sync next to the relevant personal calendar.
They select the relevant account to sync with their Wix Bookings calendar.
They click Allow to grant the necessary permissions.
Allowing staff to manage their own working hours
Allow your staff members to manage their own working hours and control their schedules. Staff members can then maintain their availability and reduce scheduling conflicts. This decreases your admin time and allows you to focus on other areas of your business.
Before you begin:
Your staff need to accept your invitation to become a Bookings Staff Member before you can allow them to edit and manage their own hours.
To allow staff to manage their own working hours:
Go to Roles & Permissions in your site's dashboard.
Click Manage Roles.
Click + Create New Role.
Enter the Role Title (e.g. Senior Bookings staff member) and a brief Description of the role (e.g. can update and manage their own working hours).
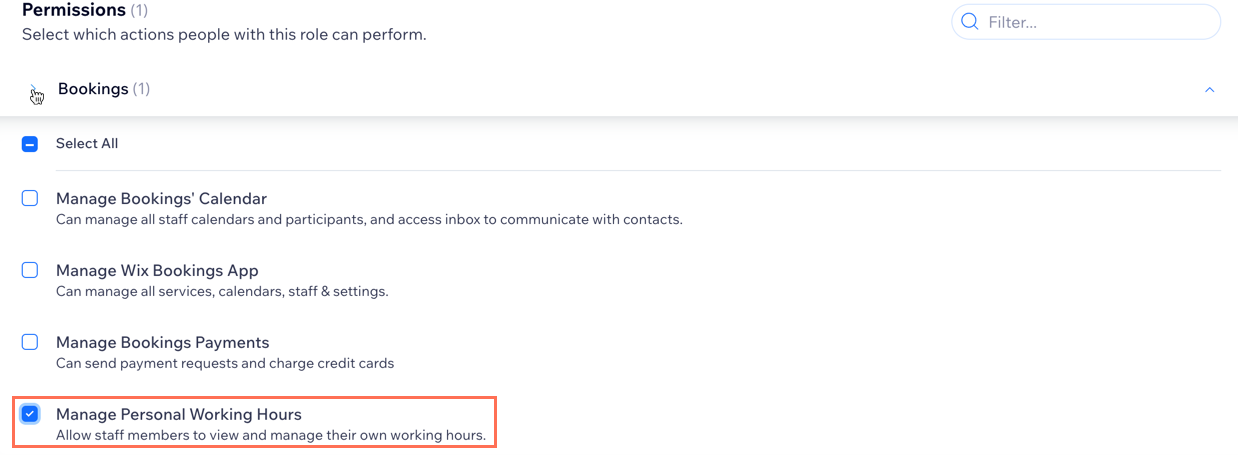
Click Bookings under Permissions to expand the permissions.
Select the Manage Personal Working Hours checkbox.
(Optional) Select the checkbox next to any other relevant permissions to your new custom role.
Click Save.
Go back to Roles & Permissions in your site's dashboard.
Click the More Actions icon
 next to the relevant Bookings Staff Member.
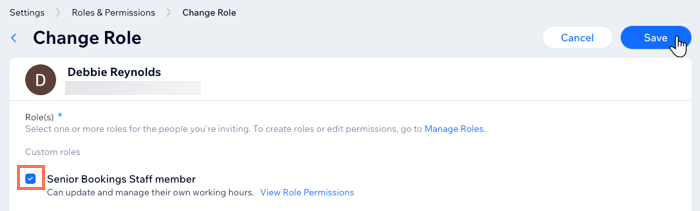
Note: The staff member needs to accept your invite before you can complete the following steps.Click Change Role.
Select the checkbox next to your newly-created custom role.
Click Save.
Tip:
Learn more about creating and managing custom roles.
FAQs
Click a question below to learn more about staff permissions.
How long do my staff have to accept an invite?
The invite you send is valid for 30 days. If the staff member doesn't accept the invite in time, you can resend it.
Can I revoke an invite?
The invite goes to the email address you enter. However, anyone with access to this email address can accept the invite by clicking the link and signing in or creating a new Wix account.
If you feel that the email address that accepted the invitation is suspicious, remove it from the collaborator list.
Are there terms and conditions for inviting my staff?
By sending an invite, you agree to the Wix Terms of Use.