Additional Wix Apps
Wix Apps: Design Guides
The Wix Design Guides add-on lets you create rows, columns or cells in your Studio Editor to help structure and design your site in a more organized manner.
The guide appears on your Editor as a colored grid, it does not appear on your live site. The purpose of this is to guide you as you place your elements on your site and make sure everything is aligned correctly.
Wix Design Guides is only available in the Wix Studio Editor.

In this article, learn more about:
Adding Wix Design Guides to your site
Add the Wix Design Guides add-on from the tools in your Studio Editor.
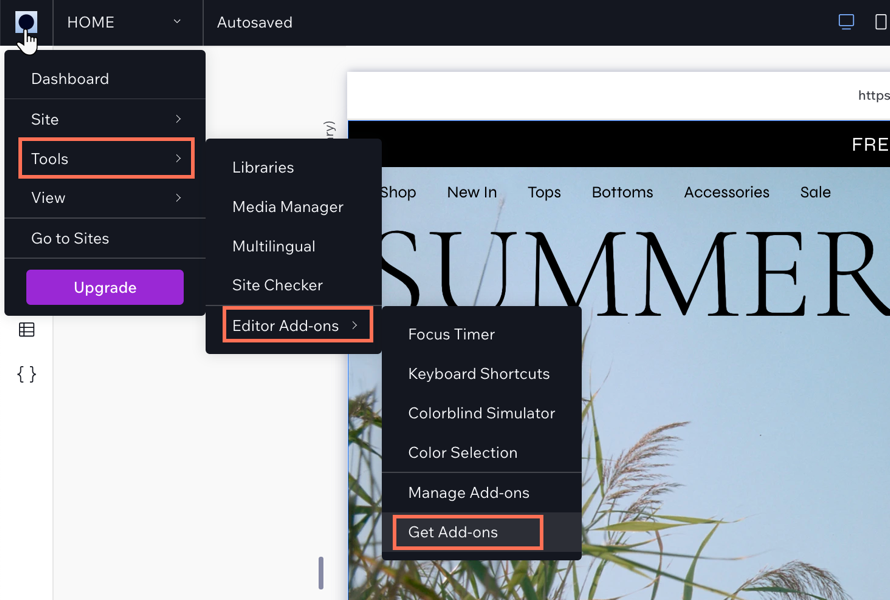
To add Wix Design Guides:
Click the Wix Studio icon
 at the top left.
Click Tools.
Click Editor Add-ons.
Click Get Add-ons.
Click Design Guides.
Customizing your Design Guide settings
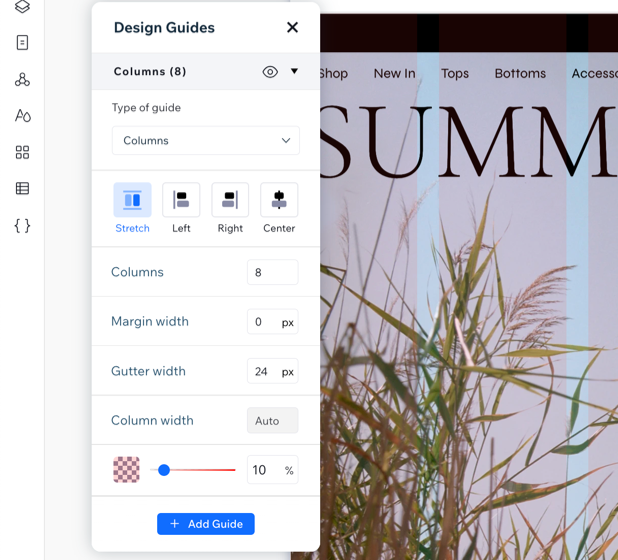
Customize your grid to get the exact layout you want. You can make changes to the number of columns or rows in a grid, and change their size and spacing etc. The settings change depending on the grid type you choose.
To customize the settings:
Click the Wix Studio icon
at the top left.Click Tools.
Click Editor Add-ons.
Click Design Guides.
Click the drop-down icon
 next to columns to display the settings.
Choose what you want to customize:Type of guide: Click the drop-down icon
 and choose a guide.
Alignment: Set the alignment, stretch, left, right, or center.
Columns: Enter the amount of columns you need for your guide.
Margin width: Set the width of the margin.
Gutter width: Set the gutter width. This is the space between the columns.
Column width: Depending on your alignment, the column width maybe set to Auto.
Opacity and Color: Set a color for your columns and the adjust the opacity.
(Optional): Click Add Guide to add a new guide to your site.
Note: This layers the guides on top of each other so the pink lines are more visible as you edit.