Using the Wix app for Pricing Plans
Pricing Plans: Connecting a Plan to Content & Services in the Wix App
After you add the Pricing Plans app and create plans, you can connect them to services and content.
In this article, learn how to connect:
Offering access to booking services
Allow clients who purchase a pricing plan access to Wix Bookings services. When creating a plan that connects to Wix Bookings services, there are two plan types you can choose from:
Membership: Membership plans are subscriptions which give unlimited access to services for a set amount of time (e.g. a monthly gym membership).
Package: Packages allow clients to pay for a set number of services at a discounted rate (e.g. a 6-class package that allows clients to go to six yoga classes per month).
To connect a new pricing plan to existing booking services:
If you have not done so already, create the pricing plan and save your changes.
Go to your site in the Wix app.
Tap Manage
 at the bottom.
Tap Catalog.
Tap Pricing Plans.
Tap to select a plan.
Tap Edit Plan.
Scroll down to the Connect Benefits section.
Tap Connect Services or Manage Services.
Select the type of plan you want to offer:Membership (e.g. unlimited access for a month)
Package (e.g. a 10-service package)
Tap to select the booking services you want to connect in the What services are included? section.
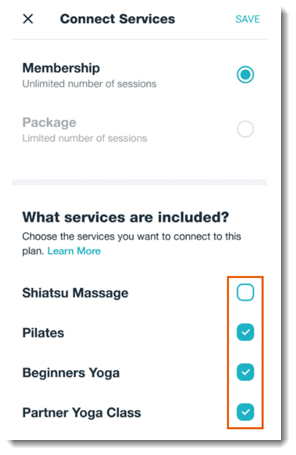
Tap Save.
Tap Save to save the pricing plan.
Offering access to events
Offer discounts on event tickets to guests who purchase a membership plan.
Note:
Before you start, create the relevant events.
To offer access to events:
If you have not done so already, create the pricing plan and save your changes.
Go to your site in the Wix app.
Tap Manage
at the bottom.Tap Catalog.
Tap Pricing Plans.
Tap to select a plan.
Tap Edit Plan.
Scroll down to the Connect Benefits section.
Tap Connect Events.
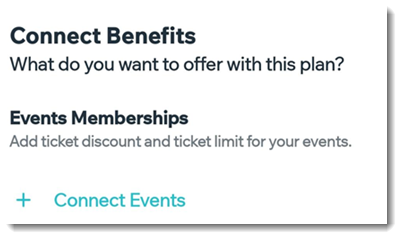
Tap to select the events you want to connect.
For each event, enter the discount amount (e.g. 25%) and enter the maximum number of tickets a guest can apply the discount to.
Tap Done.
Tap Save.
Offering access to online programs
Using the Online Programs app, you can create programs with steps along the way that participants need to perform, like a 30-day push-up challenge. You can include access to your online programs as part of a pricing plan.
Note:
Before you start, create the relevant programs.
To offer access to online programs:
If you have not done so already, create the pricing plan and save your changes.
Go to your site in the Wix app.
Tap Manage
at the bottom.Tap Catalog.
Tap Pricing Plans.
Tap to select a plan.
Tap Edit Plan.
Scroll down to the Connect Benefits section.
Tap + Connect Programs.
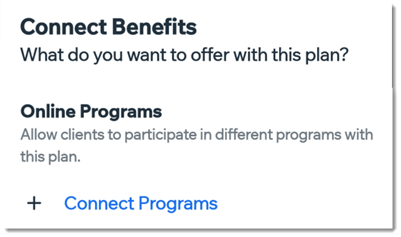
Tap to select the program you want to connect.
Tap Done.
Tap Save.
Offering access to blog content
You can limit access to your blog so that all site visitors can view the blog feed but only clients who purchase a pricing plan can read individual posts.
To offer plan holders exclusive access to selected blog posts:
If you have not done so already, create the pricing plan and save your changes.
Go to your site in the Wix app.
Tap Manage
at the bottom.Tap Catalog.
Tap Pricing Plans.
Tap to select a plan.
Tap Edit Plan.
Scroll down to the Connect Benefits section.
Tap Choose Posts.

Tap to select the posts you want to connect.
Tap Done.
Tap Save.
Note:
To offer plan holders exclusive access to your entire blog, make the blog feed page an exclusive site page. See below.
Offering access to exclusive site pages
Offer access to exclusive content by creating site pages that can only be accessed by clients who purchased a pricing plan. You can add any content to these pages including videos or downloadable documents.
Note:
You can only customize a plan so that it offers access to exclusive site pages on desktop.
Connecting members-only groups
Invite your clients to members-only groups using the Wix app. This is a great way to build a community around your business. It also allows members to share advice and tips and get to know each other better.
Before you begin:
Make sure to create the relevant groups. You can adjust the privacy settings of your groups at any time to make them members-only.
To connect Wix Groups to your pricing plans on the Wix App:
If you have not done so already, create the pricing plan and save your changes.
Go to your site in the Wix app.
Tap Manage
at the bottom.Tap Catalog.
Tap Pricing Plans.
Tap to select a plan.
Tap Edit Plan.
Scroll down to the Connect Benefits section.
Tap + Connect Groups.
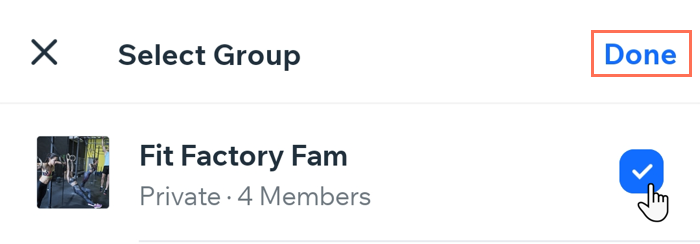
Tap to select the group you want to connect.
(Optional) Tap + Create New Group.
Tap Done.
Tap Save.