top of page

Setting up Online Programs

Online Programs: About Automations for Your Program

Boost your site's success with minimal effort by creating automations to manage your program. Automations streamline repetitive tasks and help you hit your marketing targets. Think of them as a combination of triggers and actions—like sending a welcome email when someone joins your program. You can use built-in triggers and actions, or customize your own.

Ready to create automations for your program?

Go to Automations in your site's dashboard.
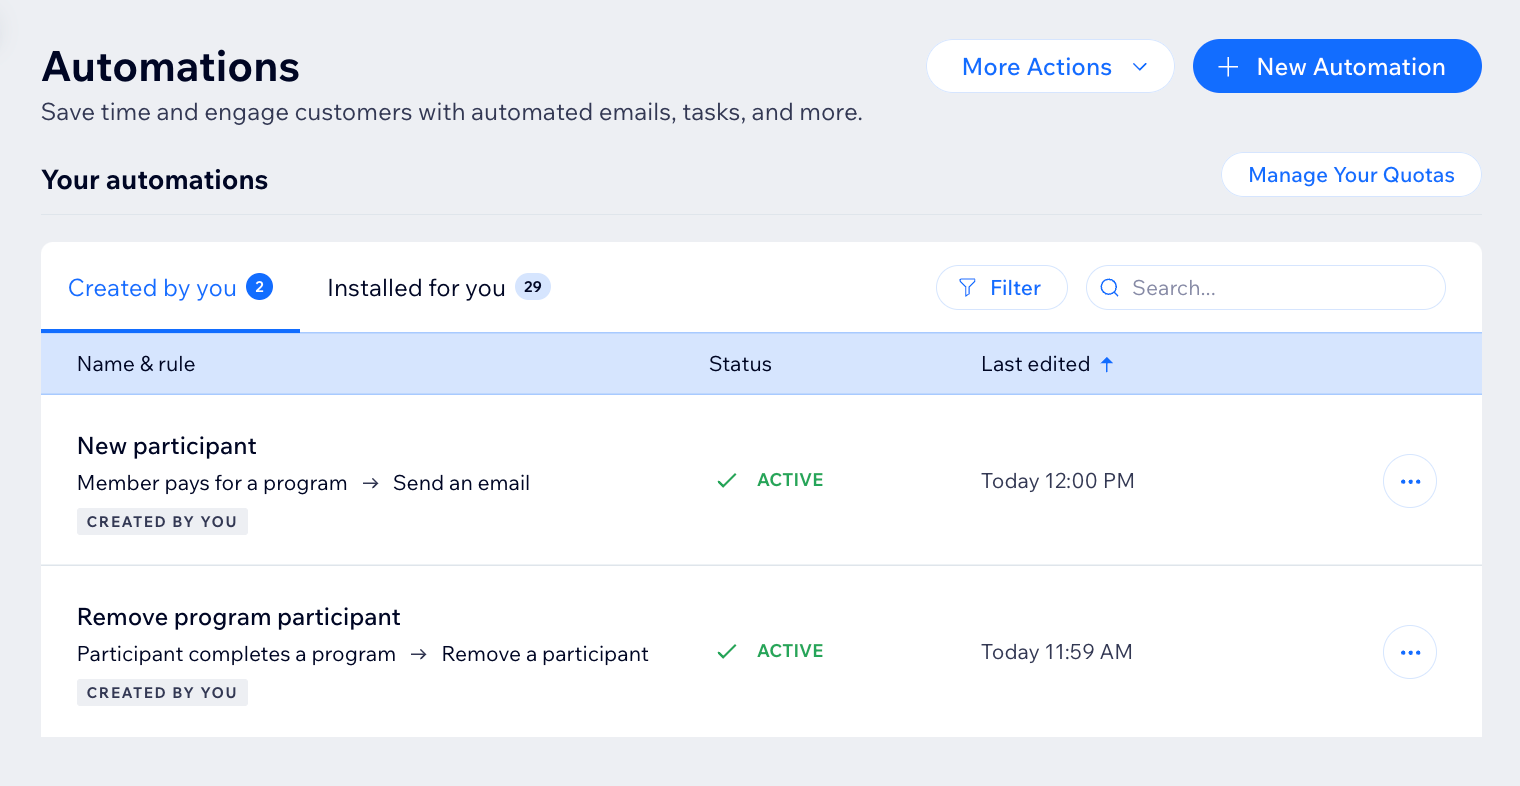
A screenshot of the Online Programs app in the automation flow

Choose a trigger

Select the Online Programs app in the automation flow to see its triggers. A trigger is an event that a member or participant does involving your program. This event initiates an automatic response. You can choose from a list of available triggers and select specific programs.

For example, you can remove a participant when they complete a self-paced program. To do so, use the trigger "Participant completes the program". Add a delay of 3 days, and the action "Remove participant", for a specific program.

The built-in triggers for Online Programs are:

  • Member pays for a program

  • Member joins a program

  • Participant completes a step

  • Participant leaves a program

  • Participant completes a program

  • Program end date has passed

A screenshot of the Online Programs app in the automation flow

Choose an action

Select actions that respond to your trigger. You can choose general actions like sending an email or updating Google Sheets. You can also use the specific Online Programs action: Remove a participant. For example: Combine "Program end date has passed" with the action "Remove participant". This will remove participants from a program when it ends.

A screenshot of the Online Programs app in the automation flow

Participants that are removed by an automation are labeled as Auto-Removed.
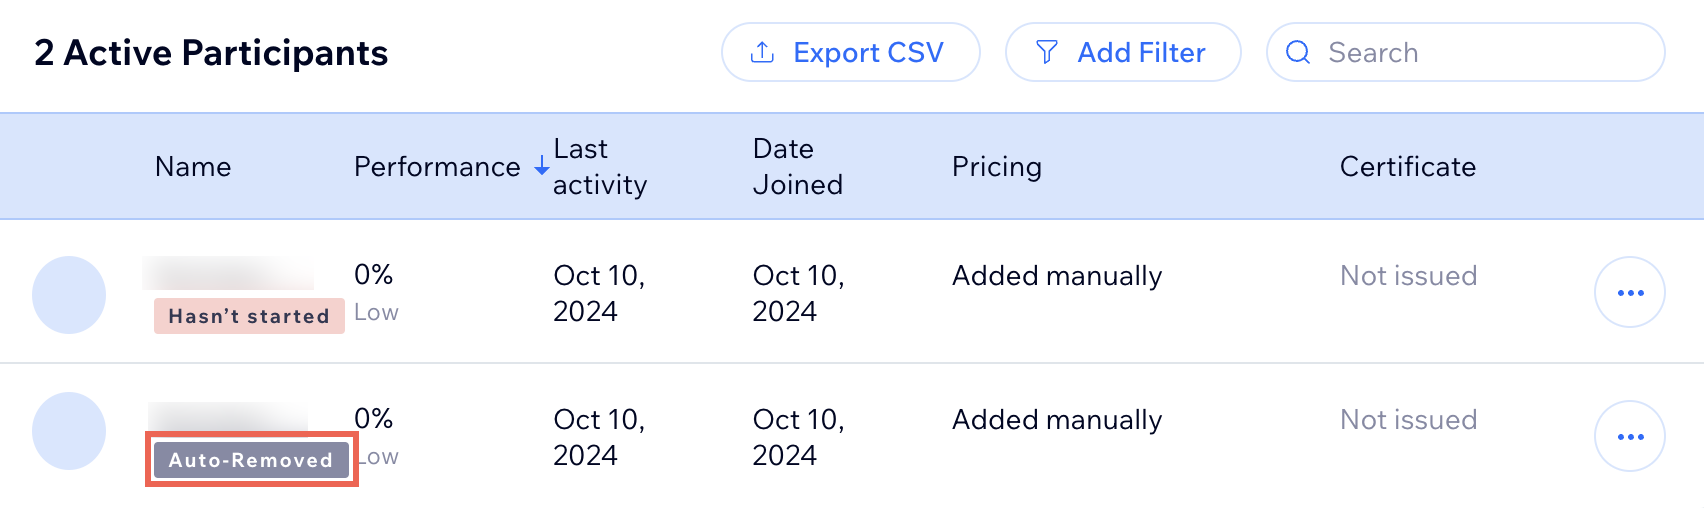
A screenshot of the Online Programs app participants list

Need A Professional Website?
Contact Us 
Today!

Receiving Your Payouts from Wix Payments

Wix Payments: Receiving Your First Payout

Wix Payments: Viewing Your Payouts

Managing Business Owners in Wix Payments

Wix Payments: Updating Your Account Settings

Wix Payments: Understanding the Status of Your Account

Wix Payments: Accessing Your Account Dashboard

Wix Payments: Troubleshooting Site Access Issues

Wix Payments: Adding Klarna as a Payment Method

Wix Payments: Adding Affirm as a Payment Method

Wix Payments: Adding Afterpay as a Payment Method

Wix Payments: Assigning Payments Roles

Wix Payments: Adding Tap to Pay on Mobile as a Payment Method

Wix Payments: Adding Google Pay as a Payment Method

Wix Payments: Enabling Point of Sale (POS)

Wix Payments: Adding Apple Pay as a Payment Method

Wix Payments Terms of Service

Wix Payments: Service Fees

Customizing Your Wix Payments Statement Descriptor

Wix Payments: Ensuring Your Business is Ready for Sales

Best Practices for Merchants Using Wix Payments

Wix Payments: Prohibited Products and Services

Wix Payments: Guidelines for Uploading Documentation

Wix Payments: Verifying Your Employer Identification Number (EIN)

Adding Business Owners to Your Wix Payments Account

Wix Payments: The Difference Between Account Types

Wix Payments Verification Process

Completing Your Wix Payments Account Setup

Switching to Wix Payments

Wix Payments: Creating an Account

wix experts
Graphic2Traffic web design
©
bottom of page