


Shared Gallery
Creating and Managing Albums in the Shared Gallery App
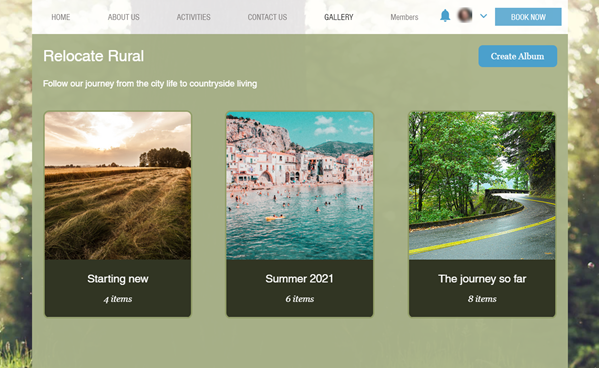
With the Shared Gallery app, you can start sharing your photos and videos by uploading them to your gallery.
Creating albums lets you organize your media into themed folders with album names, descriptions, and cover photos. You and any site visitor with permissions can upload media and manage your albums.
Important:
By default, all your site members can upload media and only admins can manage albums. You can change these permissions on the app's Settings panel in your Editor. Learn how
In this article, learn more about:
Creating an album
You and any site visitor with Manage Gallery permissions can create new albums on your live site.
Important:
When you create your first album, another album with the same name as your site is also created. All of the photos and videos that you previously uploaded are automatically moved to this folder.
Your gallery's main page will also display only albums instead of individual photos and videos.
To return to displaying individual photos and videos, you need to delete your albums.
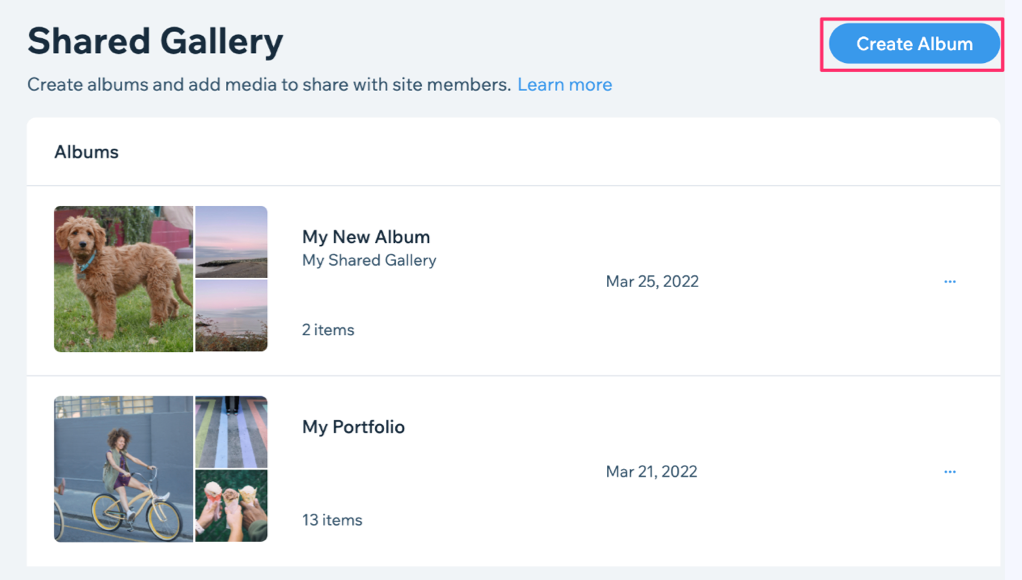
To create an album:
Dashboard
Live Site
Click Create Album.
Adding photos and videos to an album
You and any site visitor with Upload Photos permissions can add photos and videos to your albums on your live site. You can also add photos and videos from the Shared Gallery section of your site's dashboard.
Important:
After you add your first album, you can only add photos and videos to albums. You won't be able to add individual photos or videos to your main gallery page.
If you want to add individual photos or videos, you need to delete your albums.
To add photos and videos:
Dashboard
Live Site
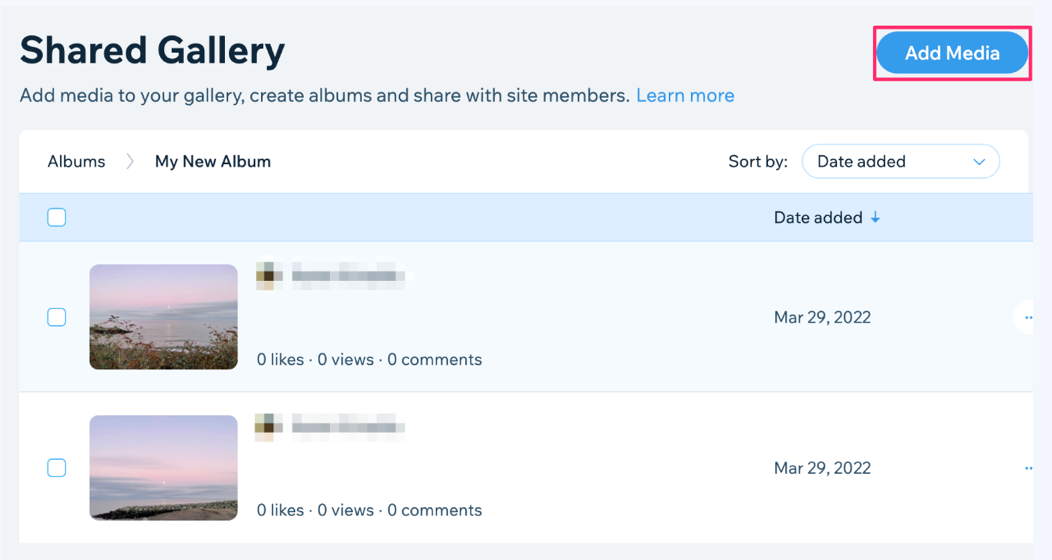
Select the album that you want to add photos or videos to.
Click Add Media.
Select photo or video file(s) from your computer.
Click Open.
Tip:
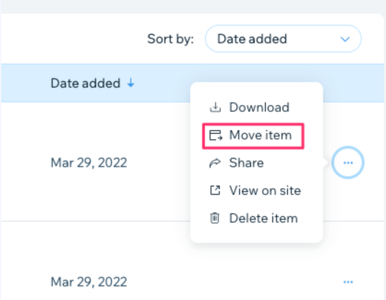
Click the More Actions icon  on a photo or video to see options to download, move, share, or delete it.
Moving photos or videos between albums
You can move photos and videos between albums on your live site. Your site visitors can also move any media that they add. You can also move photos and videos in the Shared Gallery section of your site's dashboard.
To move photos and videos:
Dashboard
Live Site
Select the album with the photo or video that you want to move.
Click the checkbox next to the item(s) you want to move. Note: Click the checkbox at the top of the list if you want to move all the items.
Select Move item.
Editing an album
You and any site visitor with Manage Gallery permissions can edit the name, description, and cover image of your album on your live site. You can also edit albums from the Shared Gallery section of your site's dashboard.
To edit an album:
Dashboard
Live Site
Click the More Actions icon
 next to the relevant album.
Select Edit album.
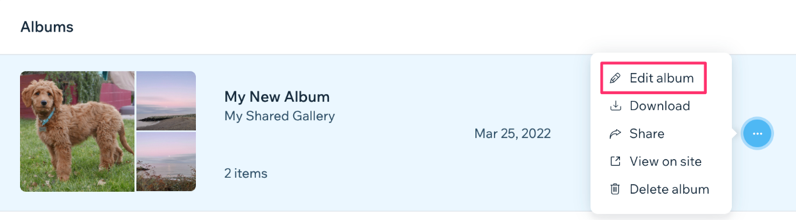
Edit the name, description, or cover image of your album. Note: Your cover image must be a .png or .jpg file and can be up to 25mb.
Click Save.
Deleting an album
You and any site visitor with Manage Gallery permissions can delete albums that are not needed anymore on your live site. You can also delete albums from the Shared Gallery section of your site's dashboard.
Important:
Deleting an album permanently removes all the photos and videos in the album. It's not possible to recover an album after you delete it.
When you delete all of the albums that you created, your gallery reverts to showing individual photos and videos.
To delete an album:
Dashboard
Live Site
Click the More Actions icon
 .
.Select Delete album.
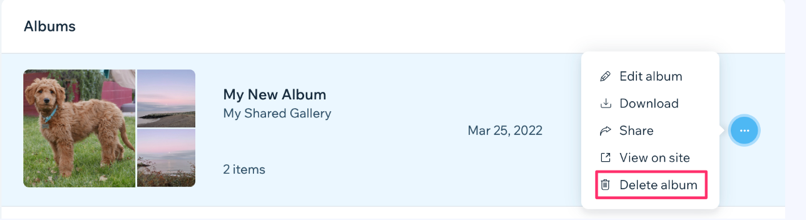
Click Delete.